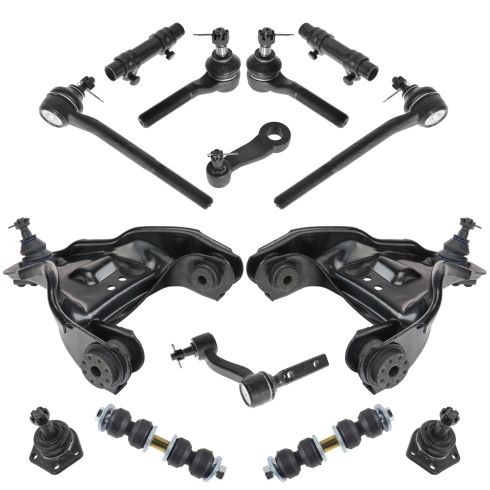
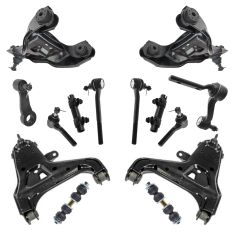
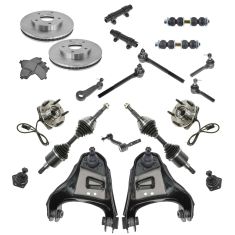
Kit Includes: (2) Front Lower Ball Joints (2) Front Upper Control Arms with Ball Joints (1) Pitman Arm (2) Front Outer Tie Rods (2) Front Sway Bar Links (1) Idler Arm (2) Front Inner Tie Rods (2) Front Tie Rod Adjusting Sleeves
Quantity: 14 Piece
Specification
Drivetrain
4 Wheel Drive
Location
Front
TRQ suspension kits are manufactured using premium raw materials and coatings for extended service life. Each TRQ suspension component is designed to be a direct, maintenance-free replacement to the stock unit. To extend the life of your steering and suspension components, TRQ recommends replacing components in pairs, sets, or kits. All products are fit and road-tested in our Massachusetts R&D facility to ensure we deliver on our promise of Trusted Reliable Quality.
Product Features
Application Specific Design: No modifications necessary
Anti-Corrosion Coated: Enhanced surface life
Pre-greased: No additional maintenance required
Kitted for Restored Performance: Improved road-feel and handling
Install Tip: When replacing steering components, have a professional alignment performed afterwards. This ensures proper tracking and even tire wear.
Our steering and suspension components are pre-greased and sealed for long life and do not require the extra maintenance typically required by greaseable versions.
Item Condition:New
Attention California Customers:
WARNING: This product can expose you to chemicals including Lead and Lead Compounds, which are known to the State of California to cause cancer, and birth defects or other reproductive harm. For more information, go to www.P65Warnings.ca.gov.
Lifetime Warranty
This item is backed by our limited lifetime warranty. In the event that this item should fail due to manufacturing defects during intended use, we will replace the part free of charge. This warranty covers the cost of the part only.
FREE Shipping is standard on orders shipped to the lower 48 States (Contiguous United States). Standard shipping charges apply to Hawaii and Alaska.
Shipping is not available to a P.O. Box, APO/FPO/DPO addresses, US Territories, or Canada for this item.
Expedited is available on checkout to the United States, excluding Alaska, Hawaii.
Final shipping costs are available at checkout.
How to Replace Ball Joint 1997-2004 Chevy S10 Pickup Part 2
How to Replace Front Lower Ball Joint 1997-2004 Chevy S10 Pickup Part 1
Created on:
Tools used
20mm Socket
24mm Socket
35mm Socket
Hammer
Socket Extensions
Pry Bar
Jack Stands
Grease Gun
Rubber Mallet
Chisel
Ratchet
Floor Jack
13mm Wrench
11mm Socket
12mm Socket
13mm Socket
14mm Socket
Torque Wrench
15mm Socket
Rust Penetrant
18mm Wrench
16mm Socket
17mm Socket
18mm Socket
19mm Socket
21mm Socket
Flat Blade Screwdriver
10mm Socket
22mm Socket
1. Clean up the top of the upper control arm
2. Install the ball joint
Line up the boot on the ball joint and put the ball joint in place and put the nut on it.
Bolt the ball joint in with the four nuts and bolts.
Torque them to 25 ft lbs
3. Install the tie rod.
Put the tie rod in place
Bolt it in at 55 ft lbs.
Put in the cotter pin, hammer it through and bend it with a pair of pliers.
Fill the tie rod end with grease.
4. Install the hub
Put the O ring into the hub.
Mount the hub and thread the ABS harness into place.
Bolt the hub into place and make sure the shield is in the correct position.
Use a star like pattern when bolting in the hub and torque the bolts to 65 ft lbs.
Clip and bolt the ABS harness in and connect it.
5. Install the brakes
Mount the rotor and caliper
Bolt the caliper bolts in and torque to 50-60 ft lbs.
Use a rubber mallet to help get the caliper on.
6. Install the hub nut and wheel.
Before putting the wheel on, put the hub nut on and tighten but do not torque.
Put the wheel back on and lower the car.
Torque the hub nut to 90 ft lbs.
Using a star pattern, torque the wheel lug nuts to 75 ft lbs.
Put the cap and lug nut covers on.
Brought to you by 1AAuto.com your source for quality replacement parts and the bet service on the internet.
Hi I'm Mike Green; I'm one of the owners of 1A Auto. I want to help you save time and money repairing and maintaining your vehicle. I'm going to use my twenty plus years experience restoring and repairing cars and trucks like this to show you the correct way to install parts from 1AAuto.com. The right parts installed correctly that's going to save you time and money. Thank you and enjoy the video.
Okay this is kind of part two we are going to install the ball joint on this S-10 four by four the same as any S-10, S-15, Blazer or Jimmy. The tools you're going to need are various size metric sockets including a thirty five millimeter socket for the hub, jack, jack stands, screwdriver, pry bar, cold chisel, air chisel if you're replacing your original ball joints, some penetrating oil, torque wrench and also a rubber mallet and a hammer.
Okay we are going to start out just to clean up the top of the upper control arm just to get some of the dirt and stuff off of it and now here I'm just lining up the boot on the ball joint and then I'm going to put the ball joint down into the steering knuckle and push down and then put the nut onto the ball joint. Okay and once I tighten that up a little bit by hand and then I just push the steering knuckle down onto the control arm so it's in place.
Okay and now what I'm going through in fast motion here is I'm just putting the four bolts, the ball joint comes with brand new bolts I'm putting the four bolts down in and the nuts on and then I'm starting them with my ratchet so I'm just putting the bolts down in and starting the nuts on the other end and then once this slows down I will be torqueing them and you torque these nuts to about twenty five foot pounds. So you can see here I'm torqueing them and then I go across and torque one on the front and torque one on the back and then torque the other back and then torque the front. So you kind of go in a criss-cross motion. Okay I'm finishing up here torqueing it.
Okay and now I'm going to put the tire rod end down in and put the bolt on. Okay and I'm torqueing the bolt to about fifty five foot pounds and then I basically look to see where the hole is because the nut has ridges in it for the cotter pin to go through and I can see that I just need to tighten it up here just a little bit more so that the cotter pin will go through. So now I'll knock the cotter pin through. It shouldn't take much if you're doing it right to get the cotter pin through and then bending it with some pliers. Okay and then I'm going to repeat that procedure for the lower ball joint. I'm putting it on and torqueing the nut to fifty five foot pounds and checking it out to see where the cotter pin is lined up and tighten it up a little bit more so you have a clear shot. Okay not the best shot of this here but down on the bottom right you can see a little socket I'm just putting the grease fitting in right there.
Okay no is as good of a time as any to grease the lower ball joint, the tire rod end and then the upper ball joint. Okay here I'm actually putting the jounce bumper back in. You just put it up in and put the bolt on top and tighten it up. Okay preparing to put the hub on just putting the O-ring on the hub. This goes on here like that and put it through and the connector is going to be where that big gap is. I'm just going to get this up in here and get it somewhat lined up, grab one of our bolts and make it one of the easy ones down here and thread it through and torque it in and get it going a little bit.
Okay now I'm going to speed it up a little bit and I'm just going to work the other two bolts in and then I'm going to use the ratchet and socket and tighten them up shifting the steering a little bit to get to them and you do want to try to tighten them up evenly. You don't just want to tighten one all the way up you want to pull the hub into the steering knuckle pretty much evenly so I'm just kind of rotating around and tightening and then after this I will set my torque wrench to sixty five foot pounds and torque them up.
Now you take it up to about sixty five foot pounds. Now we are going to put the harness back in. Okay so remember here you have a little ten millimeter bolt on that first clip and then you've got a thirteen millimeter bolt and nut on that second clip and you have to clip it in together with the brake line. The hub harness goes in behind the brake line so the bolt goes through the hub harness first and then the brake line harness and then it's opposite on the frame connector the brake line goes onto the frame and the hub harness goes on top of it. Okay so tighten up that bolt, tighten up the frame and then you can take the clip and put it onto the frame and connect them together and then once they're connected pull your flap back down and then you're all set.
Okay here I'm putting the rotor back on and I apologize for the poor camera work here I didn't realize that I wasn't shooting it very well. I'm putting the lug nut just one on just to kind of keep the rotor in place it makes it easier to get the caliper on. Okay now I'm grabbing the caliper. I'm also not touching the disc or the brake pad services. You want to try to keep them clean it keeps your brakes working better. If you do hit them just use a little linseed oil or brake parts cleaner and then I use a rubber mallet to try to persuade the caliper on there, put the bolts in for the caliper they should be torqued to fifty to sixty foot pounds. The top I didn't get a torque wrench on so I used my well calibrated arm and hand as you'll see. After that, torque up the bottom one correctly.
Okay so I'm going to tighten the hub nut with an impact wrench and I'm going to watch back here and you can see that there's a little gap right here this shiny ring and that will close up as I tighten and I will just stop before that closes all the way because I want to tighten that with a torque wrench when the car is on the ground.
So I re-did my lower ball joint those four bolts are done and the bottom one is torqued with a cotter pin and I had this apart and that's torqued with a cotter pin. Okay I replaced my hub and those three bolts have been torqued. Okay I put my brake back on and those bolts have been torqued and I re-installed my line here. Okay and that's all tight so now I can put my wheel back on and I'm going to torque the hub nut to ninety foot pounds. Okay and now I'm going to torque the wheel lug nuts to seventy five foot pounds. I put my cap back on and the lug nut covers.
We hope this helps you out. Brought to you by www.1AAuto.com your source for quality replacement parts and the best service on the internet. Please fee free to call us toll free 888-844-3393. We are the company that's here for you on the internet and in person.
Tools used
14mm Wrench
Air Chisel
15mm Wrench
Socket Extensions
Torque Wrench
16mm Wrench
17mm Wrench
Rust Penetrant
Pry Bar
18mm Wrench
Jack Stands
19mm Wrench
10mm Wrench
Flat Blade Screwdriver
Floor Jack
11mm Wrench
12mm Wrench
13mm Wrench
Complete Metric Socket Set
1. Loosening the Lug Nuts and Hub Nut
Before lifting the car, loosen the lug nuts up with a 19 mm wrench, and the hub nut using a 35 mm socket. It's best to do this while the car is on the ground so the wheels won't move.
2. Raising and Securing the Car
Position the jack under the control arm with a jack stand under the frame.
Raise the car (most of the weight should be on the jack stand).
3. Removing the Brake Caliper
Remove the tire, and the hub nut and washer.
To remove the break caliper, there are two 18 mm bolts to remove-one on top and one on the lower backside.
Once those are off, pry the caliper right off with the wrench.
Remove the brake rotor.
4. Redistributing the Weight
Now, to redistribute the weight, move the jack out to the end of the control arm, and jack it up so that most of the weight in now on the jack with only a little weight on the jack stand.
5. Removing the Harness
First, disconnect the harness. Remove the clips on the left side of the harness, and use a screwdriver to pry it up off the frame.
It would be best to coat the nuts with penetrating oil at this time.
Take the small bolt off with the 10 mm wrench (put the bolt and the nut back into the control arm just for safe keeping so you'll know where they are).
Remove the last bolt on the frame-a 13 mm bolt.
Once the bolts are removed, pull the harness out and free. (Save the clips from the harness in case you need them to install)
6. Removing the Hub
There's three 18 mm bolts that hold the hub-one in the back, one in the middle of the top, and one in the front.
The front and rear ones can be reached with an impact wrench or regular wrench. The middle one, you'll need to use a hand wrench. (Swivel the steering to help you get at the bolt easier.)
Remove all three bolts.
Using the pry bar or screwdriver, pry against the steering knuckle. (Be careful not to bend up that backing plate too much.)
Pull out and away from the backing plate, and the hub is out.
(There is a little O ring that needs to be replaced correctly. If you are replacing the hub, transfer it to the new hub. If not, make sure it's in the correct spot.)
7. Removing the Jounce Bumper
There are two bolts where the ball joint is secured to the control arm. (If your ball joint hasn't been replaced before, you'll just see little round rivets.)
If it is rivets, use a cold chisel and pound them to shear them right off.
Remove these bolts or rivets on the front, in the back and underneath.
8. Removing the Ball Joint
Remove the cotter pin and the bolt-22 mm or 24 mm-from the ball joint.
Remove the cotter pin and the bolt-18 mm or 19 mm-from the tire rod end.
For the tire rod end, hit it with a couple of good hammer hits. Holding the control arm, give the ball joint a few whacks as well.
Take out all the bolts from the top of the ball joint.
Pull down on the control arm and towards the rear of the vehicle, and the ball joint will come out.
This video is brought to you by 1AAuto.com your source for quality replacement parts and the best service on the internet.
Hi I'm Mike Green. I'm one of the owners of 1A Auto. I want to help you save time and money repairing and maintaining your vehicle. I'm going to use my 20 plus years experience restoring cars and trucks, to show you the correct way to install parts from 1A Auto.com. The right parts, installed correctly, are going to save you time and money. Thank you and enjoy the video.
In this video we'll be showing you how to remove a ball joint from this S-10 pickup, same as any pickup truck or Blazer. This is just the removal. We do have the installation in a video response to this video.
The tools you'll need are: You'll need metric sockets anywhere from 10 mm to 35 mm with Handles and Extensions. You'll need wrenches anywhere from 10 mm to 19 mm. A jack and jack stands. You will also need a large screwdriver, or pry bar or air chisel. That's if you're replacing the original ball joints that are riveted in, penetrating oil and a torque wrench. We strongly recommend that you have air tools. You can do it with hand tools, but it's slightly more difficult.
First, if you're using hand tools you're going to want to loosen those lug nuts up with a 19 mm wrench. You want to do this on the ground so that your wheels won't be moving. The other thing you're going to want to do is you're going to want to use your 35 mm socket to loosen the hub nut. Now I'm going to raise the car up and secure it. I've raised the wheel I'm working on up off the ground by putting the jack under the control arm. I also have a jack stand under the frame here that's what's going to hold most of the weight.
I'm going to remove the tire, and then I can remove the center hub nut (35 mm) and the washer. Now, I'm going to remove my brake caliper by removing the bolt on top and the bolt on the backside. They're both 18 mm bolts. Now I'm going to use my wrench to just pry the caliper right off. Then, I'll take the disc off.
What you want to do is transfer the weight back on the control arms. Move the jack out to the end of the control arm, and jack it up. Now, most of the weight is on the jack with only a little weight on the jack stand. I'm disconnecting the harness, and then I'm going to remove the clips for the hub harness. These clips are on the left side. Use a screw driver to pry it up out of the frame. I'm prying the harness clips off. I'm going to coat the nuts with penetrating oil. Then I'm going to take the small one off with the 10 mm wrench.
I'm, actually going to get the wrench up behind to hold that bolt. Then, I'm removing that bolt. Okay, here I'm just finishing up taking out that bolt (I like to put the bolt and the nut back into the control arm just for safe keeping so I'll know where they are). The last bolt on the frame is a 13 mm bolt.
Now I'm just pulling the harness out and free. I'm going to pull the clips off the harness so that I can put them onto the new hub harness when I'm ready to install it. Now you want to remove your hub. There's three bolts one in the back, one in the middle of the top, and one in the front. These are 18 mm bolts.
The front and rear ones you can get to with an impact wrench or regular wrench. The top one is a little more difficult you have to use a hand wrench. It helps if you swivel the steering which helps you get to the bolts much easier.
Then I'm taking them out. You can pry with a pry bar or a large screw driver. I'm using the screwdriver and pry against the steering knuckle.
You can see me get it apart now, just shaking it. You want to be careful not to bend up that backing plate too much. I leave that top bolt in it's very loose but it's still in there. Now the hub comes right out. Pull the harness out away from the backing plate and your hub is out.
There's this little O ring that you want to make sure goes back on correctly. If you put a new hub on, obviously, transfer it to the new hub, if you don't just make sure it's in the correct spot.
Now I'll remove this jounce bumper from the top to allow your upper control arm to fall down some more. Where your ball joint is secured to the control arm, there are two bolts. This has been replaced before it's by bolts. If your ball joint hasn't been replaced before, you'll just see little round rivets. If it is rivets you've got use a cold chisel and just pound them to shear them right off. You're going to remove these bolts or rivets on the front, in the back and underneath everything is bolted underneath.
Then, with the ball joint shaft, I'm going to remove the cotter pin. I'm also going to remove this cotter pin and bolt from the tire rod end. This whole time, my jack here is supporting the control arm.
The best way to get at the inner bolts is to go under the shaft and hook on with your bolt. I'm just removing those four nuts right now. I am not removing the bolts from the top. I'm just taking the nuts off the bottom.
I'm also removing the cotter pin and the bolt from the ball joint. I believe it's either a 22 mm or 24 mm bolt. Okay, now here I'm removing the cotter pin and the bolt from the tire rod end. I believe that's an 18 mm or 19 mm bolt. For the tire rod end, you just hit it with a couple of good hammer hits. It comes right out. You do the same thing with the ball joint hold them down on top of the control arm and giving it a couple of whacks with the hammer.
Now, at this point, I'm taking out all the bolts from the top of the ball joint. After that, I pull down on the control arm and towards the rear of the vehicle, and the ball joint comes out. Okay, that's how you remove your ball joint. We also have a video detailing the installation which can be found as a reply to this video. Check that out.
We hope this helps you out. Brought to you by www.1AAuto.com your source for quality replacement parts and the best service on the internet. Please feel free to call us toll free at 888-844-3393. We're the company that's here for you on the internet and in person.
PSA56321
In Stock
Product Reviews
Loading reviews
4.74/ 5.034
34 reviews
5 Stars
4 Stars
3 Stars
2 Stars
1 Star
26
7
1
0
0
Suspension Kit
Labon
January 23, 2017
The service was great no delays or anything Just was sent wrong parts
Like it alot
chris
March 6, 2017
Great price and I will purchase more stuff when I need it great company
Suspension Kit
stephen
July 2, 2017
I received the kit much sooner than I had expected it , which of course is great . It took a couple weeks before my mechanic could get my truck in . My mechanic unpacked the box and confirmed all the parts were there and started to work . After he finished the only thing I had to do was have it aliened . Thanks for your quick service and accuracy .
Great deal!
Rebecca
July 11, 2017
I was very pleased with the quality of parts I received. first time I've ordered a kit like this and i was happy to find it all together. I wish the kit would include lower swing arms with new bushings as well instead of just bottom ball joints, that would be more complete kit and worth the extra $$.
Once again great service from 1A Auto! I highly recommend ordering from this company, not only this kit but all parts ive ordered have been great quality and delivered on time or early. They have great customer service as well!
S10 blazer
J
October 18, 2017
Everything i needed in1 package truck rides super nice now the videos were so great and helpful was able to complete front end in a couple of days. The hardest part was removing old parts. New parts are an exact for great ??
bill
October 20, 2017
Everything fit great hassle free install and fast shipping
Perfect Fit
L
October 24, 2017
Everything fit great. Only suggestion would be that the Pitman arm and steering shaft is probably not needed for 99% of these suspension rebuilds, and I did not use mine since that part about triples the time to install this kit.
Great parts.
PT
November 5, 2017
Great parts for the price. Excellent fit no issues, it's been over a year-and-a-half and 15000 miles. Thanks 1aauto.
O
January 24, 2018
Hey guys i wanted to respond to your email simply because ya'll need to be held responcible .... for surpassing my every expectation!
Honestly when i saw your prices and compaired them to my local parts houses, i was sure that i had just bought a bunch of shitty knock-offs that would in no way fit.
I couldnt have been more wrong!!
Your parts fit, they are of good quality, and they saved me a grip of cash.
Thank you guys! I'll be back , with freinds!
M CANO
Sent from my Samsung Galaxy smartphone.
-------- Original message --------
From: 1A Auto
Date: 1/13/18 10:40 AM (GMT-07:00)
To: onacttam@hotmail.com
Subject: How do you like your 1ASFK02602-Steering & Suspension Kit?
INSTALLATION VIDEOS | SHOP | CUSTOMER SERVICE
CALL TOLL FREE
866-404-3393
EMAIL
1A AUTO
Thank you again for your recent order with 1A Auto! We work hard to make sure you are 100% satisfied with the service and shopping experience.
Your opinion is greatly appreciated by other customers as well as
Very good company
K
February 23, 2018
I got my parts from here very fast! Everything fit perfect and has been doing me good! ?? I would recommend this website to everyone. Very satisfied and will deffently be ordering more parts from here.
Parts that fit
Terry
April 16, 2018
All of my parts arrived on time and intact when they said they would be here the installation of these parts went very well and did not have incurred any problems during installation and they all fit very well I have already referred several people to your website and will continue to refer people
Great Service!
L
April 27, 2018
The service was great, fast shipment, great quality parts and easy to install. Price for parts was inexpensive which made repairing my vehicle quick and easy.
Tony
June 6, 2018
All the parts were there the only problem was that the upper control arm came without the bracket for the ABS sensor wire which is standard. Everything else was great.
E
August 30, 2018
I was worried about my order from the start , but you quickly proved to me that you are on top of it , got here super fast , the right part ,of the and I am totally impressed ! Thanks.Write
98 Blazer Steering/Suspension kit
Jason
September 4, 2018
I ordered the kit, paid with card over the phone, product was shipped and in my possession on the third day after ordered (almost 4 days total). Note: I did not pay for any rush delivery, that was just thru standard mailing!!! I know, AWESOME !!!, I couldn't be more happier!!! Received kit and everything was in there, COMPLETE.!! EXCELLENT SERVICE FEOM BEGINNING TO END!!! Now I'm just saving up for the lower control arms and I will finally be able to drive again!!!, AND SQUEAK FREE!!!!
THANKS, JASON MASTERS
Great parts
K
September 6, 2018
Parts came individually wrapped and looked great. I've had them for about a week and no more popping every time I back out or go over a big bump.
Steering suspension kit
mary
October 15, 2018
Very pleased with product and service. Recommend this site
York
October 26, 2018
Thank you for your prompt service. I received my parts in a timely manner, although the box was somewhat damaged. need to ensure that the packaging is done so it will not open during transit. I would recommend 1A Auto for all your parts needs. After looking to other parts outlets, I find that 1A Auto was best as far as price and service is concerned... thank you...
J
March 20, 2019
staff was awesome took my truck to a local chevy dealer and they advised me wrong knowledge is great at this place
Great experience
H
May 3, 2019
Great parts and great prices my shippment came very fast and the how to videos are by far the best i have come across. Very informative and use full. Will definitely be ordering from here for all my auto needs. Blows rock auto away
Joseph
October 12, 2019
Quality parts
Life Saver
C
October 20, 2019
1A Auto is now my go to parts supply, the parts I have ordered fit excellent and work phenomenal.
Best bang for the buck
Uver
November 25, 2019
So far so good. This is what I needed for over two years when the left tire bent because of an ungreased balljoint. I recommend 1a auto. Great prices.
Front suspension kit for 99 GMC Sonoma 4x4
R
March 4, 2020
Installation was not difficult. The entire suspension kit was precise fit very good quality parts. I highly recommend these parts not just because of durability but the cost as well saves your wallet. Fast delivery no hassles and great customer service over the phone when placing my order.
I love your service and parts .This parts app. Is very very helpful in getting quality parts 4 less than every one else and fast delivery. Thanks very much I will tell everyone I know and don't know about you guys.
MATTHEW
March 19, 2020
I love you guys and your parts and service thanks 4 getting them out fast as you do I will tell the world if that's possible about you guys thanks
Great parts
Ray
April 25, 2020
Received parts quick had a local shop install them truck is a 2001 but rides like a 2020 now thanks 1 a auto
K
June 6, 2020
Everything came quickly and went in great.. will refer to my friends and family. Will order again this was my 5 purchase.
A
August 27, 2020
I loved how quickly I could order how quickly it was shipped and all the parts were great quality. It took no time at all to be delivered
Wow!!
william
September 24, 2020
You guys are awesome..all them parts for that inexpensive price. I dont know how you do it..but im glad you do what you do
1998 chevy blazer 4WD 13 piece front end kit
Richard
October 3, 2020
Everytthing fit as ordered.....no problems
Quick shipping
J
December 30, 2020
The item shipped quickly, and arrived with all advertised parts.
Great bang for your buck
Janai
June 15, 2021
Great all around. A bit stiff but I still need to work the joints out.
03 Chevy blazer lower control arms.
Tyvan
January 28, 2022
This mounts for the sway bar were not mounted in the proper area on the new lower control arms. The original sway bar was 3 too narrow because of were the mount was located on the new lower control arm and to be modified.
Steering kit
Paul
September 6, 2023
Everything fit perfect no problems only been on a week so far so good. 1999 GMC Sonoma zr2
Customer Q&A
Are these ball joint, and tie rods grease able or sealed?June 15, 2016
Jay Bredlau J
10
There are zerc fittings on the ball joints
June 15, 2016
Michael V
10
Grease able
June 16, 2016
Stephen W
10
They're greasable
June 21, 2016
Joseph S
Does this kit replace all needed parts for a front end suspension/steering rebuild?January 25, 2017
Melissa G
10
No all the parts.. it doesn't include shocks, tortious bars or lower control arms. But does give you the lower ball joints. Also. To install the pitman arm on the steering box you need to really remove the box. There isn't enough room to use the puller to remove the old one.. and its difficult to install the new one without an impact gun.. the shaft is tapered and using a wrench you don't get enough torque. . Hope this helps. Tim
January 25, 2017
Dianne G
10
Aside from shocks(or struts, whichever you have), lower control arms, CV axles(if applicable), and anything upwardly connected to the pitman arm (i.e. steering shaft, u-joint, etc.), it gives a fairly thorough rebuild. IMPORTANT: You may have to grind or air chisel off the rivets securing the original lower ball joints to the lower control arm, provided that is how they are secured (pray for nuts and bolts!)
January 25, 2017
John T
10
This will cover most of the parts, however for a complete front suspension rebuild shocks or struts with coil springs or torsion bars could be inspected for wear. Other components which are not included are the control arms or bushings.
January 25, 2017
Alex P
10
Yes, I used this successfully to rebuild the front of my daughters 04 Blazer. Everything fit perfect
January 26, 2017
James S
10
Pretty much. They're aren't any Springs or shocks tho.
January 26, 2017
Joseph S
Do you have a 2wd kit like this?February 1, 2017
Ashton L
Does this come with the idler arm only or the idler arm assembly?February 9, 2017
Nicholas B
10
This set will only include the idler arm. The bracket is not included but depending on the condition of your factory part may be reused or you may purchase separately.
February 14, 2017
Alex P
Will these parts fit on a 2001 zr2 s10?February 14, 2017
Austin B
10
Yes, this will fit your 4WD model 2001 S10 with the ZR2 package.
February 14, 2017
Alex P
Is this kit for 1 side or is it for both sides of the s10?March 9, 2017
Janson C
10
Both sides.
March 9, 2017
Brian R
10
Both sides. Be prepared to air chisel or torch off the lower ball joint rivets, too!
March 9, 2017
John T
10
Its for both sides. Quality kit for the money!!
March 9, 2017
Donnie K
10
Janson, if this is truly your question. My answer is YOU do not need to order parts. Let someone else do the ordering.
March 9, 2017
PT S
10
Both sides.
October 25, 2017
L A
10
Both sides
March 19, 2020
MATTHEW J
who is the manufacturer of these parts?April 14, 2017
Brandon B
10
A few kids in China would be my guess. They're not name brand. But the name brand stuff comes from China anyhow most of the time
April 14, 2017
Joseph S
10
These are our 1A Auto brand parts made in either China, Taiwan, or Japan.
April 14, 2017
Alex P
Does this fit on a 2.5 inch suspension lift on a 2002 chevy s10 4x4?August 22, 2017
Eduardo C
10
These may still fit, but with any lift the parts would prematurely fail due to the strain on the suspension.
August 25, 2017
Alex P
Well this work on the 98 chevy s10 zr2?August 27, 2017
Alex G
10
I don't think it will fit a ZR2. They're wider.
August 27, 2017
Joseph S
10
I have a 2000 ZR2 and it fit mine perfect. Although they are wider, the tie rods and ball joints and the control arms are the same size as the Sonoma and S10's.
October 25, 2017
L A
10
They fit my truck just right shocks and 14 piece front end kit
March 19, 2020
MATTHEW J
Will this kit work for a 2000 zr2 blazer?September 20, 2017
Brad E
10
Yea it should work, I used this kit on my old 2003 ZR2 S10 after installing torsion keys. I would imagine they are same suspension set up. The only thing different on a ZR2 is the lower control arms if I remember and they are expensive and can only be bought from GM
September 21, 2017
Ryan R
10
As long as you have a 4x4 model then this kit should fit!
September 21, 2017
Tim K
10
It might fit but will not meet the performance specs of a ZR2
October 3, 2020
R I
Will this kit fit a 97 Blazer 4x4?October 17, 2017
Cliff W
10
These are listed to fit only a 1998 and newer model.
October 17, 2017
Alex P
Is this upper and lower control arms for both side with bushing?November 5, 2017
Larry H
10
Scatch that.. it's an upper control arm kit only.. no lower arms.. But its for both sides..
November 5, 2017
Dianne G
10
Also.. in order to properly replace the pitman arm you'll need to remove the power steering box.. Which is a real pain it the "bleep"
November 5, 2017
Dianne G
10
This kit only included upper control arms with bushings. Lower control arm bushings are not in this kit.
November 7, 2017
Tim K
Does this kit work on the zr5 model sonoma 4x4 ?December 3, 2017
Jeffrey H
10
Yes, it worked . Fit well.
December 4, 2017
Bryce K
How long should it take a qualified mechanic to install these parts?April 27, 2018
Ronald H
10
It really depends on the rust no longer than 4 or5 hrs
April 27, 2018
Robert D
10
Took me about 6 hours. The originals were well rusted and siezed. I'm not sure on the certified mechanic part of it though
April 27, 2018
Nicholas S
10
No more than a day. I did everything. Upper and lower control arm kits and everything in between it in my driveway with nothing more than my sockets and a floor jack. It took me 8 hours
April 27, 2018
Dianne G
Does this kit fit a Chevy s10 1997 4wd?September 26, 2018
Abraham M
10
This part will not fit your vehicle. We may have a part that is listed to fit.
Please enter your vehicle's year make and model in the search bar at the top of the page. This will display parts guaranteed to fit your vehicle.
September 27, 2018
Jessica D
Will this fit my 2002 chevy blazer zr2 4 wheel drive?June 21, 2019
Joseph D
10
Yes, according to the information you provided, this part will fit your vehicle.
June 21, 2019
Adam G
How long is the warranty on these parts ?November 27, 2020
Tommy M
10
This item is backed by our limited lifetime warranty. In the event this item should fail due to manufacturing defects during intended use, we will replace the part free of charge. This warranty covers the cost of the part only.
November 30, 2020
Katie L
Will these fit my 2001 4x4 s10 with a three inch lift?December 3, 2020
Chris J
10
Our parts are exact replacements for your vehicle's OEM parts. We would not be able to guarantee the fitment, function, or longevity of our parts on a lifted or modified vehicle. We would recommend purchasing parts that are designed specifically for lifted trucks to avoid any issues.
December 4, 2020
Curtis L
Do the upper control arms need to be shimmed for alignment?December 6, 2020
Eric F
10
Thank you for your question. Our Suspension part comes with No modifications need and pregreased. You should not have to shim the control arms for an alignment.
December 8, 2020
Ricale A
What is the part number for the lower a arms to match this kit?February 9, 2023
Chris M
10
Thank you for your inquiry. Can you please provide us with your vehicle's year make and model?
February 9, 2023
Jean O
Customer service
877-844-3393
Monday - Friday 8:00am - 9:30pm ET Saturday - Sunday 8:00am - 4:30pm ET
Chevrolet is a registered trademark of General Motors Company. 1A Auto is not affiliated with or sponsored by Chevrolet or General Motors Company.See all trademarks.
Enter Vehicle Year Make Model
Specify your vehicle's year, make and model to guarantee fit.
Year
Make
Model
Options
Drivetrain
This part doesn’t fit a . Select from parts that fit.