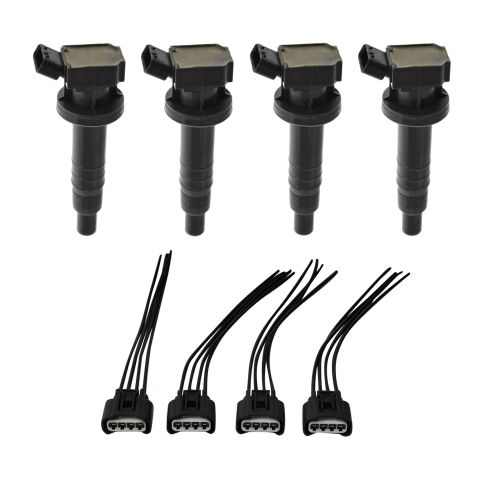
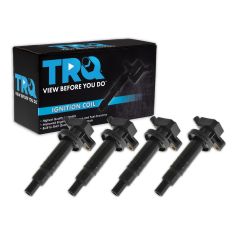
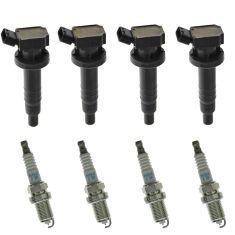
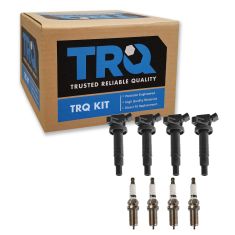
Complete Repair in One Purchase - Stop searching for parts individually and complete your repair with a customized kit or set from DIY Solutions.
High-Quality Parts from Trusted Brands - DIY Solutions' kits and sets are selected from the best automotive brands and include hard-to-find and even obsolete parts you may need for your vehicle.
Guaranteed Fit - DIY Solutions ensures its selected parts are quality-tested to guarantee fit and function.
Item Condition:New
Attention California Customers:
WARNING: This product can expose you to chemicals including Lead and Lead Compounds, which are known to the State of California to cause cancer, and birth defects or other reproductive harm. For more information, go to www.P65Warnings.ca.gov.
Lifetime Warranty
This item is backed by our limited lifetime warranty. In the event that this item should fail due to manufacturing defects during intended use, we will replace the part free of charge. This warranty covers the cost of the part only.
Returns: Parts with electrical components cannot be returned once installed.
FREE Shipping is standard on Orders shipped to the lower 48 States (Contiguous United States). Standard shipping charges apply to Hawaii, Alaska and US Territories. Shipping is not available to Canada.
Expedited is available on checkout to the United States, excluding Alaska, Hawaii and US Territories as well as P.O. Boxes and APO/FPO/DPO addresses. Final shipping costs are available at checkout.
How To Replace Ignition Coils 2000-05 Toyota Celica
How to Replace Ignition Coils 2003-08 Toyota Matrix
Created on:
Tools used
Flat Blade Screwdriver
10mm Socket
Ratchet
1. Removing the Ignition Coil
Make sure you have the correct ignition coil for your engine
Disconnect the ignition coil wiring harness with a flat blade screwdriver
Remove the 10mm bolt from the ignition coil
Pull the ignition coil up and out
2. Installing the New Ignition Coil
Put the new ignition coil into place
Insert the 10mm bolt into the ignition coil
Connect the ignition coil wiring harness
Repeat Steps 1 and 2 for the remaining ignition coils
Brought to you by 1AAuto.com, your source for quality replacement parts and the best service on the Internet.
Hi, I'm Mike from 1A Auto. I hope this how-to video helps you out, and next time you need parts for your vehicle, think of 1AAuto.com. Thanks.
In this video, we show you how to replace the ignition coil on this 2000 Toyota Celica. It's the same process on the Celicas from 2000 to 2005. There are two types of ignition coils for this vehicle, so make sure you check your engine number and compare it to the engine number given with the part on 1AAuto.com. The only tools that you're going to need for this are a 10mm socket and a ratchet.
Right here are your four ignition coils. You're going to start off. You just pry up the tab and pull the harness right off. Then you just remove the 10mm bolt right here and then the ignition coil just pulls right up and out.
Reinstallation is straightforward, put the coil back in, line up the hole, reinsert the 10mm bolt and tighten it up nice and firm, reconnect the harness, and then repeat that for the other three coils.
We hope this video helps you out. Brought to you by www.1AAuto.com, your source for quality replacement parts and the best service on the Internet. Please feel free to call us toll-free, 888-844-3393. We're the company that's here for you on the Internet and in person.
Tools used
Dielectric Grease
Drill
10mm Socket
5/8 Inch Spark Plug Socket
Ratchet
Pocket Screwdriver
Okay, friends. One of the first things we need to do is get under the hood. Once you're under the hood, just make sure it's not super hot because we don't want to deal with a hot engine. Go ahead and remove this cover right here by removing your two 10-millimeter headed nuts. Okay, there should be one right here. Ours is missing. Go ahead and carefully lift that up and set it aside.
Awesome. Now that the cover's off, we have a clear view of our ignition coil harness right here. We need to go ahead and squeeze on this tab right here and try to draw it off. If you can't squeeze hard enough, go ahead and use a pocket screwdriver, come right underneath this ear, carefully lift it, and then draw this away. Every time I remove an electrical connector, I always look to see if there's any funny colors. If there is, it's probably corrosion, and that's gonna cause restriction. This looks good. Let's set it aside. The next thing we're gonna do is remove our 10-millimeter headed bolt right here. Set that aside as well. Go ahead and grab onto the coil, twist, and lift.
All right friends. Now, it's going to be time to install our brand new coil. Install the coil, I always like to put a little bit of dielectric grease right down inside this area here. It's going to keep the moisture away, and of course, along this area right there also to keep the moisture away. Right in there. Along here. You don't need very much. Go ahead and set that down on there and press it down onto the spark plug. Let's put our bolt in there. Always want to start these in by hand, of course. Now, we'll snug it up. Just bottom it out, give it a teeny bit more. That's good. If you want to use a little bit of dielectric grease inside of your connector, we'll call it your prerogative. Aside from that, go ahead and press it on, listen for a click. Give it a nice tug. Make sure it's secure. We would just do the same down the line. Now, when you get down to this portion of this, you're probably gonna see that this black piece is in the way. There's a 10-millimeter bolt here and a 10-millimeter headed nut right there. We're going to remove the pair of those, and then you can lift this up and out of the way.
All right. Now that we have everything nice and securely connected, we have this back on there as it should be, let's go ahead and put this cover back on. Line up the holes with the studs coming off your engine. Put on your nut, and then of course, snug it up. Do the same to the other one if you have one.
Okay, friends, the next thing that we need to do is carefully start up the vehicle. We're going to come right back out here and we're going to watch the engine. Make sure it's not shaking around. If it's shaking around, you have a misfire. There's a possibility that maybe you didn't plug something in. Aside from that, shut the hood, hop back in the vehicle. Make sure there's no check engine light, and take it for a road test.
Tools used
Dielectric Grease
Drill
10mm Socket
Pocket Screwdriver
Okay, friends. One of the first things we need to do is get under the hood. Once you're under the hood, just make sure it's not super hot because we don't want to deal with a hot engine. Go ahead and remove this cover right here by removing your two 10-millimeter headed nuts. Okay. There should be one right here, ours is missing. Go ahead and carefully lift that up and set it aside.
Awesome. Now that the cover is off, we have a clear view of our ignition coil harness right here. We need to go ahead and squeeze on this tab right here and try to draw it off. If you can't squeeze hard enough, go ahead and use a pocket screwdriver, come right underneath this ear, carefully lift it, and then draw this away. Every time I remove an electrical connector I always look to see if there's any funny colors, if there is, it's probably corrosion and that's going to cause restriction. This looks good, let's set it aside.
The next thing we're gonna do is remove our 10-millimeter headed bolt right here. Set that aside as well. Go ahead and grab onto the coil, twist, and lift. All right friends, now it's gonna be time to install our brand new coil. To install the coil, I always like to put a little bit of dielectric grease right down inside this area here, it's gonna keep the moisture away and of course along this area right there also to keep the moisture away. Right in there, up along here, you don't need very much. Go ahead and set that down on there and press it down onto the spark plug. Let's put our bolts in there. You always want to start these in by hand of course. Now we'll snug it up. Just bottom it out, give it a teeny bit more and that's good.
If you want to use a little bit of dielectric grease inside of your connector, we'll call it your prerogative. Aside from that, go ahead and press it on, listen for a click. Give it a nice tug, make sure it's secure. We would just do the same down the line. Now when you get down to this portion of this, you're probably gonna see that this black piece is in the way. There's a 10-millimeter bolt here and a 10-millimeter headed nut right there. We're gonna remove the pair of those and then you can lift this up and out of the way.
All right. Now that we have everything nice and securely connected, we have this back on there as it should be, let's go ahead and put this cover back on. Line up the holes with the studs coming off your engine, put on your nut, and then of course snug it up. Do the same to the other one if you have one. Okay friends, the next thing that we need to do is carefully start up the vehicle, we're gonna come right back out here and we're gonna watch the engine. Make sure it's not shaking around, if it's shaking around, you have a misfire, there's a possibility that maybe you didn't plug something in. Aside from that, shut the hood, hop back in the vehicle, make sure there's no check engine light, and take it for a road test.
IGN00515
In Stock
Product Reviews
Loading reviews
5.00/ 5.05
5 reviews
5 Stars
4 Stars
3 Stars
2 Stars
1 Star
5
0
0
0
0
A1 Auto Experience
Ryan
July 5, 2019
My car was having some engine troubles and I ended up having to take it to a shop to see what was wrong. It would still drive, but it was kicking really bad. After having the codes read, they recommended I change my sparkplugs (all) and just the one ignition coil. This whole ordeal, parts and all, was going to make out to be about $500.
After about 3 phone calls to 1A Auto, asking for different information about what I needed and how to get it, I finally ordered the parts. Everyone I spoke to over the phone was extremely courteous and helpful, and took the time to try and help me figure out what I needed.
For $100, I was able to replace all of my coils myself, and the tutorial video on how to install a coil was super easy to follow. With 0 experience working on a car, I popped off the engine cover and had swapped out all four coils and screwed everything back on in about 20 minutes.
I ended up not needing any of the pigtails to rewire, so I have no comment on those. The co
Karen
March 22, 2022
I ordered the Coil pack. As I was told the posts would be guaranteed to fit, and they did. Since then, Ive had to order more oats which Im waiting to receive tomorrow. Thanks
Bernardino
June 22, 2022
very good product
Happy customers
Jake
August 21, 2022
Nice job
Ausencio.
April 9, 2024
Son muy eficas el precio es muy rasonabla si los recomiendo amis amigos
Customer Q&A
No questions have been asked about this item.
Customer service
877-844-3393
Monday - Friday 8:00am - 9:30pm ET Saturday - Sunday 8:00am - 4:30pm ET
Toyota is a registered trademark of Toyota Motor Corporation. 1A Auto is not affiliated with or sponsored by Toyota or Toyota Motor Corporation.See all trademarks.
Enter Vehicle Year Make Model
Specify your vehicle's year, make and model to guarantee fit.
Year
Make
Model
Options
Drivetrain
This part doesn’t fit a . Select from parts that fit.