Brought to you by 1AAuto.com, your source for quality replacement parts and the best service on the Internet.
Hi, I'm Mike from 1A Auto. I hope this how-to video helps you out, and next time you need parts for your vehicle, think of 1AAuto.com. Thanks.
In this video, we're going to show you how to replace the fuel injectors in this Dodge Ram. This one's a 2008 with a 5.7-liter hemi. This procedure is pretty much the same for 2004-2008 1500, 2500, and 3500s. You'll need new fuel injectors from 1AAuto.com, flat blade screwdriver, 8-10 millimeter sockets with a ratchet and extensions, angled pick, rag, and fuel system safe cleaner.
Behind the inner wheel well liner on the driver's fender. You’ll find a large connector running to the rear harness of the truck. Using a flat blade screwdriver, pry back the red safety as far as you can, lift up on this gray latch here, and you may have to push down and lift up on the gray hatch, open that up all the way—you don't have to remove this connector, you just have to open the latch to separate the terminals—open the fuel door, and remove the fuel cap.
Now, when we start our truck, it's going to die. We want to keep cranking for a few seconds after it dies to run the system out of fuel before we try to remove our fuel rail. You'll want to use a 10 millimeter wrench to remove the negative terminal of your battery, set it off to the side.
Open the air box by releasing the metal clips on the side and the rear. Pop it out of its' holders, release this hose from the front, and using the flat blade screwdriver, loosen the clamp on the rear of the inlet pipe. With that loosened up, work the pipe off of the box and remove this assembly. The bottom half of your air box simply lifts off its retainers and comes right out of the truck.
Remove two 10 millimeter bolts, one behind the alternator, one behind the oil cap with a 10 millimeter socket, ratchet, and extension. Lift up on the air box so you can access the intake air temp sensor at the front, push down on the connector, remove it from the IAT, and remove the air box from the vehicle.
On the passenger side of the fuel rail, remove the cap on the pressure release valve. Using a thick rat or paper towel, place that below the valve to catch any excess fuel that comes out. Using a small pick, press down on the tab in the center of the valve. Now that we know all the fuel pressure has been released from the system, we can begin to remove the rail and our injectors.
Using an 8 millimeter socket and ratchet, remove these two screws. These are the same on the driver’s side, if the injector you are replacing is over there. Before removing your injectors, you'll notice we have a lot of dirt and debris on the top of the manifold. Once the injectors are out, we risk having that fall into the motor. If you have access to compressed air, it's nice to be able to blow this out. Otherwise, you can use some cleaner and a paper towel or rag to remove anything that may fall into the injector holes.
Using a small flat blade screwdriver, pry up on the red safety tab for the injector, you intend to remove. Push down and remove the connector from the injector. Lift up on the fuel rail, you want to try to do this evenly and pop out one side of the rail at a time. You may have to work it a little bit to get the injectors to come out.
On the back side of the injector, use a small flat blade screwdriver to pop out the retaining clip of the injector. Try to keep a hand on these or at least a good eye on them because when they come off they do tend to go flying, and that's not something you want to lose. With the fuel rail pulled up and the clip off your injector, pull down and work the injector out of the fuel rail. It may leak a little bit of fuel when you remove the injector but that's all right.
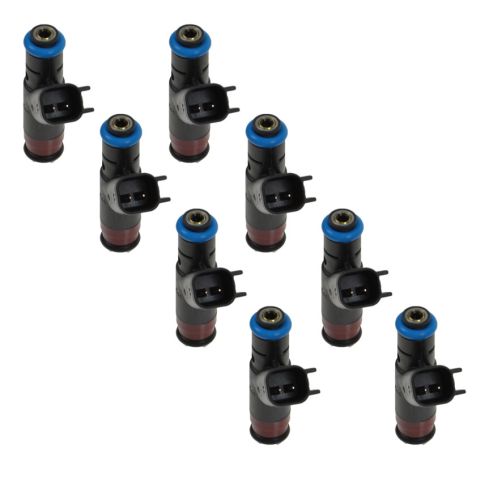
Here we have all the old injector from the vehicle and the new injector from 1AAuto. As you can see, they're the exact same injector, same size, same sprayer nozzle, same O-ring seal both to the fuel rail and into the intake manifold, as well as the same electrical connector.
Reinstall the fuel injector into the fuel rail. You may want to use a little bit of clean fuel from the rail to lubricate the gasket. Reinstall the metal clip from the back side. Check for debris at the other injectors. Press the rail back into the manifold. You can use some clean fuel as a lubricant to help reinstall the lower gasket on the injectors.
Reconnect the injector, push down on the red tab, reinstall your two 8 millimeter bolts. Screw the cap back on to your Schrader valve. This process is for the injectors, while we did the front passenger side, is gonna be the same for any injector on either side of the rail on these motors.
Reinstall the end of the airbox with the silicone gasket over the end of your throttle body. Tighten up the bolt behind the oil fill cap and behind the alternator with a 10 millimeter socket and ratchet and an extension. Reconnect the intake air-temp sensor, drop the lower air filter housing back onto its mounting locations. Be sure the air filter is fully seated in the housing, re-install the intake tube onto the airbox and the PCV breather hose. Lock the lid of the airbox back onto it's hinge, close it, lock it back down, and tighten the intake tube clamp with a flat blade screwdriver.
Bring the latch on the connector back down, reinstall the red safety tab, reinstall your fuel cap, reinstall your negative battery terminal, and tighten it back with a 10 millimeter socket.
Since we released all the pressure and fuel from the fuel system and the fuel rail, we'll have to prime our fuel system. We do this by inserting the key, turning the key to the on position for 3 seconds, turning it off, and repeating that process three times before starting. It may be a little hard to start at first because of the fuel and the cleaning agents that made it into the motor. It may rev high or run rich, but it'll all smooth out in a few seconds. There's our high idle, and, after a few seconds of running, the idle evens out and drops down to normal levels.
Thanks for tuning in. We hope this video helped you out. Next time you need parts for your car, please visit 1AAuto.com. Also check out our other helpful how-to and diagnosis videos.