Hi, I'm Mike from 1AAuto. We've been selling auto parts for over 30 years! We're dedicated to delivering quality auto parts, expert customer service, and fast and free shipping, all backed by our 100% satisfaction guarantee. So visit us at 1AAuto.com, your trusted source for quality auto parts.
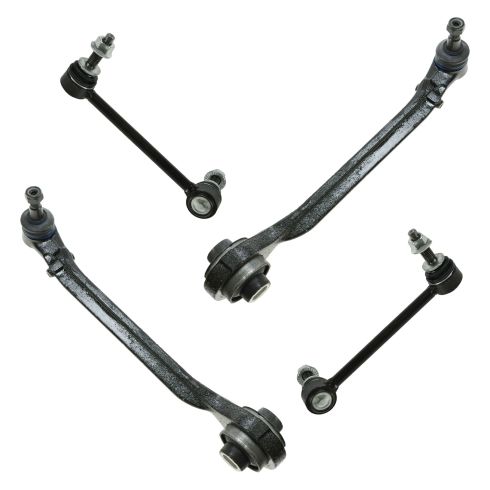
In this video, we're going to be working with our 2006 Chrysler 300. We're going to show you how to remove and replace your vehicle's front lower control arm. This is the one in the front of your spindle with the ball joint installed in the actual arm, and not the one that connects to the spindle and the strut.
If you like this video, please click subscribe. We have a ton more information on this and many other vehicles. If you need this part for your car, you can follow the link down in the description over to 1AAuto.com.
Here are the items you'll need for this repair: full metric socket set, ratchet, socket extensions, 21mm wrench, 22mm wrench, breaker bar, torque wrench, 6mm Allen key, hammer, safety goggles, gloves, rust penetrant, jack and jack stands
Using a 21mm socket and a breaker bar, loosen all of your lug nuts about one turn. Raise and support your vehicle. We're using a lift to make it easier to show you what's going on, but this job can easily be done at home with a jack and jack stand. Remove your lug nuts the rest of the way by hand. Remove your wheel and tire.
After removing your wheel and tire, locate the bolt for the forward lower control arm on the sub-frame to remove this. We use an 18mm socket breaker bar, as well as an open ended 21mm wrench on the nut at the back. Make sure that's on there good and tight, because you have much fewer points of contact with a wrench. You don't want to risk stripping it. Once you get it loose, you should be able to switch over to a socket and ratchet. Finish removing the nut and bolt by hand. Be sure not to lose these large washers that are on either side of the sub-frame.
We'll place those somewhere safe while we finish removing our forward lower control arm. Remove the 22mm nut on the bottom of your ball joint with a socket and a breaker bar. Now, what we're going to do here is loosen that nut so it's flush with the end of our bolt.
Now, we'll hit the end of the stud and the nut with a hammer until it releases from the spindle. Be careful not to damage the backing plate in the process. Be sure to use safety goggles during this step. Using the 6mm Allen key to hold the stud on the ball joints steady, remove the nut. This step should only be necessary if in hitting the nut you get it wedged onto the stud, so be sure to check the condition of the threads once you finish removing the nut. You may have to swing the spindle away some in order to get that ball joint out. You may need to use a pry bar to help work the control arm out of the sub-frame if it's really wedged in there like ours is. Remove the control arm from the vehicle.
Here we have our old control arm, which we removed from our vehicle, and our new part from 1AAuto.com. As you can see, this new part is a complete assembly, which comes with a nice new boot. You can see how beat up this old one is. Has a new nut for the end of our ball joint. You can see, this is actually a really good example of some reasons you might replace this arm.
Here we can see how bad the ball joint on the end is, while our new one has no up and down play in it. You can see that our bushing is tearing through pretty bad over here. Now, there is evidence that this vehicle was lowered substantially, meaning that the suspension took much more abuse than it would at its factory ride height, so this new part from 1AAuto is going to get our vehicle riding back the way it should, like it did when it was new without the clunks and bangs and the poor feel of suspension and handling from this torn bushing and bad ball joint. It's going to go in direct fit, just like our original equipment, and fix this up right.
Reinstall the lower control arm. We'll have to start on the spindle end. Turning the wheel could help give us a little bit of the extra clearance we're going to need. Remember, without both lower control arms, you are able to move the hub a little bit. We'll line up the rear and reinstall our bolt hand-tight to start. The bolt will go through from the front. Now, ours was being pretty difficult going in, so I ended up using the 18mm socket and ratchet to help spin it into place. Make sure that there's no substantial weight on the control arm when doing this. Otherwise, you risk damaging your threads.
Now, we'll support the nut with our 21mm wrench. We're just going to get this down close, but not tight until the weight of our suspension is on the vehicle. Otherwise, we risk pre-loading the bushing and cause premature wear to our new part. Now set the ball joint end into its hole in the control arm. You may have to move the stud in the ball socket or turn the spindle one way or the other or pull it in and out to line everything properly. Start your new nut on the end of the threads.
Now, you'll notice I'm pushing down on the ball joint to set the taper into the spindle. This should help prevent the stud from rotating. If not, we'll have to use that 6mm Allen key to hold the stud in place while we tighten the nut with a 22mm open-ended wrench. Torque the ball joint to 50 foot-pounds and add 90 degrees to it.
Now, we're going to use a screw jack, but you can easily do this by reinstalling your wheel and tire and just letting your vehicle off the jack, or you can use a jack to push up on this lower control arm. Now we're going to put the weight of the vehicle back on to the suspension by lifting up on it, just until it comes off of your jack stands or in our case the lift. We'll torque our lower control arm bolt at the cradle to 130 foot-pounds. Remove your jack or a screw jack.
If you didn't use the weight of the vehicle on the tires in order to reinstall it, we'll reinstall your wheel and tire now. Get your 21 mm lug nuts as tight as you can by hand. Lower the partial weight of your vehicle back onto the tires. Torque your lug nuts to 110 foot pounds in a cross pattern.
Thanks for watching. Visit us at 1AAuto.com for quality auto parts, fast and free shipping, and the best customer service in the industry.