Brought to you by 1AAuto.com. Your source for quality replacement parts and the best service on the Internet.
Hi, I'm Don from 1A Auto. I hope this how-to video helps you out. The next time you need a part for your vehicle, think of 1AAuto.com. Thanks.
In this video we're going to show you how to replace fuel injectors on this 2004 Chrysler Sebring and it has the 2.7 Liter V6. We're going to show you one of the injectors, but once you get as far as we get, you'll be able to replace the rest of them. Pretty much the same for any 2.7 Liter. You'll need new fuel injectors from 1AAuto.com, 10-13mm sockets with ratchet and extension, flat blade screwdriver, a torque wrench that registers inch pounds, and some Loc-Tite liquid.
With the engine running, go into your fuse block under the hood, pull out your fuel pump relay. This will stop the engine and release the pressure in the fuel system. Start out using a 10mm socket and ratchet or a wrench and remove the cover that's right next to the throttle intake. Below that you'll see a 10mm bolt and then all seven of the other 10 mm bolts that hold the upper intake manifold down. Disconnect your manifold pressure sensor, just by pushing on a tab and pulling, and then I'm going to fast-forward here as we remove those eight 10mm bolts. You basically back them out. The only one that you pull out is the last one that was underneath that cover. Next you're going to remove your air box. Loosen that clamp.
There is also usually another bolt down where his forearm is that holds the air box to the frame. You can see, remove the sensor, the hose, and then pull the air box up and out. Underneath there is a 13mm bolt that goes through a brace into the throttle body and we'll remove that. Now, pull off the gasket on top of the cowl just a little bit and you can pull your intake manifold up. The fuel rails are held down by four of the 10mm bolts that hold the intake manifold in, so we'll want to remove those four 10mm bolts. We'll just fast-forward as you remove those four bolts and you can see it helps to have a helper just hold that upper intake manifold up as you're working. Now, you'll want to pull the injectors up and out. You can see, we just grab firmly onto the rail. Both parts of it pull up and out and then grab firmly on the other side. Pull it up and out. Just to keep from getting anything down into the intake, we stuff a rag in there to block the holes. This disconnects by pressing down on a tab.
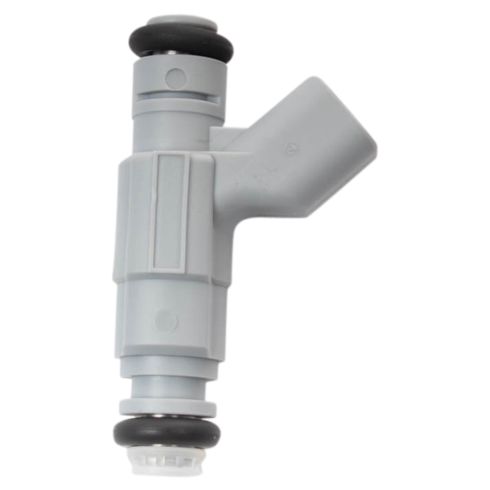
You have to pull the clip up and out. They usually pull a little more difficult, but carefully pull them up and then pull the connector off. Then there is a clip that holds the injector on. You simply pull it apart, kind of pull the two legs apart, and pull it off and then pull the injector down and off. The injector is from 1AAuto. You can see, exactly the same. They are going to install, plug in, all the same. So, we'll reinstall. We're just going to show you the one injector. The other five replace the same way. Just remember the clock position, which way the electrical connection was facing. Put the injector in the same way. You'll have to push it up into the rail while you push that clip on. Be sure to reconnect the connectors firmly and push the lock into place and then once you've replaced all your injectors, if that's what you need to do, push the rail back down into place.
Apply some Loc-Tite and put the four manifold bolts back into place. Now, you'll want to tighten those four bolts up. You want to do the middle two first, just watch the order that we do them in here, and you tighten those to 105 inch pounds. Now, pull that cowl gasket out of the way again and lower your intake manifold down into place. Push it down on once it's lined up. Just like before, we'll fast-forward here as we put the bolts down in and start them in. You'll want to use the same order to tighten them up. You start with the middle two and work your way out as you torque them. Again, we'll torque these to 105 inch pounds.
Reconnect your air pressure sensor. We're going to reinstall that 13mm bolt that holds the bracket to the throttle body and tighten that up to about 15 foot pounds. Put the cover back on top and tighten down that 10mm bolt until it's firm. Then we'll reinstall our air box and tighten up the clamp that holds the intake hose to the throttle body. Reconnect the hose and reconnect any of the sensors you might have disconnected. Don't forget to reinstall your fuel pump relay or else your car will not start.
We hope this helps you out. Brought to you by www.1AAuto.com. Your source for quality replacement parts and the best service on the Internet. Please feel free to call us toll-free 888-844-3393. We're the company that's here for you on the Internet and in person.