Brought to you by 1AAuto.com- your source for quality replacement parts and the best service on the Internet. Hi. I'm Mike from 1AAuto. I hope this how to video helps you out and next time you need parts for your vehicle, think of 1AAuto.com. Thanks.
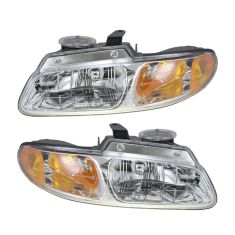
In this video, we're going to show you how to service the headlights on this 1998 Dodge Caravan; same for any '96 to '99 Caravan or Voyageur. We do show you how to just replace the bulbs if that's all you need to do, as well as if you need to replace a clouded, broken or yellowed headlight with a nice new headlight from 1AAuto. We go over that whole procedure as well.
Tools you'll need: if you're just looking to replace a headlight, the passenger side headlight will only require the flat blade screw driver and the driver's side, you will need 10mm socket and ratchet or wrench to get some stuff out of the way. You also need an 8mm socket and ratchet or wrench to get the washer bottle out of the way on the passenger side if you're replacing the entire assembly.
If you're just looking to service the bulb, open up the hood. Here's the back of the headlight on the passenger side. Use a flat blade screw driver. Put it right in here so you can pry on the back of the connector and then also pull on the bottom of the connector. Then, your connector unplugs and then there's a ring here. Twist the ring, it comes out, and then your bulb ... You'll work it up and down a bit ... Comes right out. Put it back in. Make sure this tab here is on top. Make sure you work it back into the socket. It has an O ring on it. Put your retainer ring back on. Push it on and turn it to lock it. Then, reconnect your connector.
If you're just looking to access the bulb for this side marker parking light, in your wheel well, there's usually a plug on each side, you push it toward the front, turn it counter clock wise, pull it out, and then you can see right up in there is the plug. Reach up in. You have to turn it counter clockwise. Pull it out and then you can just pull the bulb out and then put it back in. You have to do it by feel. Put the plug back in.
If you want to remove and replace the headlight because it's broken, dull, or faded, there's going to be five fasteners. A 10mm bulb on top, three 10mm nuts on the backside on the back of the headlight. To get to those two that are in that washer bottle, there's an 8mm bolt that hold the washer bottle right there. We'll speed it up here as I use an 8mm socket with a ratchet and extension to remove that bolt that holds the radiator fluid bottle and move it out of the way a little bit. Now, I'm working a little faster. I use a ratchet and socket, 10mm, and get two of the nuts on the backside off. Then, remove the bolt that's on the top of the headlight. Now, I switch to a 10mm wrench to get in between that radiator bottle and get that last bolt off or that last nut. Once you loosen these nuts, you can usually just reach in with your hand and take them off by hand once they're loose.
Pull the light right out. Thread this one counter clockwise. Pull it out. If you want to replace this bulb, just pull it out and it pushes right back in. Then, disconnect your ... Disconnect your headlight, just reach in there with your fingers and the light comes out. You need to get this light socket off; you probably need a screw driver here. They're just little tabs. Push in on them. Pull the harness out. Push in on the other side. Pull it out. This is the new light from 1AAuto. If you've broken your assembly or whatever or if it's gotten cloudy and faded, it's going to go right in and mount just like the original. I'm just going to pull the plastic off a little bit here. Connect your bulb. Connect the headlight. There's a little pin, goes into the fender back there. Then, that lines up. Make sure everything else lines up.
Fast forward here again. I start the bolt on top and then I start all three of the nuts by hand. Tighten those nuts on the backside as much by hand as you can. Then, use your wrench to make everything tight. You don't want to ... You don't need to over tighten them, but make then nice and firm. Once you have the light installed, you'll need a 4mm socket. One adjuster's right here. Turn this counter clockwise and then you can see the little leveling ball there. As you turn it counter clockwise, it starts to aim the light up, which centers that ball between the lines. Then, there's another 4mm adjuster right here and that adjusts it left and right.
Something I forgot to say: your vehicle needs to be on a flat surface. I have it in a garage. Garage floor is usually nice and flat so you can make sure that leveling ball is indicating correctly. We'll speed it up here again as we put that radiator bottle back in place. Put the 8mm bolt back in and tighten it up.
Next, I'm going to show you how to access the driver's side headlight. I'm not going to do the whole procedure, but I am going to show you how to move that fuse block out of the way so that you can access it. You do need to remove the negative battery cable first. The driver's side's the same. You will want to move the relay box. That just involves removing two 10mm bolts. There's one there, and one there. Once you remove those, you push the box foreword and bring them back up and out and move it out of you way just like the radiator bottle on the passenger side.
We hope this helps you out. Brought to you by www.1AAuto.com- your source for quality replacement parts and the best service on the Internet. Please feel free to call us toll free 888-844-3393. We're the company that's here for you on the Internet and in person.