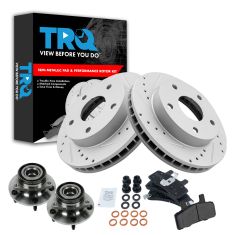
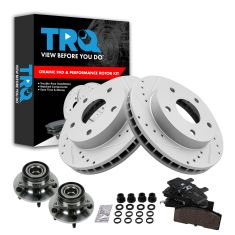
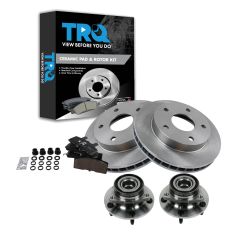
Hey friends it's Len here at 1AAuto. Today we're going to be working on our 1996 Dodge Ram 1500. This is a four wheel drive and we're going to be doing a front wheel bearing. It can be super easy, I can do it and you can do it too. As always, if you need this or any other part you can check us out at 1AAuto.com. Thanks. So friends, something to remember here at 1AAuto we do a lot of videos on a lot of different cars with a ton of 1AAuto parts. We have so many parts for almost every vehicle you wouldn't even believe it.
With these videos what you might notice is in between doing the job that you might be happening to watch right now you might see all of a sudden this new part just gets somehow installed in there. Well that's because we cut away, we do another job, we cut back in, and basically when we're showing you the steps in your video that you're watching we're just showing you the steps on how to do your particular part. There's going to be a lot of other things that are going on and if you happen to see something that maybe strikes your interest, it's brand new brakes, or brand new ball joints, or brand new tire rods, or whatever the case may be, if you happen to see it in your video that you're watching maybe you want to check that out in our playlist. Just click right on it, 1AAuto, boom. There you go. With that said let's get to work.
Okay, so now we've got it up in the air. If you're going to be using an air gun obviously you didn't have to probably break all the lug nuts free. I'm going to remove all five of these lug nuts. All right, move this out of here. Okay. So what we're going to do first now that we've got the wheel off is we're just going to push back this caliper piston just a little bit just so when we try to take off this caliper it'll come off nice and easy. The simple way to do that is you can take your small pry bar and just come right in between here. Just give this a little push just like that. That gave us plenty of room. Perfect.
So next we're going to take out the caliper sliders. To do that you're going to use a 10 millimeter Allen head. If they're rusted just put it in there, give it a few taps. Hopefully we'll be able to get this out. Oh yeah, got it. Something this old, this things a 96. So, if this has never been replaced I'm sure it's been out a couple times at this point and it just gets worn, stripped sometimes. I'm just going to get it completely out of here, show you what it looks like. Yeah, so there it is. This is the slider and this is the bolt that goes through it. Let's see if I can get this. There we are. There's the threaded end and that goes down and screws into the bracket. Let's get this off of here. There we are, it's the second one. Set that aside.
I'm going to get this caliper off of here now. Sometimes you might need a pry bar, we'll see. I'm just giving it a little wiggle. All right, it came off easy peasy. So here's your caliper. All right. So now we'll grab the rotor. Take that right off of here. Okay. So now we need to get this axle nut off. To do that you need to take out this cotter pin. That just locks this nut from spinning. If you have access to new cotter pins you can go ahead and cut this one right off. If you don't and you want to reuse it just do it carefully and try not to bend it around too much. I do have access to a new one so I'll be replacing it but that's pretty much what it's going to look like. We'll set this aside and we're going to take off this nut.
So let's get this bearing sprayed down again, right up in here and along the outer portion right there, right there. Awesome. We're going to grab our inch and three quarter and we're going to remove this axle nut. Okay. So we have our inch and three quarters and go right on here and remove it. If you're using an air gun make sure you're wearing hand protection and eye protection. If you're going to be using a ratchet you need to get this down on the ground. You're going to take a bar or whatever you've got and try to make sure that this can't spin while you try to remove the axle nut. I'll hold the axle studs. Here we go. Awesome.
Get our washer off of here. Now we need to make sure the axle moves inside the bearing. We'll just give it a push. This one actually moves fairly easily. Surprise, surprise. If it didn't you would take a center punch, go right in the center, give it a couple of loving bonks with your hammer. You never want to hit directly on the axle. The reason for that is because if you paint over any of these threads it's going to be real hard to go ahead and reinstall the nut.
So, now what we're going to do, we're going to take off this cotter pin and this nut. We're going to give the knuckle a couple of loving bonks right along here. That's going to let this drop down. You're going to want to be careful because there really isn't going to be anything holding it up. Okay. So, I'll show you what we'll do to help prevent any risk to safety, or injuries, or anything like that. So, the reason why we're doing that though to continue the explanation that way there we'll be able to turn the knuckle side to side freely and we can get to the bolts that are from the backside there. If we can turn them freely then we'll have a much better chance of getting them out. If you have new cotter pins you don't have to worry about ruining it. If you're going to be reusing it then obviously try to save it. Watch your eyes, this is going to come flying.
Take that out of there, 21 okay. You got it off. It's just a plain old castle nut. You'll notice there's a slot inside the tire rod or a hole in this tire rod. That's going to line up with one of the slots on the castle nut when we're done. I'm going to take this castle nut, I'm going to put it on just a couple of threads. Now when I give this a bonk and it wants to drop down it's not going to go very far. It's not going to be able to hurt me which is very important to me. I don't want to be hurt.
All right. It's time to give this a couple bonks. We want to be careful not to hit the boot or the tire rod. We also want to be careful not to hit up here and bend over the stud for our tire rod. So just try to hit directly on the knuckle right where my finger is ready bonk. Just kidding. Here we go. Grab. You can use whatever you've got laying around to hold this up. You can use a strap of some sort, or a bungee cord, or whatever you want. I'm just going to use this because I have it right here. That holds it on there nice. If you're worried about losing your nut, put it right on there. Now look what we can do. You've got all the room in the world to get this done.
So I'm going to use a 12-point 9/16 socket. Go right on here. I've got my ratchet. You can also use an air gun if you want. You do you booboo. Show you what this looks like, that's our bolt. If yours is rotted along the threaded area or damaged in any way it's probably a great idea to go ahead and replace this. If you were going to replace one them just do them all right. There's three of them on each wheel bearing. If you're doing both wheel bearings you need six. If you're doing one wheel bearing you need three. This looks as though it's reusable. I would just clean it up and personally I would use a little bit of thread locker but we'll say that that's your prerogative you can do what you want.
We'll set that aside and you can do the same to the other two. There we are. Oh, this one's a little nastier. I would say we're going to clean this up and make sure the threads are good before we continue too much further. All right, so we got that bolt cleaned up. As you can tell it looks really good. I know what you're thinking, that's new bolt Len. No it's not. I'm just that good at cleaning things up.
So I'm going to use one of these bolts. I'm just going to start it in there, put a few good threads maybe five or six turns around here but still leave a gap. Okay. You want to make sure you have a good amount of threads in there because we're going to use something like this now. You can get yourself an air chisel right at 1Auto.com. Get yourself an adapter that holds your socket. Eye protection. Here we go. So that's working really great. We've got a nice gap going on here. Perfect. I'm going to give this a little spin and do the same over here. I'm going to grab one of my bolts. I'm going to try pushing it through from this side. That's working. There we are. So we just need to get this to come out. This is though we're starting to get a pretty good gap up here so I'm going to try to wedge something in there, maybe one of my hammer bull pry bars, see if I can wedge it in and get this out, and then we can continue.
I'm just going to put a little bit of penetrant in here, let it do its job while we do ours. We're going to take out our bolts that we just installed to help drive this through and then we should be able to get the rest of this out just using some pry bars. Get that out of there. Come over to the side that looks like it's coming out the least. It feels like it's getting pretty close. We'll continue doing what we're doing. The backing plate's not in the best condition. There's the bearing, there's our left front bearing. Easy peasy.
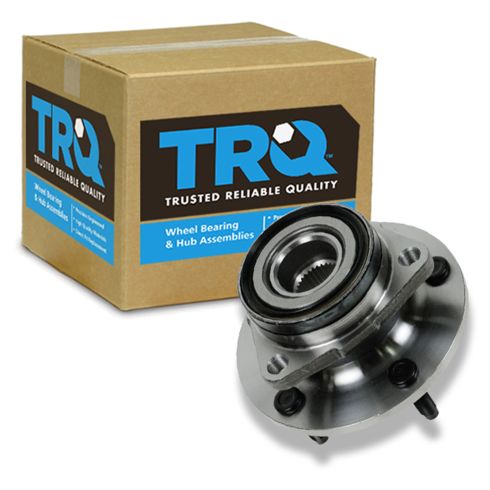
So here we are friends a quick product comparison for you. Right here we have our front wheel bearing out of our 1996 Dodge Ram 1500. Over here we have our brand new quality 1AAuto part. You'll notice you have the same five lugs or studs. You've got the hole for where your axle comes through. We'll flip them over real quick. You've got your mounting holes up along here. All right, three mounting holes. The area where your axle goes through. Your bearing's got a nice seal on there. It's beautiful. The old one well not so much actually. It should have a seal there. Anyway, it's old. We're getting rid of it. One last thing, just make sure that the diameter is the same for where the hub contacts the rotor. It looks perfect. With That said I don't see any reason why this wouldn't be a quality part to install onto the vehicle so I'm going to go ahead and do it. As always if you need this or any other part check us out at 1AAuto.com. Thanks.
So, we're just going to clean up this area of the knuckle where the backing plate and the wheel bearing are going to ride. Try to have a nice smooth surface there. Safety glasses, hand protection, and this tool right here is available at 1AAuto.com. That looks pretty great. Just clean it all down a little bit here. If you want to you can use a little bit parts cleaner. This looks fairly decent. We're going to use a little bit of Copper Never Seize right along in here and on these splines.
The reason for getting it on these splines is so that when this axle slides into the wheel bearing it will be able to move around a little bit. And then of course if there ever comes a day where I need to take it back apart for some reason it'll come off nice and easy. Same reason for in here. Okay. It's going to help keep things from seizing up and getting rusted and rotted together. Does it have to be perfect? No, it doesn't have to be perfect. Or maybe for you it does. I don't know. Me personally as long as it's pretty good. I even take my gloved finger and make sure it goes all the way around this. I'm going to go right up along here because well why not? There we go. Cool.
All right, let's grab our backing plate and move along. So, our backing plates in pretty poor condition you could of course try to get yourself a new one if you'd like or if for some reason you didn't want to replace it you could just try to clean it up and try to make the best meeting surface as possible on both sides. For the purpose of this video it's just an instructional video so I'm going to just clean it up real quick. We'll make it so it looks fairly decent and we'll move along.
Okay, so like we said before the backing plates in really poor condition. Theoretically it might be a really great idea to just get yourself a new one. Like I said before though also the purpose of this video is just an instructional video to show you how to install stuff so I'm just going to trim this part off. It doesn't do anything. There we are. This can still go here. We're going to put the bearing up on there. It's going to hold hard up against here, here, and here and the backing plate won't be able to move around. I think we should be all set with it like that.
Let's grab the bearing and we'll move along. We've got our three bolts. You can use a little bit of thread locker if you'd like. We'll call it your prerogative. Turn this. I'm just going to start these in here. There we are. Cool. Grab our backing plate and our bearing. Just going to go right up on here, push that bolt through to hold it for me, that one as well. Why not? Okay.
The bearing itself, it's all the same all the way around so there really isn't anything to go on to putting this on. You don't have to be like, "Oh there's the abs wire," or anything really pretty basic. Get it up on here. I'm just going to slide it up towards the vehicle the axle's sliding through the holes right here. Bring it in. Keep on pushing. Very nice. Start in these bolts real quick and then we'll bottom them out and we'll torque them down to manufacturer's specifications. So we're just going to bottom out these bolts real quick. So we're going to torque down with our 9/16 12-point to 125 foot pounds. There it is. All three of those are torqued so our bearing is nice and torqued onto the knuckle. We can continue.
So let's grab our tire rod end here and get the nut off of there, put it aside because we're going to be using it in one second. Just grab this. There we go. Put it up in there. Start that on there, there we are. We're just going to bottom this out and then we'll torque it down. We're going to go with 65 foot pounds. Let's double check and make sure that our castle slot is lined up with the hole in the stud which it is. If it was not you would not want to loosen it to get it to the next slot you would want to tighten it. Just go a little bit tighter until it lines up perfectly and you can get the cotter pin through.
Take our Cotter pin, just put it right through. This one, bend it up, just peen it over. Some people like to go to the side or the side they do all sorts of special designs. I'm not that type. As long as it's curled over and it can't come out that's going to hold this nice and tight and it's good to go. So we've got our bar here. We're just going to go right inside the axle in between where the U joint goes. Just try to get it up and in there so that that way there when we turn our wheel bearing it can't turn very far. Once you have it in there, you can grab your, what is that a inch and three quarters, and we're going to snug this up and then we'll torque it down.
So we've got our washer and our castle nut, put that up on there. You can see right here is where the cotter pin is going to go. There's the little hole. So once we get this on we're going to snug it then we're going to torque it, and hopefully we're going to be able to get the cotter pin to be able to line up with one of these slots in that axle hole. Just torque it. We're going to go 175 foot pounds. Looks like it lines up pretty well. Let's grab a cotter pin and we'll put it in. There we are, our cotter pins almost all the way in there.
Just going to grab this side, pull one out. There we go. Awesome. Just take both these ends and peen them over. There is no way that this cotter pin is going to be able to work its way out and also no way this nut will be able to loosen up on its own. Get our bar out of here and we can move along. We're going to use a little bit of Copper Never Seize. That's just right on the mating surface where the rotor is going to sit. We'll grab our rotor, put the rotor up on here just like that. Awesome. I'm just going to do something to make it so the rotor can't move around. I just have a spare nut laying around. I'm going to take my lug nut, slide it right like that. That just keeps the rotor from flopping around and any potential rust from falling down in between here and the the hub behind there.
Let's get our caliper down here. You want to make sure that your hose doesn't have any twists meaning you lifted it up and you brought it around and you did all sorts of things. Now you're looking at it and it's a big old curlicue. That's obviously not going to be very functional. It's going to take up a lot of the slack that we need to be able to turn the vehicle. So we're just going to take it like that. We've got a nice little rainbow here. Take our caliper sliders and push them in as far as we can.
This one, it's pretty close. It looks like it's almost ready to side on there. Oh yeah. There we are. A 10 millimeter Allen head, the same thing we used to remove these. I'm just going to wiggle it around until I feel like it starts to grab into the hole. Yep that's going in. So I'm just going to leave it just like that for now. We'll tighten it up in a minute. Now we're going to do this one, do the same thing, wiggle it around till it starts feeling like it's going in. Yep. It's definitely going in. Its bottomed out, come back down here. Let's bottom this one out. Okay. Grab our torque wrench. We're going to torque these down to 38 foot pounds. Here we are tight, tight. Just get this back off of here.
We're going to grab our wheel. We'll get it up on here, bottom it out, and then we'll torque it down. Okay, friends, so here we go. It's time to get the wheel up onto there. To do that you never want to try to bend over like this, grab your wheel and lift with your back. You're going to potentially hurt yourself and 1AAuto we do not want you to hurt yourself. I'll show you something fairly simple. Bring your leg right up to it, grab onto it, roll it right up your leg just like this, and then lift with your legs/AB muscles. That one up there easy peasy. We're going to grab our lug nuts, start them on there.
So now we're going to take our 19 millimeter socket and we're going to snug up these lug nuts in a star pattern. The reason for going in a star is so that if we tighten it up and it kinks off to the side like this we might think we have it all fully tightened, and we might even torque it down, and the torque wrench says it is. Once you hit a bump, bonk, bonk, this thing's free as a goose. So, just go like this. By going in a star pattern it starts one side in, you do the other side, it kind of sucks it right down. And then it would be sitting nice and level for time to torque it down.
Okay friends so it's time to torque up our lug nuts. We're going to go ahead and use our 19 millimeter socket and we're going to torque these down to 125 foot pounds. If you want to go around one more time why not? It doesn't cost you anything. A small price to pay for safety. Torqued, down the road we go.
Thanks for watching. Visit 1AAuto.com for quality auto parts shipped to your door, the place for DIY auto repair. And if you enjoyed this video please click the subscribe button.
