Hey friends. It's Len here at 1A Auto. Today I'm working on a 2001 Ford focus and I want to show you how to do a thermostat housing. It's going to be a very easy job and I want to be the guy that shows you how to do it. If you need this or any other part, you can always check us out at 1aauto.com, thanks.
Okay, so we're underneath the vehicle. We've got our hand protection and our eye protection, of course, safety first. We're going to remove the lower hose from the radiator. You do that by grabbing some pliers or a hose clamp tool, whatever you have. Just squeeze it like this. It's spring steel. I bring it over towards the other end of the hose over here, out of the way. It can relieve tension. Okay. You want to make sure you have a collection receptacle under here so you can recycle your coolant. Don't let it pour onto the ground.
I like to just grab the hose, see if I can give it a little twist to break it free from the radiator. If you notice that yours doesn't want to break free for some ... This one just did, but if it doesn't want to break free for some reason, you could try to come in from like the front or whatever. Try to get in between the hose and the radiator with something. Maybe a pick if you're careful and you don't poke your hose of course. Or you can use a small screwdriver, put a little bit of penetrant in there. It'll go a long way. But this seems like it's working, so I'm just going to keep doing this. I'm going to tug on the radiator hose. Just let that drain out. Once it's completely drained, we'll move ahead.
Now that we've got the coolant drained, we're just going to come up here. I'm going to take off this electrical connector for the coil just to give us a little bit of space. Let's see if I can grab it. I'll show you what the clamp looks like on that. It's kind of like this little, it's almost like a paper clip type style clip. And what you do is you grab it, you push up on it, and then you just pull out on the wiring. So there it is. What I did is I came with my pocket screwdriver, I went like this and I pushed up on it. It released. I pulled it out. Okay, so there you go. We're going to set this aside so we don't get any coolant in it.
Pocket screwdriver, here's our hose clamp for up here. Just a little squeezy. Okay. Grab some pliers, squeeze it, pull it up like that. If it feels as though the clamp lost all its tension because maybe it's old, you can go ahead and replace that. I'm going to leave that up to your discretion of whether or not you believe you should do it. I'm just going to give this hose a little wiggle. Try to break it free. It's been on there for a long time. There we are. Take a peak at our hose. Give it a little squeeze. If it looks like it's dry, rotted and cracked, you'd probably want to replace it at that point. Okay. This is your overflow. Comes like this. It goes up into here. So if this is cracked and or leaking, it's going to become an issue. We'll set this aside. Right down here, there's a clamp, okay. You can use a flathead screwdriver, something a little bigger than this obviously if you wanted to, or you can use the socket for it. I'm going to use a socket. I'm going to grab that. I'll be right back.
Okay. I grabbed my eight millimeter with an extension and a ratchet, of course. I'm going to Loosen this right up. I don't want to make it so loose to the point that it comes apart. These clamps are kind of hard to get back together. I mean, they're not completely difficult, but you don't necessarily have to take it completely off either. So we've got that. It's nice and loose. The hose can move around. I'm just going to grab it, try to pull it off, up, down, up, down, left, right. Whatever you need to do. Take a peak at our hose. This looks pretty good. All right, set this aside. Okay. I'm going to grab my flathead screwdriver. Right down here there's another little clamp for the other hose. I'm just going to try to pop this off of here. Turning it to the left. You might need a little bit of penetrant spray. Never hurts to spray a little bit on there. Just going to get this loose. Like I said, I'm not going to take it completely apart. There we are. Grab my hose, just give it a little wiggle, there we are. Cool.
Just set this aside, there we are. Okay, so we've got all the front hoses off. All three. Now we're going to remove our 10, 10 and the 10 that's down there. After that, hopefully we'll be able to move this away, pull it towards the front a little bit far enough to be able to get to that rearward clamp. I've got my 10 millimeter. You can start with whichever bolt you want. Can either take them all the way out or break them all free, whatever you want to do, but they all need to come out. I went ahead and grabbed a ratchet with a long 10 millimeter or deep 10 millimeter. It seems like it gets in there a little easier than that ratchet wrench and you get just a teeny bit more throw, which is helpful.
Bottom one's ready to come out here. Nice and loose. Let's see if I can grab it. I'll show you what it looks like. Wow, so that's what it looks like. We'll be sure to clean that up before we go ahead and reinstall it of course. But that's the link. Set it up there. We'll take out the other two. Okay, both these bolts are pretty loose at this point. There we are. Nope. Yup. Whole thing fell down. Let's get these bolts out of here. Looks like they all look the same. Cool. Okay. At this point we can see that clamp pretty clearly with our other hose. That makes it nice and easy for us to get to. I'm just going to go ahead and try using my flathead screwdriver again. You can use a socket if you'd like. It's your prerogative. You do you booboo. Okay, gets nice and loose. I'm just to try to use my screwdriver here. See if I can break it free. I don't have the thermostat housing mounted anymore, so pulling the hose off of it can prove to be a little difficult.
What I'm going to do is I'm going to hold the hose and just pull the housing unit itself towards the front of the vehicle. Bring it up through here. Here we are. There's our thermostat housing.
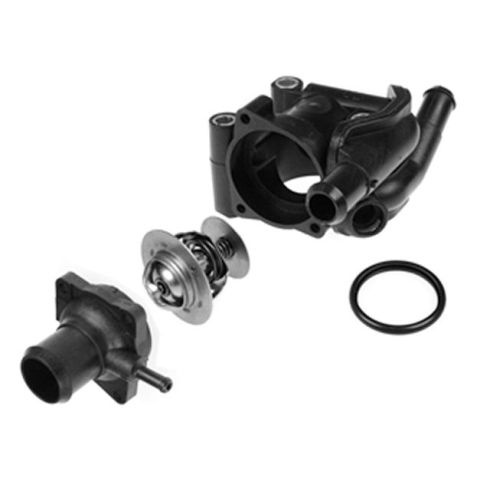
Here we are friends, a quick product comparison for you. Over here we have our 2001 Ford Focus thermostat with housing. Over here we have our brand new quality 1A Auto part. I just want to compare the two of them next to each other for you. Show you that they both have the same things. We've got our hose up here. This was a little upper hose we took off, forward upper hose, forward lower hose, and then the rearward hose. Comes with a brand new thermostat mounted inside already. You don't have to go ahead and touch any of these bolts to replace anything in there. Comes right with it. Perfect. We can turn it up. As you can tell, it looks exactly the same that way, this way, this way and this way. Every way it looks the exact same. With all that said, I don't see any reason why this wouldn't be a quality part to go ahead and install into the vehicle, so I'm going to do it. If you need this or any other part, you can always check us out at 1aauto.com. Thanks.
Okay, here we go. So we've got our new thermostat housing. Everything's ready to go on that. What we want to do now is we want to clean up the engine, all this nasty corrosion and all that crud that's on there. You can use something like a razor blade or if you happen to have a scraper that you want to use. Something nice and flat, you can even use a sanding block if you're really want to go, go ahead and do something like that. It's up to you. For me personally, the razor blade seems to work just fine, but once again, it's your prerogative. All you need to do is just make sure that it's as smooth as it can be so that the gasket makes a good seal.
Okay. So I cleaned that up the best I could. Next, what I want to do is I want to clean up these bolts. As you can tell, they're not the cleanest looking, they're not rotted or anything, so I'm pretty sure they're still saveable. We'll be able to tell once I clean them up. So I'm going to go ahead and do that and we'll move along.
Okay, so we've got our bolts, I cleaned them up. I know what you're thinking. They look like they're brand new, but they're not. They're just nice and clean. I'm just going to use a little bit of this. It's just Teflon tape. Like to put it down around the bottom area of the threads, just a couple of times around. We do the same thing to all three of them. Okay. Just going to use a little bit of silicone paste right around this. It's your prerogative if you want to or not. You don't have to. Just a teeny bit. Lubricate the surface there. Set this aside. We're going to bring this over. It goes like this. We're going to get that a rearward host started first. That way there I can still be moving this around. I'm just going to slide it down and in, then I'm going to get the rear wood hose on there, snug it right up, and then we'll get the mounting bolts in. Just carefully put this down in here. Bring it around. There we are. Grab my hose. Just going to try to slide it on there. Okay.
You want to make sure your hose is completely bottomed out against the nub there. It's super important to make sure it's fully on, obviously. Okay, I'm going to grab my flathead screwdriver again, I'm going to tighten up that clamp. Try to keep the clamp in the same channel it was in before. It's been there for a long time. It likes it there. This probably be a little easier with a socket.
I want to be careful not to over-tighten it. If it feels like it's tight and then it goes loose, all of a sudden, that means you stripped it out. At that point you'd want to replace it. Essentially just make sure it's tight and then we'll line this up to approximately where it needs to go. Grab our bolt. Just going to start this one in. Do the other top one. I just put on a little bit of Teflon tape on the ends. Get this one started. There we are. Get this bottom one started. Just going to bottom these out and we'll go ahead and torque them down. Okay, we're going to get our torque wrench in here with our 10 millimeter. Try to get it on the bolt. The EGR tube's kind of in the way, but should be able to do it. So as you can tell, 80 inch-pounds really isn't very much. Try to get that bottom one there. Hopefully. See if I can get my hand down in there at the same time. Okay.
Just like to try to give it just a couple of good torques just in case, in case I'm not getting a great reading. So there we go. We torqued all three of those bolts down, we got the rearward hose on, we're clear to continue to the front hoses. We've got our lower hose on the front there, slide it so it goes all the way on. We got our clamp, grab my flathead screwdriver, clamp back up. Set it back in its groove that it was in. Like I said before, they seem to like it where they came from. Put them right back. Okay, it feels like it's pretty snug. Just give it one little bit. Little tug. Okay, that hose is on. Grab our next hose. Put our clamp on. Bring it over right up on here. There we are.
Bring this up and around so I can see it. Got my eight millimeter. Just bring it around. There we are. Nice and snug. Get this hose, bring it around, slide it on there. Long nose pliers. Give them a squeeze, slide it down. Bring it back in its groove, so that's good. Got our hoses on there. Hoses, yeah. Those are torqued. Okay. Let's grab our electrical connector. Little squeezy tab goes down, goes right into your coil right here. Give it a nice little tug. Feels good. All right, now we'll just go ahead and close up the bottom where we drained it and then we'll come back up top. We'll fill it up and run it.
We've got our lower hose. Take off this little cap. This just protects the inside of the radiator from any debris that may get in there during shipping or handling or anything like that. We've got our little squeeze clamp. All I want to do is just squeeze the ears on that clamp, bring it in so it's up against the radiator again. It looks like it needs to move just a little bit. I'm just trying to line it up. Very nice.
Okay, so now it's time to fill the coolant. I like to use something like this. It's like a little vacuum. Essentially, I'm going to create vacuum inside the cooling system with this unit right here and then I'm going to draw in brand new coolant with it after I create vacuum. So I'll show you how this works. Hook up your hose. You have this and closed. We open this up now. Open this. Kind of build up pressure. Going to make its way all the way up into the green. You want it to be above the 25 and get it to the point where it's just kind of holding steady. All right, so it looks like we got pressure up above our 25 range there. Seems though the needle slowed down on the vacuum so it doesn't seem like it's increasing any more vacuum. Let's just close this off, close off the air. Now we'll just watch the needle. We'll give it a minute or so and see if it drops down any.
All right, get our air hose out of here. I've got the strainer end, put it right in here. This is going to fill up the coolant jug using the vacuum from the system itself that we just created. You want to pay attention to make sure that your coolant jug doesn't go empty. You don't want air getting up inside this, it will ruin the whole reason why we just created vacuum on this in the first place. So once the jug feels like it's starting to get a little low, just switch it out.
All right, Get this off of here. Okay, right now the coolant's a little full. That's okay. I'm going to get our funnel buddy. I'm going to put a funnel on there with some more coolant in it and I'm going to run this for a little while and I'm going to let it burp out any air that might be inside the system, and then once we do that, we'll get the coolant down to the level it's supposed to be at and we should be all set.
Okay, so I'm just going to use this funnel set right here, available at 1aauto.com. Inside there's pretty much every attachment that you're going to need or you could possibly need. You can do all sorts of different things with this. Almost like a Lego set really. So we'll just throw all this stuff over here. Okay, and grab that. There. This piece right here, it's going to screw on here. First we need to find the insert, the inner adapter. So we'll find one that looks like it fits in there good. That one's pretty close. Sits a little lower. Let me see if I can get one. Okay. I'm going to go with the black one. I'm just going to put it in there. Get this started. It feels like it's starting on kind of tough. It might be cross threaded. Just snug it up. Give the center piece a wiggle. Doesn't feel like it's moving around. We can go ahead and put this on there. We'll get all this stuff out of the way.
Just going to go ahead and put a little bit of coolant in here. We don't want to fill up the funnel. That right there should be more than enough. Basically what's going to happen is when the engine heats up, it's going to warm up the coolant, the coolant's going to expand. It's going to come up. Okay. If we get any air bubbles out of there, bloop bloop, they're going to come bubbling up. Coolant's going to fill that hole, work its way down in there. Okay, so we'll leave that right about there. We're going to start this up and run it for a little bit. Make sure we get out all our air bubbles, make sure that the temperature gauge doesn't fluctuate too much. It should pretty much stay pretty steady once it warms up and we should be all set.
I'm going to put the heat in the car. So the hot position with the blower motor on. Hot position, blower motor, you can set this to wherever you want. I wouldn't put it on defrost because then it's going to kick on and off your AC. Just going to turn this off real quick.
So we've got our little plunger, okay. The way this works is it's going to go straight down in that hole right there. It's going to plug up any excess fluid that's in there. What I like to do, the coolant's going to be hot right now. It's going to be super hot, so you want to be careful not to scald yourself, right. Take a nice rag, or whatever you might have, something that's going to cushion you between the heat of the hose and your hands. Give those a little squeeze and we'll just lift up on that. There we are. Now we're just going to replace the cap and we should be good to go.
Thanks for watching. Visit 1aauto.com, your place for DIY auto repairs, for great parts, great service, and more content.
