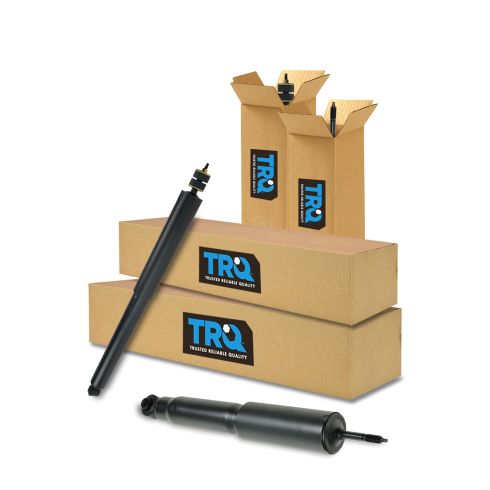
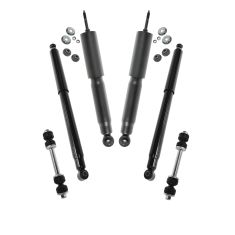
Kit Includes: (2) Rear Shock Absorbers (2) Front Shock Absorbers
Quantity: 4 Piece
Specification
Gross Vehicle Weight Rating
Under 7700LB GVW
Drivetrain
4 Wheel Drive
Location
Front & Rear
Our direct fit gas-charged strut assemblies help to restore your vehicle’s handling and ride quality to just like new.
Our direct fit gas-charged shock absorbers help restore your vehicle's handling and ride quality to just like new.
Item Condition:New
Attention California Customers:
WARNING: This product can expose you to chemicals including Chromium (Hexavalent Compounds), which is known to the State of California to cause cancer, and birth defects or other reproductive harm. For more information, go to www.P65Warnings.ca.gov
Lifetime Warranty
This item is backed by our limited lifetime warranty. In the event that this item should fail due to manufacturing defects during intended use, we will replace the part free of charge. This warranty covers the cost of the part only.
FREE Shipping is standard on orders shipped to the lower 48 States (Contiguous United States). Standard shipping charges apply to Hawaii and Alaska.
Shipping is not available to a P.O. Box, APO/FPO/DPO addresses, US Territories, or Canada for this item.
Expedited is available on checkout to the United States, excluding Alaska, Hawaii.
Final shipping costs are available at checkout.
How To Replace Front Shock Absorbers 1997-2003 Ford F150 4x4
Created on:
Tools used
Hammer
Torque Wrench
17mm Wrench
18mm Wrench
17mm Socket
Jack Stands
18mm Socket
19mm Socket
Ratchet
Floor Jack
1/2 Inch Breaker Bar
13mm Wrench
1. Removing the Wheel
Loosen the five 19mm lug nuts
Raise and support the vehicle
Remove the lug nuts
Slide the wheel off the hub
2. Removing the Shock
Hold the nut beneath the shock bushing with an 18mm wrench
Remove the 17mm nut from the top of the shock
Hold the lower shock bolt with a 13mm wrench
Remove the 18mm nut from the lower chock bolt
Remove the 13mm bolt from the shock
Compress the shock with a pry bar
Remove the shock
3. Installing the Shock
Remove the two nuts from the top of the new shock
Remove the bushing from the shock
Separate the bushings
Put the lower bushing onto the shock
Line up the shock with the control arm
Feed the shock stud through the shock mount
Raise the control arm with a jack
Put the second bushing onto the stud
Start the 17mm nut onto the stud
Tighten the 17mm nut until the bushings are as wide as their washers
Line up the control arm bolt hole with the shock by raising the control arm
Tap the 13mm bolt into the bolt hole with a hammer
Fasten the 18mm nut onto the lower shock bolt
Thread the lock nut onto the stud
Hold the 17mm nut with a wrench
Tighten the lock nut
Lower the jack from the control arm
4. Installing the Wheel
Slide the wheel onto the hub
Start the lug nuts
Lower the vehicle to the ground
Tighten the lug nuts to between 83 and 112 foot-pounds of torque in a star pattern
Hi, I'm Mike from 1A Auto. We've been selling auto parts for over 30 years. We're dedicated to delivering quality auto parts, expert customer service, fast and free shipping, all backed by our 100% satisfaction guarantee. Visit us at 1AAuto.com, your trusted source for quality auto parts.
So in order to start this project you want to go ahead and loosen the wheel and the lug nuts here. We're going to use a breaker bar with a 19 millimeter socket. So next we're going to go ahead and raise and support your vehicle. You can use a jack and jack stands. In this case here we're using a lift to make it a little bit easier. Just go ahead and remove the lug nuts here just by using that socket because we've already loosened those. With the lug nuts removed we can now go ahead and remove the wheel and tire.
We're going to go ahead and replace this front shock here. We're going to start with the upper mount area. If you notice, there is nut right here and there is a nut on the top to obviously secure and squeeze the bushings up here on the upper mount. We have a 18mm wrench to fit on this here. You may need to use this to prevent this from spinning around. It will fit right on there. In this case here, I'm going to go ahead and use our 17mm deep socket to fit over that stud and the upper nut with a ratchet wrench. I'll set this over here. I'm going to go ahead. We can see that the shock itself is not spinning so we don't have to – there we go. And that's where our wrench comes in. We're going to rotate that until it actually hits the upper mount right there and use that as leverage.
Let's go ahead and work on the bottom, removing this nut and bolt application from the bottom of the shock. What we're going to use is a standard ratchet. This is going to be a 3/8” drive with an 18mm deep socket. That's going to slip right on here. On the inside bolt head is going to be a 13mm. We'll go ahead and loosen and remove this bolt here. This bolt should slide right on out.
All right, so we might have to use a little pry bar here to try and get underneath. There we go. You got to put the pry bar right underneath the bottom of the shock tube and you can lift that right up and compress that. Pull it right up and out of the way. The shock should come right out for you.
Here we have the old part and the new part. You can see the new upper bushings and the nut with the locking nut on top of the threaded rod. On the bottom here, you have your new bushings already pressed in with the medal sleeve. Let's go ahead and get this installed.
You want to go ahead and remove this lock nut, then the main nut. You want to pay attention to the way that this is put together because this is the way that it needs to be installed on the vehicle. I'm going to go ahead and slip the bushings off here. You can see that these are designed so one has a little protrusion right here and it needs to sandwich the chassis as that comes off. You'll see how these go into the chassis on the installation. Make sure that you have your metal sleeve on the bottom, the cup, then you have the bushing facing upward on that. Drop that right in through the top, into the lower control arm. Just line that up inside. Align that so it comes up and you can see it poke up through the top of the mount.
As you can see right here, the stud doesn't protrude all the way through the upper mount here but we have to get this busing and this steel plate on. You can see that it's not going to clear. Okay? Obviously, we still have to get the nut and the locking nut back on this. If we come on down here, you can actually see we're going to go ahead and raise the control arm. You can do this by using your regular jack because your vehicle will be supported by jack stands. We're basically going to compress the suspension a little bit, enough to push that shock stud right up through the mount.
Now that we have the shock up and pressed up inside, we have enough threads to fit this bushing through. Make sure that fits inside. Go ahead, put that nut on. This particular one is a 17mm. It might vary from the one in your vehicle with the shock that you're installing. I'm going to go ahead with a ratchet and a socket and snug this up. A good rule of thumb is you want to basically snug this up to the point where this rubber bushing and the lower bushing itself expand out to the diameter of the steel washer or maybe a little bit larger. That should be good right there. Pretty solid.
I'm going to go ahead and crank this up to line up the lower bolt hole with the shock itself. Okay, just going to use a small hammer and tap that bolt right through. Just use gentle taps because you don't want to mushroom out the head of that bolt over there. Okay, because we're reusing the factory bolt and nut, it's going to be an 18mm nut with a 13mm head for the bolt. You want to go ahead and tighten this up.
We're going to go ahead and install the last nut. This is actually a lock nut. That's actually going to thread right onto the top there. You can use a wrench on this here and you can use your ratchet on the top one and basically you just want to hold that there until that snugs up. Now we're going to go ahead and lower the lift or your jack.
All right, I'm going to go ahead and reinstall the tire. I'm going to go ahead and reinstall the lug nuts here. You want to get a few threads caught on all of these here. These lug nuts are 19 millimeters. So we're just going to snug these, bottom it out. Bottom the wheel out to the rotor. We're going to lower the vehicle down onto its own weight, and then do a final torque. With the vehicle on the ground, we're going to do a final torque of the wheel which is between 83 and 112 foot pounds. We're going to do it in a star pattern. All right, just double check the first one. She's all set.
Thanks for watching. Visit us at 1AAuto.com for quality auto parts, fast and free shipping, and the best customer service in the industry.
SBA60316
In Stock
Product Reviews
Loading reviews
4.36/ 5.022
22 reviews
5 Stars
4 Stars
3 Stars
2 Stars
1 Star
15
4
1
0
2
Perfect fit..
Raymond
October 1, 2018
Great quality for the money, they were a perfect fit. Came with all the hardware easy installation. Received my order with in 4 days, great price, great delivery time. I would recommend this site to friends and family. Looking forward to doing more business and ordering with you all. Would highly recommend this site...
Work well fair price
Marshall
October 28, 2018
Shocks work well, the front were a bit of a tight fit in the lower receiver, but otherwise a simple install. Great how to videos on the website as well. I would recommend this product to others
Ford shock absorber
CR
March 12, 2019
Great quality at a low price, I would highly recommend this product!
Shock absorbers
D
April 6, 2019
The old ones werent too bad but they also werent brand new. If A1auto keeps offering quality parts at affordable prices I will be a lifelong customer.
Ford Ranger 1999 shock absorber kit
FIGUEROA-
June 10, 2019
Goodness 1A, fair prices and quality parts. I am in the process of revitalizing my Ranger and was in the process of get new shocks. Who do I go to??? Well if youve read my other posts for my other vehs, you know who! 1Aauto!! Old parts out new ones in, easy-peazy! Thanks again did I mention Free Shipping!!! Cant beat it!!! I do not get any kickback,and I am not a robot for these reviews. Im Regular day to day working guy trying to save cash and not give up quality!! Thanks 1Aauto!!! ...fig.
Nice fit
B
August 6, 2019
Love the price
2000 F-150 4x4 shocks
Carl
September 16, 2019
Improved ride excellent price easy to install
Should have bought them 15,000 miles ago
Sper
O
March 7, 2020
Good service and great price... ty
Fronts needed a little grinding to fit.
David
March 31, 2020
Back shocks mounted with no problem. BTW, It's very difficult to remove the old ones in the rear of my '99 F150. The front ones were easy to remove, but needed some minor grinding to mount properly.
Truck shocks
D
May 7, 2020
Order was delivered in a very reasonable amount of time. All correct parts were in the box and no damage whatsoever. Also correct for make and model of truck. Good job.
Front n rear shocks
Robert
November 30, 2020
Easy to install and easy follow along videos for all products! Bushings did pull through needed to add extra washer to keep from pulling through.
Quality parts!
Nathanael
May 14, 2021
I bought these shocks for my 2001 f-150 and they were perfect. Installation was very easy and the video on YouTube was very helpful. Definitely will be purchasing again!
Works great for 2002 F150
Jesse
August 21, 2021
Worked great for 2002 F150. Hardest part was removing the old rusted ones.
Too soft for 4 wheel drive truck
John
October 10, 2021
These shocks are too soft for my 1999 4 wheel drive. I would say they are borderline dangerous with the amount of bounce they crest when going over large bumps like speed bumps, etc.
Too soft for 4 wheel drive f150
Marty
October 10, 2021
These shocks are too soft for my 1999 f150 4 wheel drive. They are borderline dangerous with the amount of bounce they create when going over large bumps like speed bumps etc.
Richard
April 6, 2022
So far truck rides good.
Max
June 13, 2022
Correct parts and fit perfect
Ernest
March 8, 2023
A little undersized and I had to grind off some of the bushing to allow the shock to fit in the lower receiver where the bolt goes through (front shocks only.
thomas
June 9, 2023
Good quality never had a problem with any of the parts that I bought
Front end parts
Jennifer
July 9, 2023
Great price fast shipping
Nice Product
John
August 6, 2023
The product works as advertised. The product was easy to install as well.
Great part
Gerard
March 6, 2024
Works great, huge improvement on the old stock shocks that were thrashed. Don't know if they're necessarily an upgrade more of just a OEM replacement.
Customer Q&A
Do you have any specs for the shocks?November 18, 2016
Scott G
10
Gas charged units correct for 4WD models under 7700 GVW ONLY
November 21, 2016
Brian F
Do you have longer shocks for 2 1/2 inch lift?July 11, 2020
R W
10
We do not have any shocks that will work for models with a lift. The shocks we have are for models with the stock ride height. Thank you for the inquiry!
July 13, 2020
Andra M
Will these work for a 2x4?August 10, 2020
Todd J
10
No, this kit is only able to fit for four wheel drive vehicles. Please let us know if you have any further questions.
August 10, 2020
Emma F
Will it work with a 3 inch body lift, what full extension length?February 5, 2021
Joseph T
10
This is unable to fit for vehicles that have a lift and will only fit for vehicles with the standard suspension.
February 5, 2021
Emma F
Are these twin-tube or monotube?May 5, 2024
Gene M
10
These are twin tube.
May 6, 2024
Nick R
Customer service
877-844-3393
Monday - Friday 8:00am - 9:30pm ET Saturday - Sunday 8:00am - 4:30pm ET
Ford is a registered trademark of Ford Motor Company. 1A Auto is not affiliated with or sponsored by Ford or Ford Motor Company.See all trademarks.
Enter Vehicle Year Make Model
Specify your vehicle's year, make and model to guarantee fit.
Year
Make
Model
Options
Drivetrain
This part doesn’t fit a . Select from parts that fit.