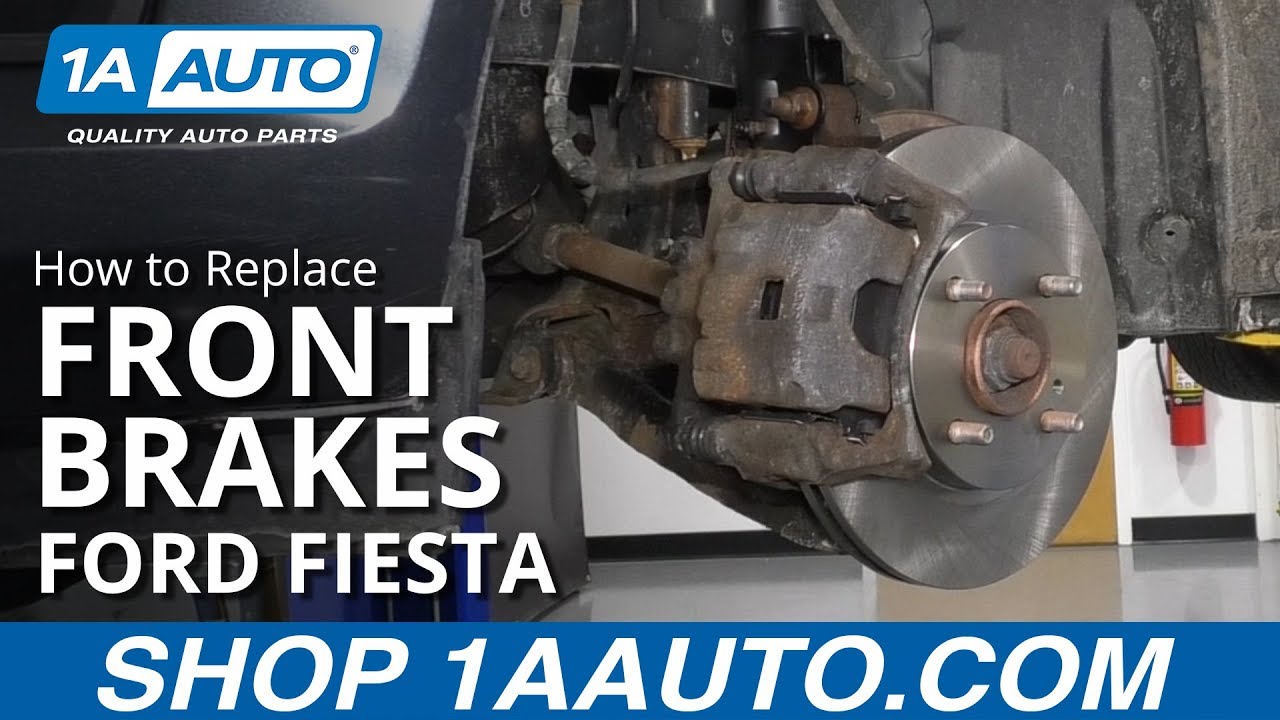
Hey everyone. It's Sue here from 1A Auto and today I have a 2011 Ford Fiesta in the shop and I'm going to show you how to do front brake service. If you need these parts or any other parts for your car, click on the link below and head on over to 1AAuto.com.
19 millimeter socket. I'm gonna take the lug nuts off. I've got the weight of the vehicle on the tire. Just enough to break 'em all free and then we'll raise the vehicle up. I'm using a two-post lift and you can use a jack and jack stands at home. The lug nuts have to come off to get the hubcap completely off. There's not an open one. Sometimes there's open ones with hubcaps, not this design. We'll take 'em all off and then we'll take the hubcap off.
Sometimes you have wheels that are frozen on the actual hubs, so what I do is, I put another lug nut back on and level half way and I'll take a rubber mallet or a hammer and hit the tire. The lug nut stops it from flying off. There we go. First thing I do is I'm gonna take the rubber boot off the bleeder screw so that I can loosen up the bleeder screw and make sure it breaks free, 'cause we have to let the fluid come out. That boots really on there. This bleeder screw on this Fiesta is 11 millimeter. Break it free. I just want to loosen it and give it a quick little snug, so when I have the caliper off, I don't take much effort to break that free.
Now we're gonna take the caliper slider bolts off, 12 millimeter. Let's pull that caliper off that caliper bracket. Nice. I'm gonna use a caliper tool that holds the caliper up in the air, it's a little hook. We sell these at the 1A Auto site. They come in handy. Get that right out of the way. Now I can work on this caliper bracket with the caliper. It's out of the way. The caliper bracket mounting bolts is a 15 millimeter, so we're going to take those off next. Break 'em both free before you take 'em out. Nice. Now you can just pull that bracket right off that rotor. Might have to work it if it's as worn as this one is. There's a lip on the actual rotor holding the pads on the bracket. I need to get a pry bar. Take a pry bar or a screwdriver and just bring it right in there. Wow.
This point now is when you want to examine your bracket. We know the pads are stuck in the slider, they're not moving, but that's an easy fix. Let's make sure our slider pins work and the actual boots are not torn. You don't want any pinholes or tears in that because water gets in the sliders and freezes them up. Looks good. We'll just clean that up. Let's take the rotor off. Now, to take the pads out of the bracket, they're frozen in there. Sometimes you can just push 'em out, but this one I'm going to have to hammer out. There you go. We're gonna clean the bracket up, clean the sliders up. We actually have new tins, so I'm going to show you how to install 'em.
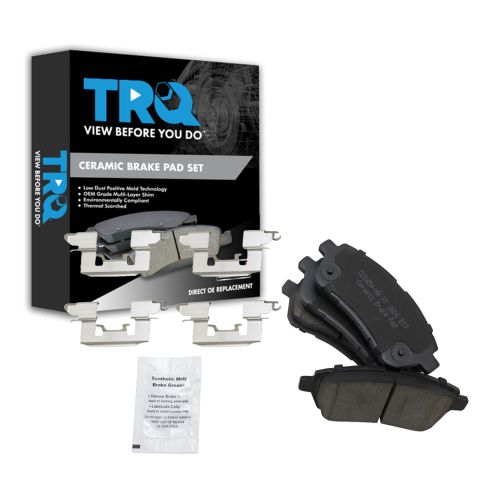
Here we have the new brakes that we got from 1A Auto for our 2011 Ford Fiesta. The rotors are nice cross-cut, they're of heavy weight, they're vented. The venting is coated on the inside. They're milled with a cross-cut like I said and they actually have the specs printed on the side. They're also balanced. The old rotor; it's aftermarket. The car has too much mileage on I. Don't know where it came from or what kind, but we can actually see the problem here with these pads. These pads have no cut-in drag like the ones from 1A Auto, that gets rid of the brake dust and disperses heat also with the slice in the center for the cooling. These are straight-on, a lot of brake dust build-up and doesn't cool down. These brake pads have chatter lines in 'em and you can see the discoloring on the rotor.
The ones from 1A Auto come with the shim pads mounted already and they got the finger lock types on 'em, which are the better of the two. You don't want riveted, riveted just slides off sometimes. These are finger-locked on. If you need this part or any other part for your car, click on the link below and head on over to 1AAuto.com.
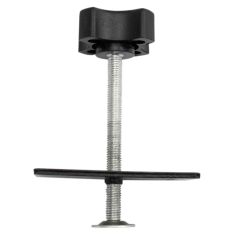
Now we're gonna take the caliper itself down and examine it. Make sure that the actual boot on that piston dust boot is not torn, there's no fluid coming out, nothing's wet, doesn't look like there's been a leak. Now I'm gonna use a tool and I'm gonna push this piston back. I'm gonna use a caliper tool that we sell on the 1A Auto site and it actually pushes the piston back in place, that's really kind of a neat tool. Lisle is the manufacturer.
Now with my 11 millimeter wrench, I'm gonna break open my bleeder screw and I have a catch pan underneath already and I'm going to aim at that and I'm gonna push this piston back. I'm looking for making sure the piston goes back smoothly and it's not frozen and to confirm that no fluid comes out of the dust boot. That would tell me that the seal is blown. Hold it in place at the last and close that bleed screw right back. Beautiful. Quick release on the tool, just push on this button and then pull the plunger back. You're done.
You gotta clean up the hub, which is the rotor mounting surface. You don't want any of this rust surface there, it could cause a break pulsation, not proper wear on the brake pads. We gotta take a wire brush and I'm gonna clean up all the way around. I'm gonna take brakes and keep the brake parts clean, clean the dust off and the rust and just keep working at this.
Now we're gonna clean up the caliper bracket and we sell a kit on the 1A Auto site for the hardware, which is the tins and the two boots and then the actual rubber bushing that goes on the slider. I'll show you. I'll take it apart. First I'm going to take the tins off. I just take a flat head screwdriver, pry up on 'em. Thank God I got new ones because this is rusty. I don't want to have to clean these up. We're gonna clean this whole surface up. You can see the chunks of rust underneath here. That's why the pads were not sliding back and forth properly. Improper braking and improper brake pad wear is due to the conditions and how people prep brake work.
I'll take this slider out, I'll just take a flat head screwdriver, work that around and then you could take the pin right out and you can see, it comes with a rubber boot, one per caliper does and it's usually going to be, I find it to be the top one. This one was on the bottom, someone might have changed it, but I don't think it really matters. That rubber boot comes off and that one goes on.
These get swollen sometimes if they get too old and that slider will not move back and forth, so we'll end up cleaning that up and putting a new boot on. Take this boot off first. I'm gonna bore out that. We're gonna clean this with a caliper brush and they look like this. They come in brass, they come in stainless steel wool and they come in a plastic. You just insert that, make sure it's the right size, they come in different diameters. I just clean that right out, make sure there's no rust in there and nothing to cause that drag. Now I'll clean up this pin, check the condition of it, make sure it's not rusted, make sure it's not cracked. Looks good. We'll put that boot on.
Now I'm going to clean up the caliper bracket itself. I take a wire brush and really get in there. You want to see all that rust flakes and you don't want that around. If you have a wire wheel you can try that to, but sometimes it's difficult to get the bracket in there without jamming it. I find this works pretty good. Use a little brake clean. I'm gonna clean inside there now too, now that I've ... take the brush back to it. You don't want to file it, so don't take a flat edged file, unless you've got some raised steel that's raised up, then it might be time for a whole new caliper.
I'm gonna get all the surface area that, that new hardware tins are gonna hit. I don't want any rust flake. This is happening, because the last person didn't do this properly. You can see, look at how much the metal's missing, pieces of it are missing. I'm gonna clean it one last time. Let that dry. Now I take caliper grease, a thin coat of it and just gonna cut the surface that I don't want rust to form. Gonna take my new shim. Like I said, this kit I got from 1A Auto website and it comes coated. This is an actual, almost looks like a Kevlar coating on the back here. That's gonna stop rust forming, which is a good thing and it's coated on this side.
You never want to put any caliper grease or silicone paste on the side the pad is on, you want it to use the force of it alone, just to slide back and forth. If you put anything sticky on there like caliper grease or silicone paste, it'll actually build up from the brake dust and stop the pad from sliding back and forth. Let's press that down in place. Make sure it's seated flush. You can see right there, that it is not. I'm going to take a little hammer and I'm gonna just tap that down in there without bending it. There we go. Sitting flush in the caliper bracket all the way around. Now I'm gonna repeat the same process on this side.
Now we have our tins on. I took care of this slider and now I'm gonna do this one on camera for ya. Take the caliper grease, put a coating on the slider, not too much, just a coating. Looks like I need a new brush, things are coming off. I'm just gonna set that aside first 'cause I'm going to grab the boot; the new boot and I'm going to put some grease inside the new boot. Use my small screwdriver, I want to get it in the grooves there. That keeps the slider lubricated throughout the process. That end of the boot is gonna go right inside that bellow area. I'm gonna slide it down in ...there you go ... that seat. Take your slider. I like to spin it in and it gets the air out, you can hear the air popping. Make sure it seats. Get any extra grease out. It's a messy process, but now I know that, that slider is lubed up and it's not going to seize up.
Get the new brake pads and we'll place 'em in there and make sure that they slide freely.
Now I'm going to use a little anti-seize on the hub surface. That's a high-temp and I can place my rotor on, make sure it sits nice and flush. Now we can grab our caliper bracket. I put the inner pad in, I'll put the outer pad on camera. Slide that right through. Gonna put the lower mounting bolt on. Tighten those down hand-tight and then I'll torque 'em to factory spec. Now I can torque down the caliper bracket to knuckle and the torque specs for manufacturer is 50 foot pounds.
Now we can put the outer pad on. This is how I meant to show you it before. That's how I put it in at an angle and let it slide right in. Make sure it moves and it does, so I know that there's plenty of movement, it'll go in and out with the caliper piston and you won't have an improper wear.
Now we can install the actual caliper. Let's put the caliper slider bolts on. Just bottle them out by hand. Now we're going to torque the caliper to the caliper bracket. The slider bolts are 12 millimeter socket and the manufacturer spec is 20 foot pounds. Now before we go any further, we're just gonna open that bleeder screw and we're gonna let this gravity bleed, 'cause we pushed the caliper, the piston back. See the air bubbles? You want to do it 'til there's a steady stream with no air bubbles. Looks good. Snug that up. Get some brake clean, clean it down and we'll replace that boot, put the boot back on the bleeder. We're gonna repeat this process on the other side.
Now we can put our wheel back on. This hubcap doesn't have wider slots for lug nuts, so they all have to go on at the same time. Line up the valve stem notch cut out and start putting the lug nuts on. I like to rock the wheel back and forth a little bit, make sure I'm centering it. Always go crisscross. Cool. Now I'm going to lower it enough to put the weight of the vehicle on it and torque the wheel.
Wheel torque is a 100 foot pounds for this Fiesta. Always go crisscross. This is getting the piston to go back and seat against the pad. Pump 'em until it's firm and it doesn't go down anymore. Let's check our brake master. The fill on the Fiesta is right here. It's an attachment to the actual master, so I'm gonna take the cover off, check my fluid, it is dot three. Grab my dot three fluid and I'm gonna fill it up until I see it come up to the line right there. Let it settle. It's gong down in that reservoir down there. I'm right there, right on the line. Take my cover, make sure there's no dirt gone inside and line up those notches and snug it down.
Thanks for watching. Visit 1AAuto.com, your place for DIY auto repairs, for great parts, great service and more content.