Hey, friends. It's Len here at 1A Auto. Today I'm working on 2001 Ford Focus, and I'm going to show you how to do a headlamp assembly. It's going to be a very simple job and I want to be the guy that shows you how to do it. So, if you need this or any other part, you can always check us out at 1Aauto.com. Thanks.
So one of the first things we're going to do is we're going to take our pocket screwdriver. We're going to remove this. We're going to remove one of these that should be here. This one's missing. And then this one right here. Okay. And it looks like there should be one right there as well. If yours has them all, just take them all off. Essentially, we want to get this plastic up. Just take your small pocket hand screwdriver. I like to try to weasel it under here a little bit. Pry it up at the center. Use my little forky tool. Here we are. I'll show you what this looks like. That's what it looks like. You should have another ear that shoots off that way.
Okay. We'll come along. Just going to try to get the center to pop up here. Okay. Grab our plastic, and we'll get this up and out of the way.
Okay. So one of the first things we're going to do is we're going to remove this grill assembly. So we're going to take our tool and we're just going to give it a little bonk. Okay. If you don't want to use your hammer and do it because you like this one, you want to keep it around for a little bit, we use something like this. Just a 10 millimeter with an extension and a ratchet. We're going to take out this bolt, this bolt, this bolt, this bolt, and disconnect these. So, let's do it this way because I like this grill.
Get the bolt out of here.
Davy Crockett, Davy Crockett. Bonk, bonk.
Cool. We'll get all this out of the way. Let's keep moving. We got a 10 millimeter here, a 10 millimeter over here, and one down right over here. There's also going to be wiring going to the backside of this obviously because well, there needs to be electricity going to it, right? Current. So when we go to remove this, we want to make sure that we don't pull it out too far without removing any wiring. There's this. It's kind of like a push connector on this one, but you unscrew it to relieve the tension. Put that aside. We'll move up here. Right here.
Okay. So under here, there's going to be another 10 millimeter located right there. So I'm just going to use a ratchet wrench, something that I can fit in here easy. You can use a ratchet and a socket if you want. But it's a 10 millimeter. Grab that bolt out of there. There it is. Okay. Let's bring it back down, and we'll get to removing this.
Okay. We're back down. We'll grab this, try pull it out. Here's our wiring that I mentioned. To take this off, there's a little tab right here. You're just going to try to squeeze that down, wiggle this around, and pull it off. There we are. Just tap it out. Take a peak, make sure you don't see any funny colors in there. Rainbow colors inside electrical connectors are bad. This one looks fine. We'll set this aside. Now we've removed our left front head lamp assembly.
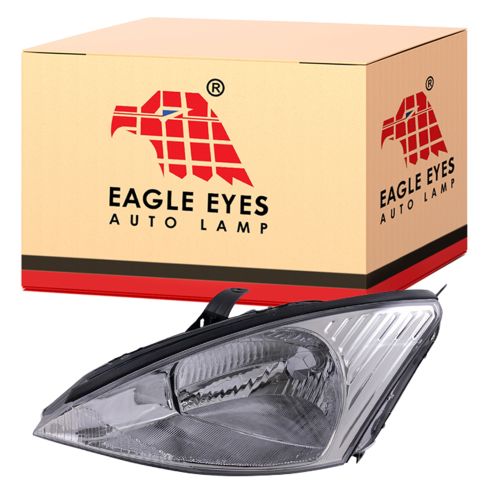
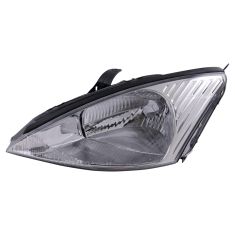
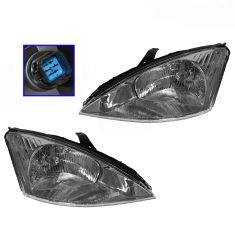
So here we are, friends, quick product comparison for you. Over here we have our 2001 Ford Focus left front head lamp. Right over here we have our brand new quality 1A Auto part. As you can tell, they're both the same exact shape. Well, we'd have to assume that they would be, right? Something that's very important to make sure is that you have the same mounting. Bring it around, take a peak. Right up here, here, here; here, here, here. Those all look the same. We've got our electrical connector, this is where your headlight bulb is going to be right behind here. We'll take a peak at that in a second. And then there we are. There's the lower bolt hole. So we have all of our mounting holes. The inside's in great quality as you can tell. Plenty of reflective service in there. It's going to shoot light out. It's going to be great, especially in comparison to what we were working with before. Which one you think has better light emittance? I'm going to go with this one.
So with that said, I don't see any reason why this wouldn't be a quality part to install. So I'm going to go ahead and do it. If you need this or any other part, you can always check us out at 1Aauto.com. Thanks.
Okay, friends. Here we go. We're going to buy our brand new quality 1A Auto part here, bring it over. We've got our wiring harness. We're going to go ahead and put it on. Okay. We just need it to go in and click or at least get stuck. There it is. Come on. There we go. Nice and locked. Okay. We're going to take this, bring her on over over the top of the bumper here. Work its way in. Okay. Grab our screws, it's the course threaded. That there. This one here. This one right here, all you do is you have it unscrewed, slide it in. When you push it down, it expands those two ears and locks it in. Okay? See if we can get it in the hole down there. Just try to push it in. Yup. Okay. Now I'm going to push the center. That's locked. Come over here, do this one. There we are. There we are. Okay. Let's get in underneath. We'll do the last bolt, and we'll be clear to move along.
So it's time to install our last bolt. We're going to come back underneath the bumper over here. There's an area right along here where the headlight assembly presses up against the side of the fender. There's a little slot. Just going to put that back in, turn it clockwise, and use my ratchet it wrench. You can use whatever you've got, but it's a 10 millimeter. Snug it right up. The assembly is just plastic so you don't need a lot of torque on this. As soon as it feels like it's snug, it's probably good enough. That looks good. I don't see any gap. All right. Let's bring it back down. We'll get the grill back put on, and we'll test it out.
So we've got our brand new grill. We're going to bring it over to the vehicle obviously. On the pigtail where the socket has little ears and on the grill itself it has little slots for where your directional bulbs go in. So essentially all you're going to do is line them up, turn it clockwise until you hear a click. Do the same thing for this one. There we are. Now we'll just take our grill unit, slide it into position. There it is. Okay. We've got our four bolts. We'll go ahead and install those. Now that I have all of them started, I'm just going to go ahead and tighten it down. Okay. We'll take our little cover assembly here. That should just go right in. See if I can get it figured out. There we are. Just took me a second. These little tabs slide under. There we are. Use what you got for push clips. If you got all four, use all four. Just going to take that, slide it in there, push that down, and do one down on this end.
So here's a quick light comparison between the new and the old. We'll show you on the wall. Over here we'll cover up the new one. That's the light emittance from our old head lamp assembly. As you can tell, it's quality. It's great. You can see about five feet. We'll slide over, and we got that one over there. We'll cover this. Can still see just as good with and without it. So yeah. I would say let's go ahead and install the other one, and we'll be good to go.
This is a basic tutorial on how to aim the headlights on your vehicle. Find the access of your headlights. This is usually indicated with a small dot or the headlight bulb size on the lens. If not, it's the actual center point of your headlight bulb. Transfer this mark to a vertical wall with a preferably dark color that'll allow you to back up 25 feet. Pull up and find the center line of your vehicle as well as the center line of your headlight access. Mark the wall with the height of the headlights and a straight line going across at that access height. Back your vehicle up 25 feet from the wall to the front edge of your vehicle's headlights. Turn your headlights on and locate the adjusting screw usually on the backside of your headlights. You'll want to rotate this until the passenger hot spot or focus of the beam is approximately two inches below the line, and the driver's side is four inches below the line. We change the heights on each side so you can still get a good beam to the offside of the road on the passenger side, and have the driver's side low enough to not blind oncoming traffic.
Thanks for watching. Visit 1Aauto.com, your place for DIY auto repairs, for great parts, great service, and more content.