Brought to you by 1AAuto.com, your source for quality replacement parts and the best service on the internet
Hi I'm Mike from 1A Auto. I hope this how-to video helps you out and next time you need parts for your vehicle, think of 1AAuto.com, thanks.
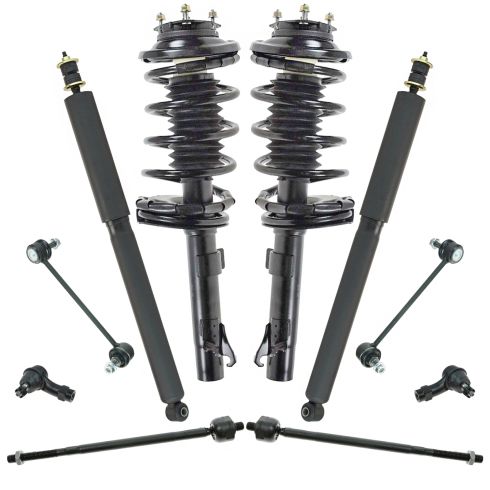
In this video, we're going to show you how to replace a front strut and spring assembly on this 2003 Ford Focus, pretty much the same for any 2000 to 2011 Focus. We're going to show you the passenger's side. The driver's side is basically the same procedure. We do always recommend that you replace your struts in pairs.
You'll need new struts from 1A Auto, jack and jack stands, 13 to 19mm sockets with all the accompanying ratchets, extensions and you'll need a breaker bar or pipe for some extra leverage, large hammer. You may need to get off the stabilizer link and nut, you may need a 17mm wrench with a T30 Torx driver. You'll also need some penetrating oil and a torque wrench to put everything back together correctly.
Remove the wheel and tire. You can use your lug wrench that comes with the vehicle. If you're using your lug wrench and hand tools, you want to have the tire on the ground. Loosen the lug nuts first, then raise and support the car and remove the lug nuts. You will need kind of a thin walled socket. Regular impact sockets don't really fit in here.
I'm going to fast forward as I remove the lug nuts, and then, actually, I realize the wheel is stuck on so I thread two lug nuts back on and use a little bit of an alternative method to remove the wheel.
Underneath here, you want to detach a couple of things, the break line pull that out of that bracket. Your ABS sensor, pull that out of here and out of the way. Then, we're going to remove this bolt that holds the upper stabilizer link. First, we're going to spray with some penetrating oil. When we spray that one, we're going to spray the one down here as well that holds the bolt right here that pitches on to the strut and we're going to try to spray the back side of that as much as we can.
Now, a 17mm wrench and put on there and we're going to then hook up the 18mm wrench on like this. It gives us more leverage and we're going to see the nuts actually coming off. What you can do is I have a T30 Torx Driver here. If this starts spinning, just insert that in there and we can hold it steady. It's coming off okay, then hammer. Next is the bolt that holds the strut into the steering knuckle right there. It's a 15mm. Then put a socket with an extension on it to get it clear of this break line. If you have a breaker bar like this, you want to use that. If not, you can use your ratchet. Just use a piece of pipe to give you some extra leverage. I'll just fast forward. You want to take that bolt all the way out. Just spray some penetrating oil where that strut goes in to the steering knuckle.
Get a 15mm socket and disconnect your tie rod in here. The best way to do it is keep the nut as close right up flush with the stud and tie rod. I'm going to repeat the hammer. Once you break the tie rod loose, the stud will start spinning in it so what I did is I took some wood and my jack, jacked up the tie rod into the steering knuckle that holds it in place. I can remove the nut the rest of the way, and then I should just take a light tap and knock the tie rod back out. This vehicle has a broken spring so I actually have lift up on the strut and then hit the steering knuckle until everything comes loose. Then I force the strut up and take the strut out of the steering. Up in the engine compartment, there are three 13mm bolts and they usually come out pretty easy and sometimes they actually break but that's not a big deal if they break off, your new strut assembly comes with new ones.
You can see. Problem with our old strut, right there, a broken spring, not uncommon on these vehicles. This strut is from 1A Auto. It comes all assembled as one piece with the coil spring already on there. It makes it easy to install. I'll remove these. You'll want to put that up in there. I'm going to put it up in there so that this is to the inside. I'm just going to put it in and through here. Take a peek here, just looking at the studs, get them up through. They come up through. Put these bolts on and the nuts. Tighten up the nuts in there. Remember to tighten that with this. Now, continue to be really careful of this harness here. Take care of your strut and your suspension when you're getting that strut right in that groove there. Pull along the strut and pull the steering knuckle out. Push everything together. Now, put a bolt that pinches the steering knuckle back on to the strut in and push on it with your wrench and start it in but don't tighten it yet.
Now, you want to make sure that before you tighten this bolt up, okay, you want to make sure your strut is in the right position. Basically you want to have it so the inside here is just below and then the outside is just flush. The strut is actually indented. You don't want to be too high on the strut. I can probably show you better on this strut here. You can see that the strut comes out and you want to be down below. Your taper is here and you want to make sure you're down below the taper where you tighten it up.
The strut and steering knuckle move around, let's make sure we have it at the right depth. Then use a torque wrench to tighten this bolt between 65 and 70 foot. You're going to put this break back in place, and take your tie rod in and put the wheel over, the tie rod back up in and just kind of put the nut on the tie rod for now to kind of hold it in place and then the stabilizer link here. Get it through. Put this strut back on. As you tighten this up the stud is not spinning, put that back in place. Put that back in place up here. I'm going to fast forward here as I use a jack. Jack the tie rod right on to the tie rod, up into the suspension that holds the stud in place in the steering knuckle. Then you tighten up the nut and torque it to 55 to 60-foot pounds. Put the wheel back on.
I'm going to fast forward here. Put the wheel on. Make sure you thread the lug nuts on a few turns, finger-tight just to make sure that they're not cross threading. Then tighten your lug nuts up preliminarily and then you're going to put the vehicle on the ground and torque the lug nuts. You want to torque the lug nuts to a 100-foot pounds and give me a crossing pattern.
These nuts up here, torque between 25 and 30-foot pounds.
We hope this helps you out, brought to you by www.1AAuto.com, your source for quality replacement parts and the best service on the internet. Please feel free to call us toll free, 888-844-3393. We're the company that's here for you on the internet and in person.