
★★★★★
August 7, 2026

Replaces








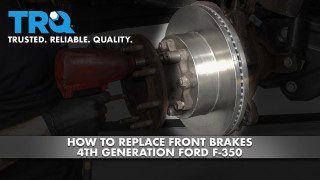
About TRQ:
TRQ is a trusted brand dedicated to making every repair a success story by combining premium parts with easy installation. Each TRQ part is engineered by a team of automotive experts to meet or exceed OEM standards, delivering enhanced performance and maximum longevity. With rigorous in-house testing, the brand ensures superior fit and function across every product line. TRQ also provides customers with best-in-class, step-by-step installation videos—so you can complete repairs with confidence, whether you're a first-time DIYer or an industry professional.
Product Features
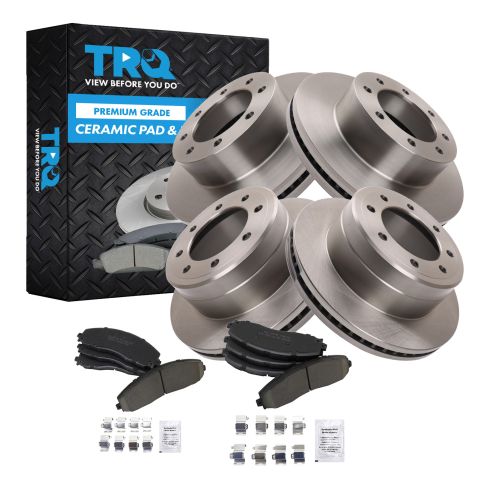
TRQ brake kits are designed to restore your brake system to like-new performance. TRQ brake pads are positive molded, thermal scorched, chamfered, and utilize a multi-layer shim for enhanced performance and service life. TRQ rotors have a non-directional finish that reduces the break-in period for new rotors as well as reducing vibrations throughout the rotor’s lifecycle. All products are fit and road-tested in our Massachusetts R&D facility to ensure we deliver on our promise of Trusted Reliable Quality.
Attention California Customers:
 WARNING: This product can expose you to chemicals including Lead and Lead Compounds, which are known to the State of California to cause cancer, and birth defects or other reproductive harm. For more information, go to www.P65Warnings.ca.gov.
This part fits 6 vehicles spanning 2013-2022.
| Year | Make | Model | Description |
|---|---|---|---|
| 2013 | Ford | F250 Super Duty Truck | Ford F250 Super Duty Truck 4 Wheel Drive From 10/22/12 Production Date Front & Rear Ceramic Brake Pad & Rotor Kit TRQ BKA11850 |
| 2014-2022 | Ford | F250 Super Duty Truck | Ford F250 Super Duty Truck 4 Wheel Drive Front & Rear Ceramic Brake Pad & Rotor Kit TRQ BKA11850 |
| 2013-2014 | Ford | F350 Super Duty Truck | Ford F350 Super Duty Truck 4 Wheel Drive with Single Rear Wheels (SRW) Front & Rear Ceramic Brake Pad & Rotor Kit TRQ BKA11850 |
| 2015-2016 | Ford | F350 Super Duty Truck | Ford F350 Super Duty Truck V8 6.7L 4 Wheel Drive with Single Rear Wheels (SRW) without Wide Track Front Suspension Front & Rear Ceramic Brake Pad & Rotor Kit TRQ BKA11850 |
| 2015-2016 | Ford | F350 Super Duty Truck | Ford F350 Super Duty Truck V8 6.2L 4 Wheel Drive with Single Rear Wheels (SRW) Front & Rear Ceramic Brake Pad & Rotor Kit TRQ BKA11850 |
| 2017-2022 | Ford | F350 Super Duty Truck | Ford F350 Super Duty Truck 4 Wheel Drive with Single Rear Wheels (SRW) Front & Rear Ceramic Brake Pad & Rotor Kit TRQ BKA11850 |
| Brand Label | Part Number |
|---|---|
| DuraGo | BR901170 |
| Bendix | PRT6229 |
| DuraGo | BR901172 |
| Wagner | BD180661 |
| Wagner | BD180663 |
| Raybestos Brakes | 681016 |
| Bendix | PRT6228 |
| Raybestos Brakes | 681017 |
| FMSI | CD1691 |
| FMSI | CD1680 |
| Aimco | 54199 |
| Aimco | 54198 |
| Ford | DC3Z2001E |
| Ford | DC3Z2200D |
| Ford | DC3Z2200C |
| Ford | DC3Z2200B |
| Ford | DC3Z2001D |
| Ford | DC3Z2001B |
| Raybestos Brakes | PGD1691M |
| Raybestos Brakes | PGD1680M |
| Ford | DC3Z2001A |
| Raybestos Brakes | 681017R |
| Raybestos Brakes | 681016FZN |
| Raybestos Brakes | 681016R |
| Raybestos Brakes | 681017P |
| Raybestos Brakes | 681016P |
| Raybestos Brakes | 681017FZN |
| Raybestos Brakes | 681016PER |
| Raybestos Brakes | 681017PER |
| Sangsin Brake | SP4179 |
This item may be interchangeable with parts from other brands with the above part numbers. This information is provided only for reference and does not guarantee that the item you are purchasing is identical to parts with part numbers from the brands listed above. To confirm that this item fits your vehicle, use the above "Check Vehicle Fit" option.
Lifetime Warranty
This item is backed by our limited lifetime warranty. In the event that this item should fail due to manufacturing defects during intended use, we will replace the part free of charge. This warranty covers the cost of the part only.
FREE Shipping is standard on orders shipped to the lower 48 States (Contiguous United States). Standard shipping charges apply to Hawaii and Alaska.
Shipping is not available to a P.O. Box, APO/FPO/DPO addresses, US Territories, or Canada for this item.
Expedited is available on checkout to the United States, excluding Alaska, Hawaii.
Final shipping costs are available at checkout.
Created on:
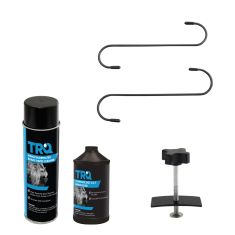
Tools used
Tools used
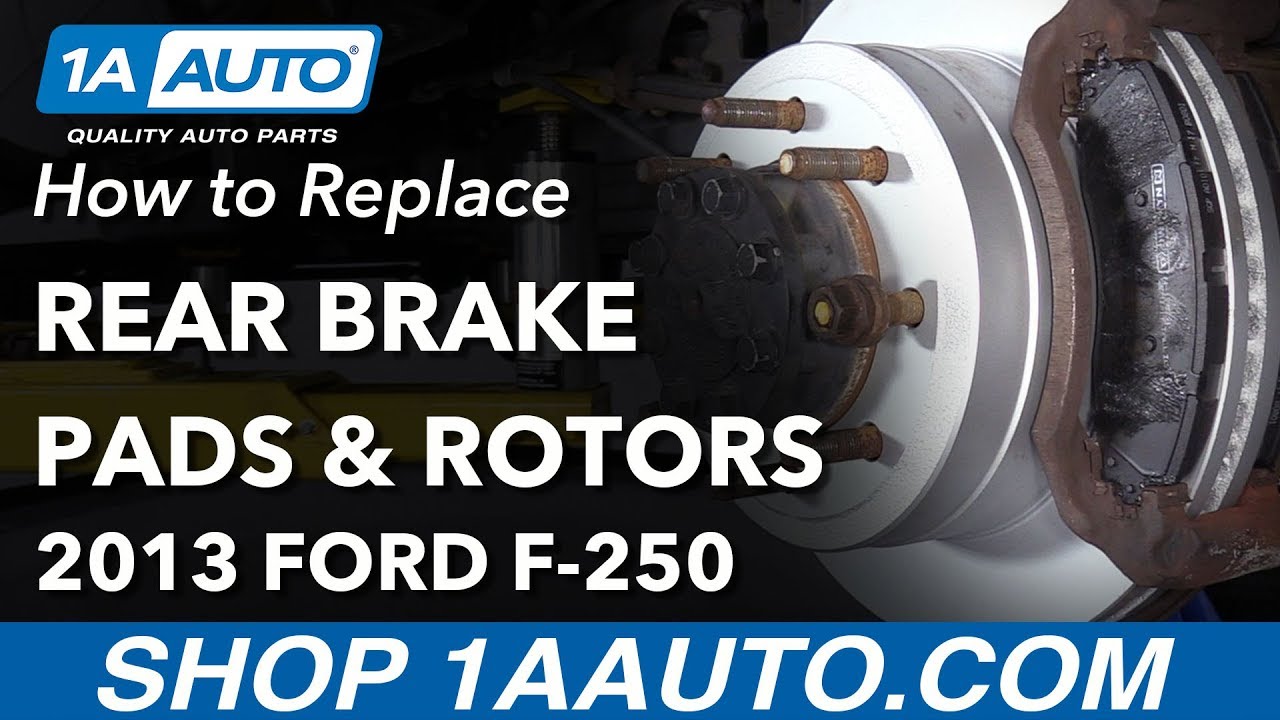
Hi, I'm Mike the 1A Auto, we've been selling auto parts for over 30 years.
What's up guys, I'm Andy from 1A Auto. Today I'm gonna be installing these brakes on this 2013 Ford F250. If you need these parts or other parts for your vehicle, click the link on the description and head over to 1AAuto.com.
Alright, we want to take the center cap off. I'm just gonna take a rag and a pry bar, get by him behind here, there's a little slot, and because I don't want to scratch the wheel, just pry it out, and I can just grab it with my hand and pull it off.
I'm gonna take a 22mm socket and a breaker bar, and you loosen up these lug nuts, just gonna break them free. Now we're gonna raise and support the vehicle, we're using a to post lift, if you're doing this at your house you can use a jack and jack stands.
Take the lug nuts off, and thank you. If a tire a little bit, get it to come loose, slide it off.
We're gonna take these caliper bolts out, it's recommended that you take the top bolt out first and then the bottom bolt, and we're gonna use a 16mm socket and a ratchet. Take that bolt, oh, and take this one. You may have to hold on to the slide pin, it's that spin is, otherwise they'll just spin like that, just hold it with my fingers, you can use a pair of pliers. That you need to pull that bolt, oh, and also next.
I'm gonna take a straight blade screwdriver, you can use a pry bar for this, and I'm just gonna compress the caliper a little bit. I'm just sliding the screwdriver in here, in between the fins on the rotor, just prying out a little bit, that's just loosening up on the caliper so I can slide it off, just like that.
Now take a Bungie, Bungie cord, slide it through the spring, hold the caliper, go through the holes, set this aside. That'll keep the tension off of the brake hose, because you don't want to just let the caliper hang from the brake hose.
I'm gonna remove the pads, I can use the straight blade screwdriver, slide these off, set these aside.
It's now I'm gonna remove these two caliper bracket bolts, I'm gonna use a 21mm socket and a breaker bar. Now when doing this job, it's recommended that you replace these two bolts. Break these free.
Right now that they're loose I'm going to use a ratchet and just take the bolts up. All right, now these are loose, stick these out, hold on out, slide the bracket off.
I want to get this rotor off. It, this is rusted on there a little bit, so I'm gonna take one of the lug nuts, slide that on there, then I'm gonna take a hammer and I'm going to hit all in-between these areas until the rotor breaks free. Take the lug nut off, slide the rotor right off.
All right, before we put the rotor on, we want to clean this hub area. There's some rust right here, that's why it was difficult to get the rotor off, so take a wire brush and clean this right here, and also the rusted section over here. Outer edge right there in the middle is not going to affect it, so that's not a big deal.
All right, we're gonna clean up this caliper, this caliper bracket. I'm just gonna use the wire brush right here. These pad clips, brake pad clips, clean these up. Take a straight blade screwdriver, take the clips off. If there's anything underneath here, you can just clean on the back side, slide these off. A little bit of rust, not too bad, and then right here clean this rust up.
We'll take these clips, slide these back on, they only go on one direction, there's a back one and then a front one, this little tab is different, this flatter piece goes in the middle. Slide that on, make sure they're pushed all the way down.
Next we're gonna take these caliper pins out, just slide these off. I'm gonna take some brake parts cleaner, clean this off, wipe it down with a rag, just like that, and in the caliper bracket we just spray some brake cleaner down this slide hole, clean this out. It'll take some brake grease, brake caliper grease, put some on the pin.
Then we'll slide the pin back into the hole, make sure the boot is seated. You do the same for the other side. These are our old brakes, is our new brakes from 1AAuto.com. As you can see, the brake pads have the same shape and design, the same shim design on the for the pad material. The rotors are the same height, they up they have the same cooling fins, same thickness. Get yours at 1AAuto.com and your be ready to rock and roll.
Right before I install the rotor, I'm gonna take some brake parts cleaner and just clean off the surface and then wipe it with a rag, because there is a chemical on here that prevents it from rusting. Just get that coating off. Flip the rotor over, do the same on this side and wipe up the rag.
All right, now take the rotor, slide it over the studs, make sure it goes all the way down. I'm just gonna take one of the lug nuts, slide this over, that'll prevent the rotor from falling off and it'll keep it secure.
I'm gonna slide this caliper bracket over, take these caliper bolts, stall these bolts. It's recommended that you replace these bolts, we're gonna reuse ours. And I'll take a 21mm socket and a ratchet, start to tighten these down, snug those up. Now I'm gonna use a torque wrench with the 21mm socket and I'm going to torque these to 166 foot-pounds.
I'm going to install these new brake pads. I'm going to be careful not to be touching the pad surface if you have greasy hands. I'm going to take a little bit of brake caliper grease and just slide it on the pins right here on the ends, just like that, and I'll slide it into the caliper bracket just like that. I'll do the same on the inside.
Now I'll take the caliper, remove the bungee cord, slide this out. I'm gonna flip the caliper over, just take some left stuff off. I'm gonna take the old brake pad, slide this into position.
I'm going to use this brake caliper compressor tool, we actually sell these at 1AAuto.com. Now this is generally for a single piston caliper, but because I use the brake pad in this position, I can use it on a dual piston. So I'll just go back and forth slowly to both sides.
Now, while I'm doing this, this is pushing brake fluid through the brake hose, through the brake lines, back up into the master cylinder and into the reservoir. So it's a good idea, good idea to check your reservoir after you do this job and adjust the fluid level accordingly.
All right, so going back and forth very slow couple times, and this caliper piston looks like it's all the way down. You want to check the boots, make sure the boots haven't popped out at all. If they have, you want to push them back in with like a small screwdriver. Flip this over, make sure the caliper hose is not twisted at all. You'll slide this over the caliper bracket, just like that. Now install the caliper bolts.
All right, I'm gonna snug these up with a 16mm socket and a ratchet, and then I'm gonna torque them. I'm gonna hold the pin so it doesn't spin on this one, just snug that up, then I'm gonna use the torque wrench. I'm gonna torque these 255 foot-pounds, and I'm gonna start with the bottom one first. It's important to start with the bottom one on this vehicle, because it makes sure that pin lines up properly, and then torque the top one, same 55 foot-pounds.
Now I'm gonna take this lug nut off, we'll reinstall the wheel. We're gonna torque these lug nuts to a hundred and sixty-five foot-pounds, and we're going to torque them in a star pattern so that the wheel gets tightened down properly.
Now after we torque the wheels, we're going to take this center cap, line it up with the lugs, tap it on. You can use a rubber mallet to help tap it on.
After we do the brake job, what we're gonna want to do is pump the brake pedal, because there's gonna be an air gap between the piston and the brake pads. So this will eliminate that air gap, and you'll be good to go.
Thanks for watching. Visit us at 1AAuto.com for quality auto parts, fast and free shipping, and the best customer service in the industry. You


All parts fit well. Went on easily
Everything fit and went together well. Now for the longevity test.
Perfect fit. Very fast getting me the product. Thanks!!
Working great!!!! Fit perfect easy to install.
2015 F250 6.7L 4x4. The installation was fairly easy and I love the quality of the parts, my problem was removing the old rotors. Rear removal was especially difficult because of the rust that literally welded the parts together. My parking brake came out with the old rotors!! Highly recommend the kit, very satisfied with the rotors and brakes.
Got here fast. Fit was perfect! No gimmicks, no noise, no BS. Will buy again!
Fast shipping and great quality
Shipped quick. UPS lost one of my boxes. I contacted 1AAuto customer support and had a new one within a few days. The boxes looked a little worse for wear, but the parts arrived in good condition and installed easily. I've been running them for a couple of weeks now and have no complaints.
Was alerted when part was in stock, ordered parts with ease online and received in with in a couple of days. I have used them serval times with out disappointment, and will continue to use 1AAuto in the future.

BKA11850
There is a good 30-30-30 rule when breaking in brakes. You will want to speed up to 30 mph and apply moderate brake pressure all the way down to 5 mph. Wait 30 seconds and do it again. Repeat this 30 times and your brakes will be properly burnished/primed.
These are manufactured by TRQ. TRQ is a high quality, high-end name brand that we offer and back with our 1A Auto Limited Lifetime Warranty. The parts are built to your vehicle's exact OEM specifications.
This kit is listed to fit 2017 Ford F350 Super Duty Truck models with 4 Wheel Drive and with Single Rear Wheels.
