Brought to you by 1AAuto.com, your source for quality replacement parts and the best service on the Internet.
Hi, I'm Don from 1A Auto. I hope this how-to video helps you out, and next time you need parts for your vehicle, think of 1AAuto.com. Thanks.
In this video, we're going to replace one of the front wheel drive axle actuators. Usually, if your vehicle seems to be stuck in four-wheel drive or it's making a lot of humming noises, what you can do is, with the car running, you jack up the front wheels. If, with the car running, you turn the front wheels, and the front drive shaft still turns, that's a good indication that these axle actuators, and also, possibly your solenoid that's up behind your battery are stuck. It's a common problem on these trucks.
You'll need new actuators from 1AAuto.com, jack and jack stands, a pry bar, pliers, 8 13, 24 and 30mm sockets, ratchets and breaker bar of pipe for some extra leverage, and a 12mm 12-point socket and ratchet. In the video, we show you the right-hand, or passenger side. The left-hand, or driver side is the same procedure.
To start out, raise and support the vehicle securely, and then remove your center cap. We're going to remove the cap on the end of the hub. With a 13mm socket, we're going to remove the nut from the end of the axle. Where the end of your CV joint meets the solid axle, it's going to be six 12-point 12mm bolts so I'm using a 12-point socket to remove those. Okay, we're just going to do some fast-forwarding here. You can basically hold on to the tire or have an assistant, or you can have somebody hold the brakes for the vehicle. Loosen up those bolts and remove them. I'm going to remove the bolt, the 30mm socket that holds in the lower part of the lower part of the strut assembly, so that we can get more room to pull the CV shaft out. I'm going to fast-forward here as we remove that nut and bolt. Once you get the nut loosened up, you can tap it with a hammer a few times, make sure that the bolt is loose and will come out.
I'm going to use a pry bar and pry out the lower end of the strut assembly from the lower control arm. While I was prying on the lower part of the strut assembly, I was able to pull the CV shaft past this. I'm going to pull the shaft out. We'll just speed it up here. Work the axle out, and then, you actually have to work the lower strut mount out. You can see, we'll us a pry bar and get that moved out of the way. Then the axle comes right out.
There are three 8mm bolts that hold it on. We'll fast-forward here as we remove those 8mm bolts. Using a flat-blade screw driver, I'm going to pry off the actuator. I'm going to disconnect the vacuum hoses.
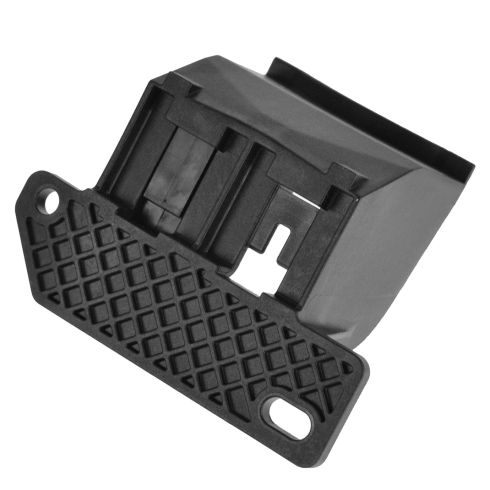
Here, we have the old part, and here's our new replacement part from 1A Auto, identical. You can see here that when you try to apply pressure, the back of this, where it would engage and disengage the four wheel drive, it doesn't work, whereas our new one is nice and fluid. I'm going to start by connecting the vacuum hoses, placing it back inside and reinstalling the 8mm bolts. We'll fast-forward here again as we reinstall those bolts. We always put the bolts in first and make sure that they can start by hand. Make sure all three of them start in, and then tighten them up.
I'm sliding the CV joint back into place. With the wheel all the way turned out, I'm going to go ahead and re-secure where the strut goes into the lower control arm. Then, once you get that back in place, use the bolts, or you can also use a screw driver or a line-up tool. Get the hole to line up, get the bolt through, put the nut on the back side, and then tighten it up. You want to tighten that bolt up to about 95 to 100 foot-pounds. I'm going to line up the holes in the CV shaft with the solid axle, and reinstall the 12mm 12-point bolts. Once again, we'll fast-forward here. Reinstall the bolts first by hand. Make sure they're turning in there and you're not cross-threading any of the bolts. Then, tighten them up preliminarily. Then, what you want to do, is use a cross pattern. Tighten one up. Then, you want to tighten them up to about 25 foot pounds. Tighten one up, then go to the opposite one. Tighten that one up, and just keep with that pattern until they're all tight. I'm reinstalling the 13-mm nut on the end of the axle, the CV shaft. Reinstall the cap. Align your center hub cover with the pin here and the hole there.
We hope this helps you out. Brought to you by www.1AAuto.com, your source for quality replacement parts and the best service on the Internet. Please feel free to call us toll-free, 888-844-3393. We're the company that's here for you on the Internet and in person.