Okay, friends. One of the first things we need to do to get started on this job is to safely raise and support the truck. After you've done that, remove your center cover here. And then remove all six of your 21-millimeter lug nuts and get the wheel off.
Now that the wheel is off, let's go ahead and get this ABS wire disconnected. I'm just gonna come right along here, and then remove this 8-millimeter bolt.
Now let's go ahead and remove our anchor bolt for our flex hose for the brakes. The next thing we need to do is remove our two caliper bracket bolts. I'm just gonna start that in a couple threads. Now we're gonna remove our caliper and we're gonna hang it so it puts no pressure on the flex hose. Let's remove the rotor. Let's go ahead and remove our vacuum lines here. Let's go ahead and remove this little center cover. Now, let's remove our axle nut. Now we're just gonna push on this axle stub here. If it doesn't move, just go ahead and put the nut back on a few good threads and then give it a couple of loving bonks with a hammer.
Now let's go ahead and get this off of here. Let's go ahead and follow that ABS wire just continue disconnecting it up along the way here, comes up to this area, coming from the back. You're gonna see you have a little push button, go ahead and push on that and then separate the two. Now let's go ahead and get our cotter pin out for our tie rod. Set that aside for recycling. Let's remove the nut. Now we're gonna use a hammer and we're gonna hit right on the knuckle right here to try to break this free.
Now let's remove our upper ball joint nut. Now we're just gonna separate these two. So, now we're just gonna go ahead and put that nut on just a couple small threads here. That's gonna help prevent this knuckle from falling down when we relieve the lower ball joint. The next thing I wanna do is pull down on the upper control arm and we're gonna put it just like this, so it leaves a nice gap between the knuckle and the nut itself, so we can move down to the lower ball joint. Let's just leave this on a couple of threads.
Now the next thing that we need to do is carefully bonk on the knuckle and try to separate the ball joint from it. Let's remove that nut. Hold up on your knuckle, remove the lower ball joint nut. Bring it down and slide it out and away from the vehicle.
Now that we have the knuckle off of the truck, let's go ahead and unbolt this from here. But, before we do that, go ahead and spray it down with some penetrant spray. Let's give this a loving bonk. There it is friends.
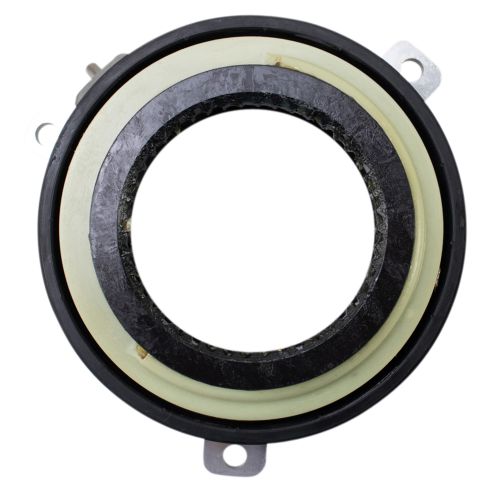
The next thing we're gonna do is come along the edges where the actuator was and just try to make sure we get up as much of this debris as possible.
Now that I've got the majority of the crud off the outside here, let's continue on to getting out some of the grease that's inside there. Now we're just gonna grab a little bit of high-temperature bearing grease, and we're gonna go ahead and coat this area. That's gonna help keep moisture out of there. Let's go ahead and get this installed. Lay it down on there, starting all three of your bolts and then we'll snug them up and torque them to 106-inch pounds.
All right. Let's go ahead and clean down this area. All right. Let's go ahead and get this axle back inside the bearing there. We're gonna slide the knuckle up, so we can get the ball joint started on the lower aspect here. There we are. Go ahead and give that axle a nice wiggle and it should wanna set right in and then it's gonna be coming out the other side here. Let's snug this up. Now we're gonna torque this to 85-foot pounds and then we'll continue on to putting on the cotter pin. Now the next thing you wanna do is line up the slots on the nut to the hole in the stud for the ball joint. If for some reason after you torque it, it doesn't line up, continue tightening until the very next slot does. The next thing we need to do is get our axle inside the knuckle as we push the knuckle up, you wanna be very careful not to damage your internal seal.
Now I'm just gonna take a pry bar, come in and under here, and then I'm gonna try to put the ball joint through the knuckle. Go ahead and start with that nut. Snug it up. Torque it to 85-foot pounds. What you wanna do next is make sure that you have your slot lined up with the hole on your ball joint stud. If for some reason it isn't, you need to continue tightening until it is. Next, take your cotter pin, go ahead and put it through the slot and the hole and then, of course, lock it down.
The next thing we're gonna wanna do is put on our axle nut. I like to use a little bit of red thread locker, bottom it out and then torque it to 20-foot pounds. Now that that's torqued, we're gonna go ahead and install this cover. You wanna make sure that it's not damaged in any way and slide it right on there, and bottom it out. Now before we can continue on to putting the brakes together, we wanna make sure that the hub mating surface in the back of the rotor mating surface, is nice and clean. After you've done that, apply a little bit of copper Never-Seez.
Let's go ahead and get our rotor back on here. I'm gonna start a lug nut on so it holds the rotor for me. Let's get our caliper reattached. We're gonna use some thread locker, of course, on the bolts. Start them both in and then we're gonna torque them to 185-foot pounds. Let's get our vacuum lines reattached. Now we're gonna reconnect in our bracket. ABS wire. Let's snug them up. Let's start resecuring our ABS wire, make sure you go up and in between the brake line here, just like that.
This looks good for now. Make my way down here. Get a little push clip. It's gonna go into your hole right there. The rest of it should just line up, we'll continue on. Making our way up here, let's make sure we reconnect in our ABS wire. Listen for a click. And then, of course, give it a nice tug. After that, you wanna make sure that you secure it back in up here. Make sure everything's nice and secured and it's definitely not rubbing up against anything and there's no way it can get caught.
Let's get the outer tie rod end on here. Snug this up, torque it to 85-foot pounds. The next thing we wanna do is make sure that our slots line up with the hole in the stud for the tie rod. If for some reason it doesn't, you need to continue tightening until the next one does. Install your locking cotter pin and then lock it down. Let's get the wheel back up on here. Start all of your lug nuts, snug them up, and torque them to 150-foot pounds. Torqued. Okay, friends. So, that's pretty much it, aside from making sure you pump up that brake pedal and then get yourself safely down to an alignment shop.