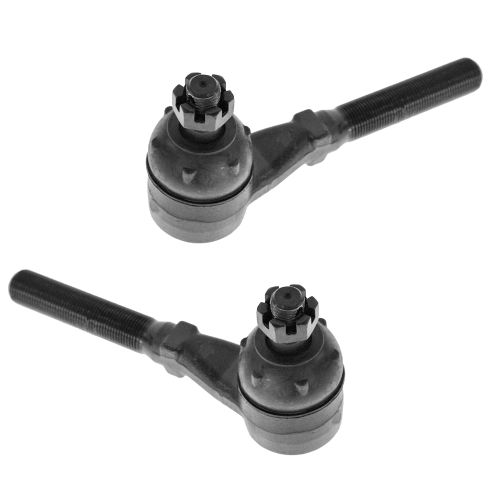
Actual Measurements are not listed or available. Our parts are exact replacements for your vehicle's OEM parts. As long as your vehicle specifications match up with our listing, these parts will directly fit and function like the originals.
Replaces
PSA54822
This part doesn’t fit a . Select from parts that fit.
Specify your vehicle's year, make and model to guarantee fit.
This part does not fit a .
About TRQ:
TRQ is a trusted brand dedicated to making every repair a success story by combining premium parts with easy installation. Each TRQ part is engineered by a team of automotive experts to meet or exceed OEM standards, delivering enhanced performance and maximum longevity. With rigorous in-house testing, the brand ensures superior fit and function across every product line. TRQ also provides customers with best-in-class, step-by-step installation videos—so you can complete repairs with confidence, whether you're a first-time DIYer or an industry professional.
Install Tip: When replacing steering components, have a professional alignment performed afterwards. This ensures proper tracking and even tire wear.
Our steering and suspension components are pre-greased and sealed for long life and do not require the extra maintenance typically required by greaseable versions.
Attention California Customers:
WARNING: This product can expose you to chemicals including Lead and Lead Compounds, which are known to the State of California to cause cancer, and birth defects or other reproductive harm. For more information, go to www.P65Warnings.ca.gov.
This part fits 5 vehicles spanning 1997-2004.
| Year | Make | Model | Description |
|---|---|---|---|
| 1997-2002 | Ford | Expedition | Ford Expedition 4 Wheel Drive Front Driver & Passenger Side Inner 2 Piece Tie Rod Set TRQ PSA54822 |
| 2004 | Ford | F150 Heritage Truck | Ford F150 Heritage Truck 4 Wheel Drive Front Driver & Passenger Side Inner 2 Piece Tie Rod Set TRQ PSA54822 |
| 1997-2003 | Ford | F150 Truck | Ford F150 Truck 4 Wheel Drive Front Driver & Passenger Side Inner 2 Piece Tie Rod Set TRQ PSA54822 |
| 1997-1999 | Ford | F250 Truck | Ford F250 Truck 4 Wheel Drive Front Driver & Passenger Side Inner 2 Piece Tie Rod Set TRQ PSA54822 |
| 1998-2002 | Lincoln | Navigator | Lincoln Navigator 4 Wheel Drive Front Driver & Passenger Side Inner 2 Piece Tie Rod Set TRQ PSA54822 |
| Brand Label | Part Number |
|---|---|
| MOOG Chassis Products | ES3369T |
| MOOG Chassis Products | ES3370T |
| DIY Solutions | SUS00861 |
| DIY Solutions | SUS07420 |
| DIY Solutions | SUS07421 |
| Mevotech | MES3369T |
| Mevotech | MES3370T |
| Mevotech Supreme | MES3369T |
| Mevotech Supreme | MES3370T |
This item may be interchangeable with parts from other brands with the above part numbers. This information is provided only for reference and does not guarantee that the item you are purchasing is identical to parts with part numbers from the brands listed above. To confirm that this item fits your vehicle, use the above "Check Vehicle Fit" option.
Lifetime Warranty
This item is backed by our limited lifetime warranty. In the event that this item should fail due to manufacturing defects during intended use, we will replace the part free of charge. This warranty covers the cost of the part only.
FREE Shipping is standard on orders shipped to the lower 48 States (Contiguous United States). Standard shipping charges apply to Hawaii and Alaska.
Shipping is not available to a P.O. Box, APO/FPO/DPO addresses, US Territories, or Canada for this item.
Expedited is available on checkout to the United States, excluding Alaska, Hawaii.
Final shipping costs are available at checkout.

Created on:
Tools used
Brought to you by 1AAuto.com your source for quality replacement parts and the best service on the internet. Hi, I'm Mike Green. I'm one of the owners of 1A Auto. I want to help you save time and money repairing or maintaining your vehicle. I'm going to use my 20-plus years experience restoring and repairing cars and trucks like this to show you the correct way to install parts from 1AAuto.com. The right parts, installed correctly that's going to save you time and money. Thank you and enjoy the video.
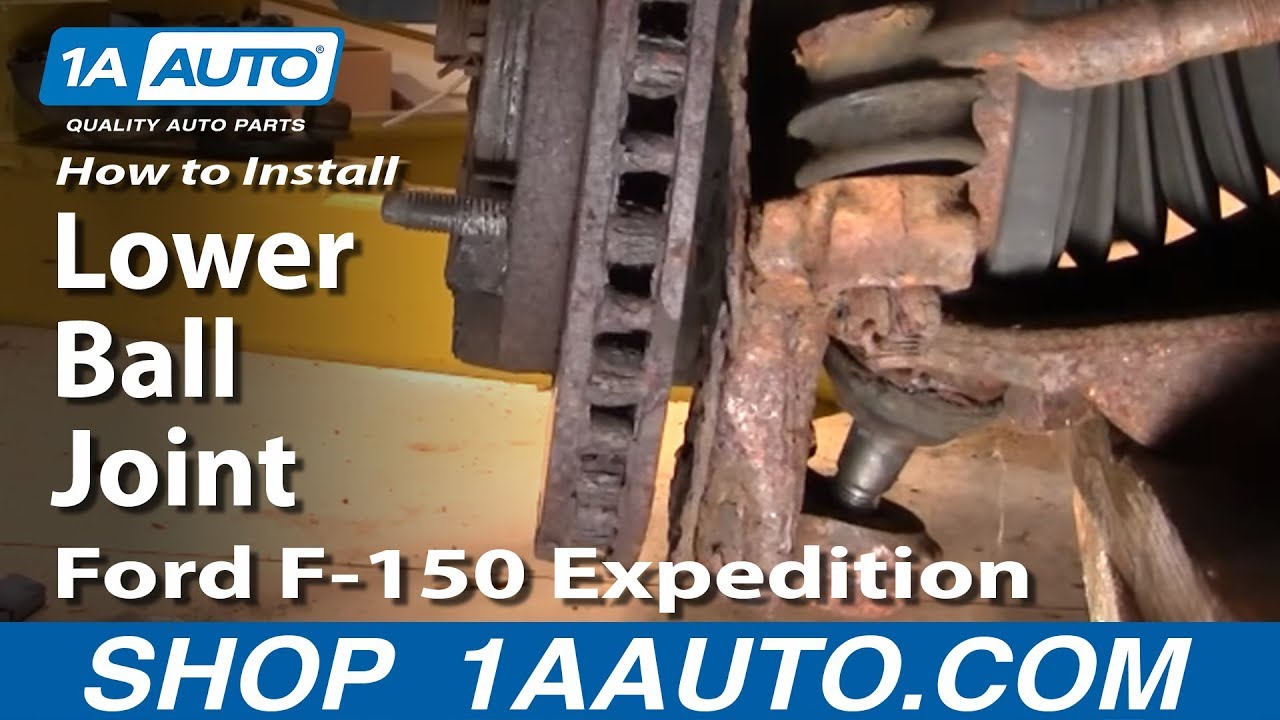
This video is part one of a two-part series, replacing the ball joint in this '97 Expedition. In this video, we basically detail removing the old ball joint. This is the same for all the Expeditions, F150s, Explorers, a whole bunch of the Ford trucks and SUVs from this era.
Here's a list of the tools that we use on the Expedition. If you're doing a vehicle different from the Expedition, some of these sizes may differ. You will need heavy-duty tools. You're not going to want to try this with the 20-piece set Uncle Joe gave you for Christmas. This is heavy work. You'll need jack and jack stands, metric sockets 13-27 mm, standard sockets 1/2 inch to 7/8, you'll need a 35 mm socket, a 12 point 13 mm socket, ratchets extensions and a breaker bar or pipe because you will need to get some leverage on some of those bigger bolts and things, pliers, hammer, a heavy punch, ball joint removal tool, ball joint press, large flat blade screwdriver, and a paint marker or a old can of spray paint. The ball joint removal tool I'd recommend if you're going to be doing a lot of your own work. It's a pretty affordable tool to go out and get. Ball joint press might be something that you want to borrow.
Obviously, you're going to start by removing your cap. If you don't have the benefit of air tools, what you'll want to do is start with your wheel on the ground. With your wheel on the ground, there are probably three things you're going to want to do. Loosen your lug nuts. Then there's a 35 mm bolt in the center that holds the axle into the hub you're going to want to take the cotter pin and the cover off of that and loosen that 35 mm bolt. Also, go underneath and there are seven 13 mm 12 point bolts that hold your axle to your front drive. You'll want to just loosen those seven bolts. Much easier to loosen all these bolts with your tire on the ground held in place if you don't have all the tools that I have access to. You're going to want to loosen up your torsion bar. Your torsion bar is actually your spring. This is what supports the vehicle. I'm just going to take a little silver spray paint ... That way, when I back that bolt out, I'll know where it originally was.
Using an 18 mm socket and a ratchet, I'm going to loosen the torsion bar tension nut, or bolt, and you can basically pull it all the way out and then just turn it back in a few turns. You just want to loosen it up and take as much tension off the torsion bar as you can. You can see as I'm done, you can see where there's no paint on the threads, that that is how far you would want to retighten it. Now we're going to undo our tie rod end here. I'm just going to speed it up here. The cotter pin's very rusty, so first so first I break it with the pliers. Then I use a hammer and punch and just kind of keep working and breaking small pieces off until I can drive it through and out of the tie rod end. Now I'm pounding a 21 mm socket onto that nut because it was quite rusty. I just want to make sure I get a good socket that gets a good grip on it.
I've got a bar on here. Put a piece of pipe on it for some more leverage. Hopefully it comes apart. Just fast forward here as I switch over to a ratchet and remove the nut the rest of the way. Here I'm going to put a tie rod, it's a tie rod and ball joint tool, but obviously I'm using it to do a tie rod right now. By using this tool, I can assure that I can just reassemble my tie rod. I won't damage the tie rod by removing it this way. Next, I'm going to remove the stabilizer link, so I'm going to spray the top of it with some penetrating oil and let it sit for awhile. These stabilizer links are sometimes difficult to get apart. You can use hand tools. They will come apart. I just chose to use a impact wrench just to make it easier. I have a 9/16 socket on the bottom and a 14 mm socket on the top.
Use a hammer and pound down on that bolt. Then use a punch, see if you can it to go down through the sleeve. I end up actually having to use vice-grips and a wrench. Obviously, you also want to remove the other side so you can move your stabilizer bar around easily. What I'm going to do here, put set of vice-grips onto this shaft, tighter here. Now we're going to remove the half shaft of the CV axle. As I said in the beginning of the video, these are the bolts that if you don't have all the tools that I have, it might be easier to just loosen them while the vehicle's on the ground. You can see I use a big, large crowbar to hold the hub in place while I'm loosening those bolts.
You can see I spin it, loosen one of the bolts, spin it some more, loosen another bolt. If you were actually doing this with your vehicle on the ground, you'd have to probably loosen one or two of the bolts, then roll your car a little bit, put it in park, put the emergency brake on, loosen a couple more, and keep repeating that process.
Once it's unbolted, pull it down and off. I use a pair of pliers and either break off the ends or just straighten out the cotter pin and pull it out. Okay, 35 mm ... As I said in the beginning, if you don't have impact tools and this is easier with the tire on and on the ground, your other option would be to have a helper hold the brakes while you remove it.
What I do is give it one tap and just watch it, see if it moves. Actually, it moves pretty freely. You can pull your stabilizer bar up and out of the way. Pull your axle down towards the front. Then push it, lift it up, push it out. I've got the vehicle support under the frame. Then I've got my jack right under the control arm. You can see there is the bolt for the ball joint, and then there's the jack. I have a piece of the wood on there so I can easily access that ball joint bolt, as well as get a puller on there. Now I can jack it up. You can see, without that torsion bar tightened, the suspension travels here very easily.
Now I'm going to use pliers to break off and remove the cotter pin from the lower bolt. It ends up being kind of a rusty mess, so I actually use a hammer and punch and pretty much just break it away as much as possible so I can get that bolt off. Now a 27 mm socket put it on there, use a little hammer, make sure it goes all the way on. Got a breaker bar on there, actually you're going to take piece of pipe, put it on, give me some extra leverage. It's coming loose. Just one note here: It will help if you take your tie rod and put it back into the steering knuckle and just put the bolt on. That tie rod will hold things in place while you loosen that ball joint nut.
Just speed it up as I change over to my ratchet and take that bolt most of the way off. While my bolt's still on there, take my ball joint removal tool- This just, doing it this way, allows you to break it free without things falling down. Finish removing this bolt. Get your control arm on up. Pull the steering knuckle down and off.
There's a snap ring that holds the ball joint in place. You can use snap ring pliers. Mine was pretty rusty so I used a screwdriver and a hammer to just kind of pry it off and pop it off.
Now you're going to take a ball joint pulling tool, put the collar up on there. With this particular press use a 7/8 socket, put one on top there, and just tighten down the press. Traded my ratchet handle for my breaker bar. I'm going to speed it up here. What I did there was I created a whole lot of pressure by tightening it down. Then I used a hammer, gave it a good whack that kind of broke it free, and then the press just works it the rest of the way out. There's my old ball joint out.
Good a place as any to end it. Check out part two for the reassembly.
We hope this helps you out. Brought to you by www.1AAuto.com, your source for quality replacement parts and the best service on the Internet. Please feel free to call us toll-free, 888-844-3393. We're the company that's here for you on the Internet and in person.

Tools used
Hi, I'm Mike from 1A Auto. We've been selling auto parts for over 30 years. We're dedicated to delivering quality auto parts, expert customer service, fast and free shipping, all backed by our 100% satisfaction guarantee. Visit us at 1AAuto.com, your trusted source for quality auto parts.
So in order to start this project you want to go ahead and loosen the wheel and the lug nuts here. We're going to use a breaker bar with a 19 millimeter socket. So next we're going to go ahead and raise and support your vehicle. You can use a jack and jack stands. In this case here we're using a lift to make it a little bit easier. Just go ahead and remove the lug nuts here just by using that socket because we've already loosened those. With the lug nuts removed we can now go ahead and remove the wheel and tire.
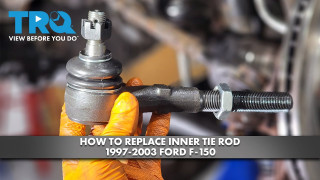
We're going to go ahead and replace this inner tir rod end here. We first have to start by loosening this jamb nut. Now, the jamb nut can vary in size, depending on your application. That's why we're choosing to use an adjustable wrench right here. We just want to loosen that. We don't want to crank it out so many threads, but just loosen that. All right.
The next step here, is we have to remove the cotter pin right here, that goes through the castle nut. We're going to start by getting some pliers in here. Pull that cotter pin right out. Next use your 13/16” and loosen that. Okay. I usually keep the castle nut on, just a few threads at this point.
You can try one of two methods. You can use a pickle fork to get between here and the center link and trying to pop that off, or, in your driveway, use the hammer, and you want to strike the end here. We're going to go ahead and try putting the pickle fork in here. In this case here, that didn't actually work, trying to use the pickle fork to remove this. What we're going to do is, I'm going to twist in on the castle nut, just so that the castle nut is flush with the top of the ball joint end here unit, on the inner tire rod.
We're going to try and hit this here, and push this out. All right. We tried the pickle fork. Didn't work. We tried leveling off the nut, and hitting this with the hammer, cause obviously this whole component's going to be replaced. In this case here, it looks like we're going to try some heat. Always be aware of your surroundings when using a torch. You want to make sure that you have fire extinguisher, or something to extinguish the fire, in case one should erupt. All right. We're going to try hitting this with the hammer. There we go.
We took advantage of this torn boot, and took some locking pliers here, put it right inside, and we crimp down right on that. We're finally able to get this nut to come off. All right. Now that this is free, go ahead and pull that out of the way.
Now in order to keep your base preliminary alignment, this here, the inner tire rod end, needs to thread in the same amount. What we're going to do is, we're going to take our new part, okay? We're going to unthread this here. We're going to count the amount of times that this threads out in a full revolution. Then when we're on the reassembly, we'll be able to get the same amount of count going in. All right. 26 full revolutions. Okay? Want to go ahead and unthread this here.
Here we have the old part. Here we have the new part from 1A Auto. It looks identical and identical installation. Now we want to go ahead and take our jam nut. We want to get this threaded on.
Now for the installation into the adjuster sleeve. All right. You want to go ahead and count the same amount of turns in, and then we'll go ahead and lock up the adjuster nut. Okay. So, you want to go ahead and bring this adjuster nut in. We're not going to lock that yet. We just want to snug it a little bit.
Bring this around. Obviously remove the castle nut. Now, you want to pay attention to this here on the installation, because you have a hole right here for your cotter pin to go back into, to anchor the castle nut. All right? We're going to spin this around. Get that lined up. Okay. So, on this nut, this is actually a ¾”. It may vary, depending on the application of vehicle. All right.
We'll go ahead and tighten this, and want to line up one of the grooves in the castle nut with the hole in the joint. Then we're going to go ahead and install the cotter pin. We'll go ahead and bend that over. This will pretty much lock that cotter pin. It'll lock that castle nut from coming back out. Just go ahead and bend this over here. Your final step is to go ahead and tighten up the adjuster sleeve anchoring nut.
All right, I'm going to go ahead and reinstall the tire. I'm going to go ahead and reinstall the lug nuts here. You want to get a few threads caught on all of these here. These lug nuts are 19 millimeters. So we're just going to snug these, bottom it out. Bottom the wheel out to the rotor. We're going to lower the vehicle down onto its own weight, and then do a final torque. With the vehicle on the ground, we're going to do a final torque of the wheel which is between 83 and 112 foot pounds. We're going to do it in a star pattern. All right, just double check the first one. She's all set.
Thanks for watching. Visit us at 1AAuto.com for quality auto parts, fast and free shipping, and the best customer service in the industry.
PSA54822
Actual Measurements are not listed or available. Our parts are exact replacements for your vehicle's OEM parts. As long as your vehicle specifications match up with our listing, these parts will directly fit and function like the originals.
877-844-3393
Monday - Friday 8:00am - 9:30pm ET
Saturday - Sunday 8:00am - 4:30pm ET
Check Your Email
We sent a verification email to .
Click the Verify Email button in the email to submit your question.
This extra step helps prevent spam.
Specify your vehicle's year, make and model to guarantee fit.
This part does not fit a .
Before proceeding,
select your Vehicle, to verify this Part will fit.
If your vehicle isn't listed, search Tie Rods & Adjusting Sleeves
This part will only fit a vehicle with these options.