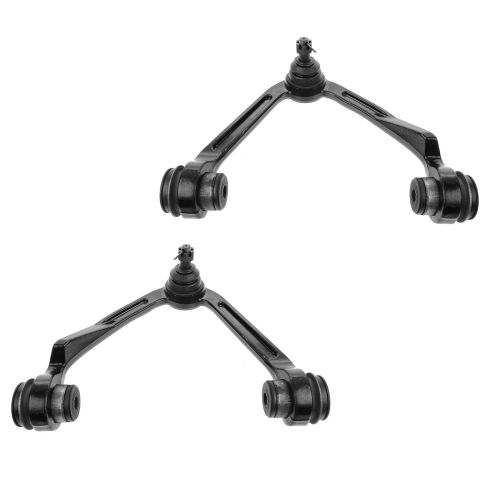
1ASFK00076-Ford Lincoln Front Driver & Passenger Side Upper 2 Piece Control Arm with Ball Joint Set TRQ PSA62149

Replaces
Ford Lincoln Front Driver & Passenger Side Upper 2 Piece Control Arm with Ball Joint Set TRQ PSA62149

Product Reviews
Loading reviews
4.75/ 5.0
20
20 reviews
Ok
February 16, 2017
Covers over the ball joint was cracked so I had to reuse one that I had from the old ball joint
Replace parts
December 6, 2017
Needed to replace the front ball joints on my truck. I was able to get it done quickly and easily. I didnt have any issues and loved how easy it was to find parts on this site. Piece of cake
Upper Control Arm
January 20, 2018
The upper control uppers from 1A auto are awesome. They follows the OEM specs perfectly. The price was great, and the product was awesome. I would highly recommend anything from 1A auto!
Upper control arms order
February 4, 2018
I had ordered a set of upper control arms for my F-150 . This company not only sold the control arms but the bushings and upper ball joint was already in there. They had beat all there competition. For researched all the different sites and found an original equipment parts for an excellent price. And the install I performed myself. was easy . Later that day I had informed all of my friends that build and customize there 4 wheel drives about your prices and outstanding service. Thanks for the good experience. Rico
Perfect fit
April 23, 2018
Ordered these parts because my truck hadn't been properly taken care of before I bought it. They fit perfectly, were easy to install (I watched the videos they provided) and I don't have to worry about greasing them later on. Getting my old parts off was a different story. I will definitely be getting my parts from 1A Auto from now on!!
2002 Ford Expedition control arms
October 21, 2018
Once again 1aAuto comes through with great service, a great product, at a great price. Thank you for the awesome service and the free shipping. You have quickly become my go-to parts store.
99 F150 control arm
July 26, 2019
These fit my truck exactly. Greats parts at much lower prices. Shop here first. Free shipping and fast delivery.
1997 Ford Expedition 4 wheel drive
January 23, 2020
Installed super easy and no problems.. Excellent fit and durable.
Quality parts
January 25, 2020
Quality parts and affordable
Fit
February 4, 2020
Fit my f150 4x4 perfect. No issue. If you buy make sure you read 1a q and a for correct part # for side it goes on.
March 16, 2020
Parts came in within a few days and were just like OEM. Very good quality parts. Im satisfied with it
Perfect fit !
September 5, 2020
The easiest upper control arms Ive ever installed. Perfect fit !
2001 Ford F-150
February 4, 2021
Awesome upper control arm for the price. Very easy to install after watching 1AAuto video. Looks very similar to stock control arm. So far no issues but make sure you get an alignment after install.
Perfect fit would bye again.
July 7, 2021
Upper control arms and ball joints.
Perfect fit for my Ford
August 1, 2022
Fit perfectly on my 2001 Ford F-150. Although I do wish it had a grease zert available.
Great price and matched original equipment.
May 17, 2023
Perfect fit up. Took little over an hour to replace. I would recommend buying.
June 21, 2023
Parts were excellent. Price and shipping speed were awesome, thanks
Not the best quality.
June 22, 2023
I bought a set of these about 2 years ago, got them installed, got the alignment done. I was good to go. But recently I started hearing a clunking noise going over some small pot holes (windows were down). So I check to see if something was loose, like the castle nut. Nope, that was torqued to 89 foot pounds as per specs. So I pressed down on the upper control arm and I can see and feel movement on the ball joint. Not a lot of movement, but there shouldn't be any for a joint that is only 2 years old.
Yup, it has a life time warranty but I'd have to pay for shipping to return it...
So I'll call it a loss, and buy a new set of moogs and not have to worry about it failing when I'm on a long road trip.
As described
August 25, 2024
Great BBB fit
October 2, 2024
Just like factory installed easy
Customer Q&A
Are the ball joints replaceable?
July 26, 2019
10
Thank you for the inquiry. The ball joints are not replaceable and they are machines into the arm rather than pressed in after the arm is manufactured.
July 27, 2019
Curtis L
There are two part numbers which one is driver side and passenger side?
January 10, 2020
10
Thanks for your inquiry. The driver side part number is 1ASFU00021 and the passenger side part number is 1ASFU00022. Please let us know if we can be of any further assistance.
January 10, 2020
Peter L
which one goes on each side one says R and the other L at the end of the numbers? I have a 20 and a 21. Not 21 and 22. Please help.
May 18, 2021
10
Hello R would be for the right side passenger side and L would be for the left side driver side.
May 18, 2021
Ricale A
i bought these but think i got a 4 inch lift do i need different control arms?
May 23, 2021
10
These control arms are meant for the stock ride height only. You would need different control arms for a 4 inch lift.
May 24, 2021
Andra M


