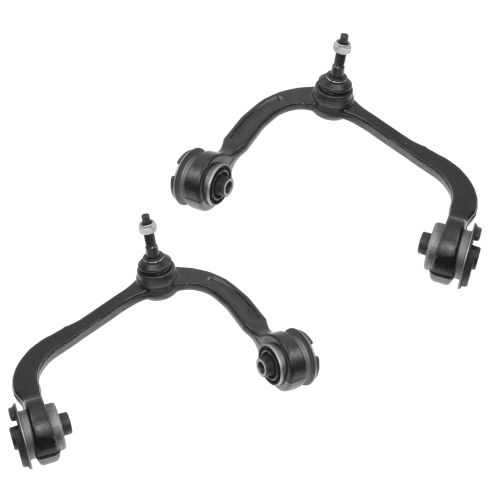
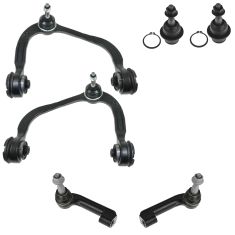
1ASFK00180-Ford Lincoln Front Driver & Passenger Side Upper 2 Piece Control Arm with Ball Joint Set TRQ PSA62186
Replaces
2011 Ford Expedition Front Driver & Passenger Side Upper 2 Piece Control Arm with Ball Joint Set TRQ PSA62186
Product Reviews
Loading reviews
4.79/ 5.0
34
34 reviews
2014 ford f150 control arms
November 10, 2017
Nice product, oem spec, fast shipping. Awesome customer service.
Exact fit
November 15, 2017
These upper control arms are an exact fit for my Ford truck, easy installation and fast shipping. I highly recommend them!!
Awesome!
April 20, 2018
These fit perfect. and the videos are so awesome. You don't have to remove the CV axle and the swing arm connection to do this swap. love 1A auto. way better than others.
New control arms
July 25, 2018
Order to set a front control Arms for my 2nd order. Again everything fit perfectly. And A 1's website Has disassemble and assembly videos Which made the installation easy. Great place to buy your auto parts, Fast delivery and perfect fit....
Good price
July 31, 2018
Good price, seems to be good quality and fast shipping
excellent
August 18, 2018
Excellent product. Fast shipping. You saved me a ton of money and your videos were a huge help.
2005 f150 suspension
October 4, 2018
Found all the parts I ordered in perfect condition and fitment parts also arrived in good time .upper control arms ,right and left,outer tie rods , and lower ball joints. All parts installed exactly no surprises.! Also 1aauto was always willing to follow up with any questions or problems.I am totally satisfied with the products and service.
Service
October 12, 2018
I am very pleased with the parts and services and shipping just great people to do Business with thanks Victor Lockert
October 14, 2018
Have recommended web site,inexpensive parts quickly delivered to your door
Control arm 2008 F-150 FX4
March 18, 2019
Excellent, high quality parts from 1aauto. Fit exactly as needed and definitely affordable. Will buy again.
Fast delivery! Great product!
September 20, 2019
Ordered a pair of upper ball joints. Never ordered from here before, but the price was great! Did not disappoint me! Fast delivery and great product. Will order from here from now on!
upper control arm
May 18, 2020
The parts looked like what was there. Thanks. Prompter service than promised and priced right. Your website search needs help though...
Great
August 20, 2020
Order was a breeze and parts arrived quickly and great quality.
Good replacements
October 17, 2020
Replaced of F150 and installed nicely. No issues and shipped in good box.
Upper control arms
November 3, 2020
I ordered two new upper control arms for my f150 got them 2 days late but when arrived were in excellent condition and went the extra step to cap the ball joint with plastic so it would not be damaged in shipping
Ford f150
November 4, 2020
I like this parts is perfect for my truck and is easy to instal
Thanks 1aauto
Control arms
April 11, 2021
Very good quality easy to install fit perfectly and was perfect on delivery. Would recommend for parts and quality
Upper control arms
May 19, 2021
Ordered control arms on Monday they were here on Wednesday ,just like they said. My day off I was able to complete the task and up and running and back to work on Thursday. They were right on
Could not be easier
August 14, 2021
Awesome they work perfectly
2004 Ford F-150 Lariat Front Upper Control Arms
September 3, 2021
Theyre the perfect fit! Ive been driving with them for a couple of weeks now and havent had any issues. I recommend them!
October 10, 2021
Working good good price
!!!!!!!! FAST DELIVERY
November 18, 2021
I Ordered them on 11/17/2021 and got them the next day WOW, talk about fast delivery, I will installed them this weekend, great jobs guys
Great fit
January 23, 2022
Arrived quick and the install was simple
April 4, 2022
Good quality. Easy to install and no issues.
Suspension
May 26, 2022
perfect fit
July 3, 2022
So far so good
May 27, 2023
Great parts. Always fit perfect
June 27, 2023
I like 1A Auto the parts are great and they get my parts to me on a timely matter, I shop with 1A Auto when I need parts. Thank you for being there and reasonable on your parts.
July 28, 2023
Really good product
100% Recommend Buying these
July 29, 2023
Great product and easy installation. Exactly like OEM.
10/10
September 16, 2023
Best stuff on the market for the price I will always shop here
Built to lasts
November 4, 2023
Built to last. Exceptionally good control arm. No more overseas car parts for me! Im 1A all the way
Highly satisfied 1A Auto customer
May 21, 2024
The 2-piece upper control arm with ball joints were the perfect fit! The metal and bushings are made better than the factory OEM I took off my 2013 ford F150 FX4. I went to several different dealerships looking for exactly what I received from 1A Auto. I highly recommend 1A AUTO for your replacement parts.
Didn't even make it 20k miles!
October 14, 2024
Terrible Product!!! I made the mistake of buying these upper control arms for my 2013 F150 when money was tight?now two years later and less than 20k miles later the upper ball joints are shot. This is at a product of improper installation, simply a cheap, poor quality product that is now going to cost me extra time and money. The product is an exact fit and cheap so I understand all the positive reviews, but I can attest that they don't hold up.
Customer Q&A
Do these come with all the hardware needed or will I have to use the old bolts and stuff?
October 15, 2019
10
Will have to reuse factory bolts.
October 15, 2019
J P
Do the ball joints come already greased or will they need to be greased prior to installation?
February 12, 2020
10
I dont remember, been awhile. I would grease them just to make sure.
February 13, 2020
James W
10
Thank you for your inquiry! These will either come sealed with grease pre-packed in them, or they will come serviceable with a grease fitting. If they do not have a hole for a fitting then they will be packed with grease ready to install. If they come with a hole for a fitting then you will have to grease them up and remember to grease them from time to time. Most of these suspension parts are supplied to us are not serviceable.
February 13, 2020
T I
Will this work with a 3" level, or will it scrape struts?
February 9, 2022
10
These parts will not work with a 3" level. They are made for vehicles with the stock ride height and no modifications.
February 9, 2022
Andra M
10
I'm not sure. I purchased them and got my mechanic to install them. You have to ask the seller that question
February 13, 2022
Raphell S
Ford is a registered trademark of Ford Motor Company. 1A Auto is not affiliated with or sponsored by Ford or Ford Motor Company.
See all trademarks.


