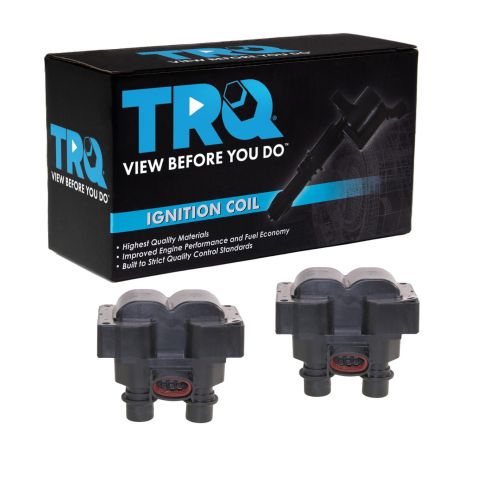
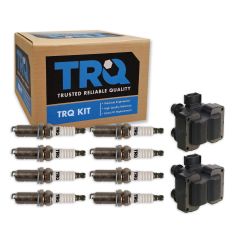
TRQ ignition coils will have your engine running like new. TRQ ignition coils are manufactured to precise specifications using premium raw materials to optimize each vehicle's ignition system. To ensure peak performance, TRQ recommends replacing ignition coils in sets to prevent electrical output imbalances. All products are fit and road-tested in our Massachusetts R&D facility to ensure we deliver on our promise of Trusted Reliable Quality.
Product Features
High dielectric epoxy and reinforced bobbins for extended service life
Rubber, Silicone, or Phenolic Resin Shell: Prevents premature boot wear
Application Specific Design: No modifications required
Complete repair to restore your engine to like-new condition
Item Condition:New
Attention California Customers:
WARNING: This product can expose you to chemicals including Lead and Lead Compounds, which are known to the State of California to cause cancer, and birth defects or other reproductive harm. For more information, go to www.P65Warnings.ca.gov.
Lifetime Warranty
This item is backed by our limited lifetime warranty. In the event that this item should fail due to manufacturing defects during intended use, we will replace the part free of charge. This warranty covers the cost of the part only.
Returns: Parts with electrical components cannot be returned once installed.
FREE Shipping is standard on Orders shipped to the lower 48 States (Contiguous United States). Standard shipping charges apply to Hawaii, Alaska and US Territories. Shipping is not available to Canada.
Expedited is available on checkout to the United States, excluding Alaska, Hawaii and US Territories as well as P.O. Boxes and APO/FPO/DPO addresses. Final shipping costs are available at checkout.
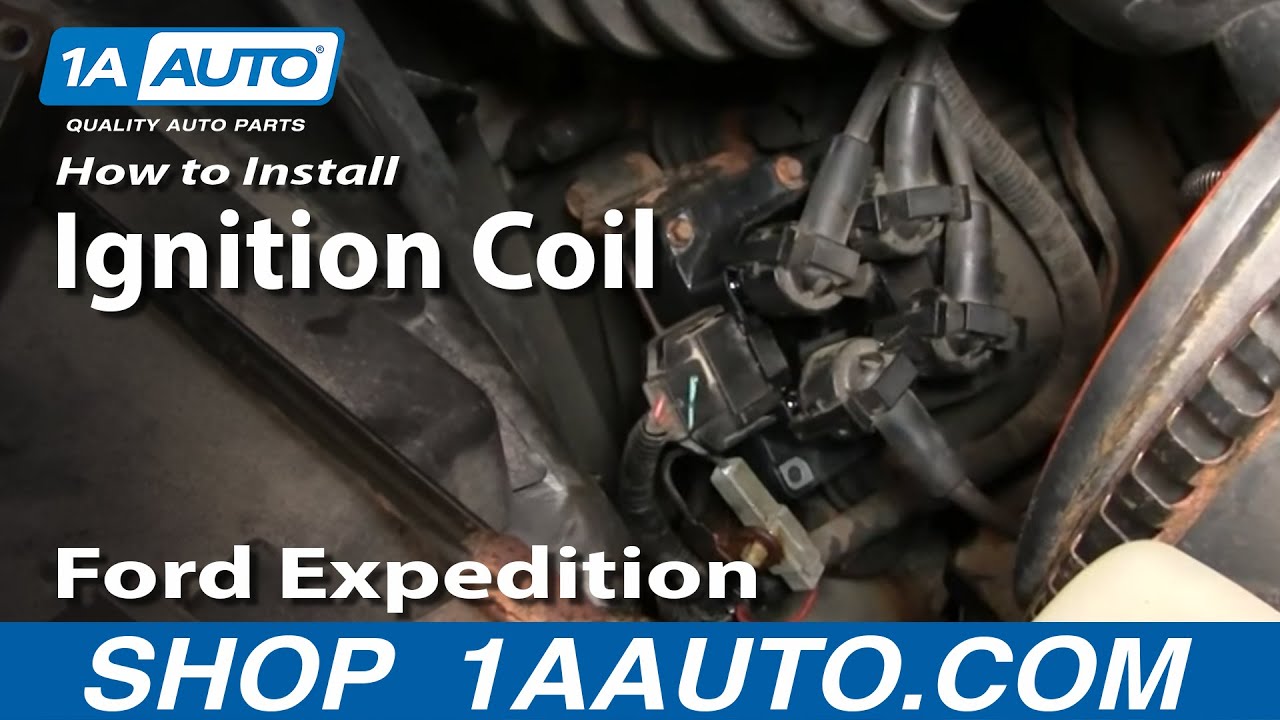
How To Replace Ignition Coil Ford 1997-2002 Expedition
How to Replace Drivers Side Ignition Coil 1997-99 V8 4-6L Ford F-150
How to Replace Passenger Side Ignition Coil 1997-99 4-6L V8 Ford F-150
Created on:
Tools used
Socket Extensions
Rust Penetrant
7mm Socket
Ratchet
1. Access the ignition coil
Pull the airbox off and out of the way.
2. Remove the ignition coil
Remove the four 7mm bolts.
Use penetrating oil to help remove the bolts.
Mark the spark plugs for reinstallation later.
Unplug the spark plugs.
Disconnect the wiring harness.
Remove the coil.
3. Install the new ignition coil
Clip in the wiring harness.
Bolt the four 7mm bolts in.
Plug the spark plugs back in, using your marks to put them in the correct locations.
Put the airbag back into place.
Brought to you by 1AAuto.com, your source for quality replacement parts and the best service on the internet.
Hi, I'm Mike Green, I'm one of the owners of 1AAuto. I want to help you save time and money repairing and maintaining your vehicle. I'm going to use my twenty plus years' experience restoring and repairing cars and trucks like this to show you the correct way to install parts from 1aauto.com The right parts installed correctly, that's going to save you time and money. Thank you and enjoy the video.
In this video, we're going to replace the ignition coil on this '97 Expedition or one of the ignition coils. These coils, Ford used on many cars and trucks with either the 4 cylinder they either used one coil for 4 cylinder, or V8 they use two coils. This thing can fit anything from a 2.0 liter 4 cylinder to a 5.4 liter V8. The only tool you'll need is a ratchet and a socket with extension, a 7mm socket. Only the location of the coils is going to vary depending on what vehicle you have.
To replace this driver side coil, first you need to kind of get your air box and just kind of bring it up and move it out of the way. Now that we got the air box out of the way there's four 7mm bolts here. One here, here, down here, and then back there you can't really see. You can see probably the top of my can of penetrant. I'm going to do the best I can to use this little red tube to spray some penetrant on all the bolts under here and that will make them a little easier to come out.
Ok, so I've run into little bit of a problem here. You can see that these two bolts came out and actually my third bolt over here that you can't see is out. This bolt here, the head was so rusty it actually stripped, so what I'm going to do I'm going to take a marker and I'm going to start with the one closest to me. Mark that as one, two, three. Make sure we got two marks there, one, two three, and the one without marks is the fourth one. That way I know the number one stared closest to me and then clockwise around. Now I can unhook these. Now what I'm going to do, I'm actually just going to take my coil, and unfortunately on a rusty bolt in a truck like this, it's kind of the only way. What I did is I just broke that bolt. I'll be able to put my coil back on with three bolts and, not ideal, but it will hold it just fine. Hope that when you're doing your truck, it will all come apart easy. But if not, if you lose one bolt, it'll be ok.
Ok so I'm ready to bolt in my new one, I've got a little bit of a problem here. This one bolts on, on top here where our broken bolt went so I can't quite get it there so what I'm actually going to do is I'm going to put this clip on right here and then I'm going to put the coil on top of it so it's pinched down in there, then I'll start my bolts. I'll get these going and I'll tighten them up and we'll be all set. Plug this in and then these will kind of settle down right where they were anyways. There's my number one mark very close to me. That's got three marks on it, two marks. Last but not least, this guy has no marks. Now we can start her up and make sure everything's running good. Put the air box back here. Everything sounds good!
We hope this helps you out. Brought to you by www.1AAuto.com, your source for quality replacement parts and the best service on the internet. Please feel free to call us toll free 888-844-3393. We're the company that's here for you on the internet and in person.
Tools used
Socket Extensions
Flat Blade Screwdriver
7mm Socket
Ratchet
1. Removing the Air Filter Box
Loosen the air intake hose clamp with a flat blade screwdriver
Disconnect the hose from the air filter box
Pop out the air filter box
Put the filter box aside
2. Transferring the Ignition Coil Wires
Hold the new ignition coil pack next to the old ignition coil
Pop one ignition coil wire off the old coil pack
Pop the wire onto the corresponding spot on the new coil pack
Repeat these steps for the remaining three ignition coil wires
Put the new coil pack aside
3. Removing the Ignition Coil
Disconnect the ignition coil wiring harness
Remove the four 7mm bolts from the ignition coil
Pull the ignition coil off the engine
Pull the ignition coil wiring clip out of the coil
4. Installing the Ignition Coil
Put the new ignition coil into place
Start the four 7mm bolts into the ignition coil
Tighten the four 7mm bolts
Connect the ignition coil wiring harness
5. Installing the Air Filter Box
Connect the air filter box to the hose
Push the air filter box pins into place
Tighten the air hose clamp with a flat blade screwdriver
Hi, I'm Mike from 1A Auto. We've been selling auto parts for over 30 years. We're dedicated to delivering quality auto parts, expert customer service, fast and free shipping, all backed by our 100% satisfaction guarantee. Visit us at 1AAuto.com, your trusted source for quality auto parts.
We're going to unscrew the clamp that's holding the air filter box in place, and once it's nice and loose like so, you can lift straight up on the air filter box and it will pop right out. You can see on the bottom it has these two posts that it sits in, and they slide right into these rubber grommets in the body itself. You can just set that aside and get it out of your way wherever it happens to fit. Right there looks like a perfect spot.
You don't want to mix up your coil wires, so what we're going to do is we're going to have the new coil just held here in place, and we'll pull the coil wires off one by one and snap them onto the new coil. That way you don't get them mixed up. Once that's done you can set the coil aside and we'll pull the old coil off.
To disconnect this connector you'll want to take a flat tipped screwdriver and kind of pry it in the upper tab and lean it back, and then you can do the same thing to the bottom and you can see it pops off just like that.
With the connector out of the way you'll use your 7 millimeter socket with an extension to reach the four bolts that hold the coil to the engine. With all four screws loose you should be able to pop it off the engine.
Then this one has the extra little device on here that you'll need to undo to get the coil out of the way.
Now you can pull your new coil right into place. Put this bottom screw in first, then you can do the other four as well and start threading them in by hand. With all four screws loosely started by hand, then you can go in with your 7 millimeter ratchet and extension and socket, and tighten them up.
Now we'll connect the connector on the side of the coil. All you have to do for that is push it right in and it will snap right into place.
Now you can take your air filter box and put it right back into place. Slide it in this end first, and then on the bottom you've got these two pins that you can push down into the body. Once it's connected at the body you can use your flat tipped screwdriver to tighten the hose clamp.
Thanks for watching. Visit us at 1AAuto.com for quality auto parts, fast and free shipping, and the best customer service in the industry.
Tools used
Socket Extensions
Flat Blade Screwdriver
7mm Socket
Ratchet
1. Transferring the Ignition Coil Wires
Hold the new ignition coil pack next to the old ignition coil pack
Pop one ignition coil wire off the old coil pack
Pop the wire onto the corresponding spot on the new coil pack
Repeat these steps for the remaining three ignition coil wires
Put the new coil pack aside
2. Removing the Ignition Coil
Disconnect the ignition coil wiring harness
Remove the four 7mm bolts from the ignition coil
Pull the ignition coil off the engine
Pull the ignition coil wiring clip out of the coil
3. Installing the Ignition Coil
Start the four 7mm bolts into the ignition coil
Put the new ignition coil into place
Tighten the four 7mm bolts
Connect the ignition coil wiring harness
Hi, I'm Mike from 1A Auto. We've been selling auto parts for over 30 years. We're dedicated to delivering quality auto parts, expert customer service, fast and free shipping, all backed by our 100% satisfaction guarantee. Visit us at 1AAuto.com, your trusted source for quality auto parts.
Your passenger side ignition coil is right here on the front of the engine, on the passenger side. The best way to do this is to start by holding your new ignition coil in its place and pulling the wires off one at a time, so that you don't get them mixed up. All right, there's one. There's two. There's three, and the last one. Make sure they're fully snapped on. With those on the coil, you can set it aside.
Now you're going to want to remove the plastic electrical connector from the side of it. You can do that with your flat tip screwdriver. If you slide it in the upper and lower tabs, it allows you to pull the connector off, just like that. The ignition coil has four bolts holding it to the engine itself. They're seven millimeters. There's two on the top, and then on the bottom. You can't see them, but they're on the opposite corners. We're going to start with the bottom ones, because they're the most difficult. Use your 7mm socket with an extension. With all four bolts loose, you should be able to hopefully just pop this off from the bracket. Nope, one of them's not quite there. There we go. On the bottom front corner, there's actually another little device hanging off the screw, so you have to pull the screw completely out.
At this point, you can take your new coil, and put the screws into the new coil. Remember the bottom front one is a special one. We'll put it right in place, and then start off by hand tightening all of the screws, because you don't want to cross-thread them. That'll make for a very bad day. Now you can use your 7mm ratchet to get on the bolts. I like to start with the bottom, because I do all the most difficult stuff first. The last part of the process is to snap the connector back onto the coil, just like that.
Thanks for watching. Visit us at 1AAuto.com for quality auto parts, fast and free shipping, and the best customer service in the industry.
ICA61453
In Stock
Product Reviews
Loading reviews
4.93/ 5.027
27 reviews
5 Stars
4 Stars
3 Stars
2 Stars
1 Star
25
2
0
0
0
So Simple
Kenny
July 23, 2017
The parts arrived in time. I was impressed with the care taken to package everything. With the help of your videos, I was able to do the work in no time. Now you have a customer for life. Great job 1A!
Kenny W
Ingnition coils
James
August 10, 2017
These aftermarket coils performs just as good as the Motorcraft coils that were the originally on my truck.... Very satisfied with them,,
Very dependable....
R
December 23, 2017
I have never had a problem here. Always fast out the warehouse and a correct fit. Thank you
Works as new
T
January 7, 2018
They work as new like expected. Looks great and easy to install. Would definitely recommend
R
April 4, 2018
I had a really rough idle and a bad shake at between45and65 m.p.h. got a lot better now.
Ignition coils for 1999 Ford F150
James
May 23, 2018
The product was precisely what I ordered and arrived in two days with free shipping. Can't beat that. I'll order again when I need more parts.
Working good
Terry
June 7, 2018
Put both on the afternoon I received them. Very easy to install on a 91 Lincoln Town Car. Been working fine for several weeks now. Price beat anything around here local in SE Ohio.
Thanks
Added power
Levi
July 11, 2018
The coil pack really added power to my car. I am completely satisfied with my purchase. A good genuine part. It fitted perfect
E
December 6, 2018
How very pleased with it and it work real good no problem with my order and we'll be wanting more from you all thanks
1999 Ford Expedition coil Packs
Coy
December 10, 2018
Coil Packs received were perfect fit, perfect part . On time delivery. Love me some 1A Auto Parts
99 Ford F-150 ignition coil
emiliano
December 10, 2018
By ordering this ignition coils from a1 auto I was able to save money and The problem on my truck was fixed.
Perfect fit fast shipping and great quality auto parts...
1AERK00024-Ignition Coil
Louis
January 1, 2019
exact fit. Works great. Cant beat the price and quality
Great product
Marcus
January 4, 2019
Great product, fixed my issue I was having with my truck
Ignition Coil
S
February 6, 2019
Exactly as described and easy to install. Very fast shipping!
Ignition Coils
W
February 16, 2019
Ordered the parts and it worked great. Watch their video which made changing out the part easy. Great service.
Great price
R
March 31, 2019
I can always find my parts for my vehicle whenever i need to order anything. always great service and prompt arrival whenever i order.
Fit and work Perfect
David
June 10, 2019
Purchased an old 1998 Ford F150 that had been setting for four years for $600. Wouldn't run. We replaced the fuel pump and got it running. Had a miss so upon further investigation, we found one of the coil packs cracked and that was the one we were getting the misfire from. Received them as promised and installed that evening. Took just a few minutes to install and truck runs great. Great fit and easy install. Thanks Again.
P.S. Everything I have bought from 1AAuto has been quality and perfect fit. I have no complaints on any items I have bought and plan on buying more items from 1AAuto in the future. I recommend them to everyone.
Great job
John
August 19, 2019
Super fast shipping
Ford coils
Virgil
June 18, 2020
This product works as advertised. Got it in about 4 days. The videos really help with installation, along with exact tools needed for the job. What's not to like.
coil pack
TONY
December 8, 2020
This product is great an it fits like a glove. thank you.
charles
June 28, 2021
Great product works just as good as oem part
-1997 F150 4x4 intermittent rough idle when stopped
Joseph
September 18, 2021
Very happy with the parts. Quality at a fair price. Corrected an intermittent problem that I have been trying to troubleshoot for quite a while
Well made
Jerald
March 20, 2022
Excellent product
Perfect Replacement, Easy Installation
Terry
May 16, 2022
Vehicle: 1996 Ford Explorer, Eddie Bauer Edition, 5.0 V-8
My vehicle began to run rough and the PCM threw a "P0307" code, "a misfire has been detected in cylinder 7." I decided to replace the coil packs, spark plugs and wires. 1A Auto did not have the plug wires I needed but they did have the coil packs. I ordered these and they arrived in just a few days. They were a perfect fit and installed easily (the plugs were a different story). When all was said and done the vehicle is running great and the code has not reappeared. As with other purchases I have made from 1A Auto, I found the parts as described, priced competitively and quickly received.
Great product
William
June 4, 2022
Was exactly as stated and works perfectly
Replacing old ignition coils.
J
August 21, 2023
The product worked perfectly just like advertised. I also like the quick videos that show how to properly install the coils. I would recommend this product to anyone looking to replace their old coils. Thanks again 1A Auto!
Exactly what I ordered and needed
Joel
May 9, 2024
Process was quick and painless, received the parts as promised.
Customer Q&A
No questions have been asked about this item.
Customer service
877-844-3393
Monday - Friday 8:00am - 9:30pm ET Saturday - Sunday 8:00am - 4:30pm ET
Mercury is a registered trademark of Ford Motor Company. 1A Auto is not affiliated with or sponsored by Mercury or Ford Motor Company.See all trademarks.
Enter Vehicle Year Make Model
Specify your vehicle's year, make and model to guarantee fit.
Year
Make
Model
Options
Drivetrain
This part doesn’t fit a . Select from parts that fit.