Okay, friends, we wanna make sure that we blow off any of the dirt or debris that's in this area. The less dirt that we have here, the less dirt that could make it inside the engine. Next, we're gonna remove the air intake system, loosen this clamp, and this one right down here. Set this aside. Now let's remove this bolt right up here. And this clamp right here. We'll just loosen that. Grab onto this piece, give it a little wiggle, remove it. Now let's move along to getting this out of the way. Just pay special attention to where the sticker is. It's on the lower aspect closest to the valve cover. Grab this little gray tab, give it a little squeeze, draw this off of the valve cover.
I'm gonna just do the same thing to the top. And now we'll set this aside. So now we're gonna start disconnecting some of our wiring. I'm gonna start right up in the front here. Squeeze this tab, draw it right off of there. Every time I disconnect an electrical connector, I always like to look for funny colors. If you see any corrosion, it's something that needs to either be serviced or replaced. Now let's disconnect this one. Tap on that tab, slide this out. You're gonna see that you have four ignition coils going down the line. Let's disconnect all four of them.
Up along the top, you're gonna see some gray connectors. Those lead to your fuel injectors. Remove all four of those connectors as well. Give this a little squeeze, pop that off as well. Okay. At this point, you're gonna notice that you have some anchor points holding your wiring down. We wanna grab a little fork tool and pry these away from the valve cover. I'm just gonna grab on to this wiring harness, give it a little wiggle, try to draw up the connecting clip. Here we are. Comes across here and then over here. Okay. This is looking good. Let's get this off of here as well. Now we can set this aside. It won't be bothering us anymore.
Let's continue on by removing our ignition coils. You're gonna find a mounting bolt on each one. Now let's just grab onto that, twist it, and lift it up and out. There's our coils. We're gonna do the same to all four. And when you take them out, put them in a spot where you can remember which order they came out of. So the front cylinder can be on the left, and then work your way to the rear as you go to the right. Let's take this wiring, slide it over towards the center of the engine. Now we're gonna remove this from the vacuum booster. Just give it a little wiggle and you should be able to pry it right out of there.
Once you've done that, we're gonna lift up on this piece right here and try to get the tube off of the valve cover. There we are. And set that aside. Let's grab this wiring. We'll set this aside as well. The next thing we need to do is remove the mounting bolt that holds the dipstick to the engine. We want this to be able to have plenty of room. If you were to feel down along the dipstick, you'll be able to feel where the bracket is and, of course, the 8-millimeter headed bolt. Let's go ahead and remove that. All right. There it is. There's our bolt. And now the dipstick can move around.
Before we continue on to removing the valve cover, let's cover up the ports that lead into the engine, that way there no debris can make it inside. You have one here, one here, and then one located right there. Just go ahead and cover those up. And now we're just gonna take our blowgun and once again, blow off any debris that might be in this area. Next, we're gonna remove our nine mounting bolts. You're gonna find four mounting bolts that look like this up along the top, and then five down along the bottom of the valve cover. Let's remove them all.
Now that you have all the bolts nice and loose, let's continue on with a nice, rubber mallet. We're just gonna give the valve cover a couple of loving bonks to try to break it free from its holding point. After you've done that, we'll just lift it up and get it out of here. There it is, friends. With the valve cover off, it's a good idea to make sure you get off any debris that's remaining around this area. I'm gonna typically do this with a vacuum cleaner, get off the majority of it, and then I'll continue on by scraping it with a nice razor blade. Certain areas that you want to pay attention to is along the front area where the valve cover used to ride.
You're gonna see that there's RTV or gasket maker located in two areas. One up along here, and then one up along the lower area down there, which is on the same exact areas as this one. Let's go ahead and vacuum this off, we'll scrape it down, get it nice and clean. Once you have it all scraped down, just go ahead and wipe it with a nice clean rag with some parts cleaner on it. We wanna try to get off as much of the debris as possible along the area where the gasket's gonna ride. Now that we have this all cleaned up, let's remove our mounting bolt for our solenoid.
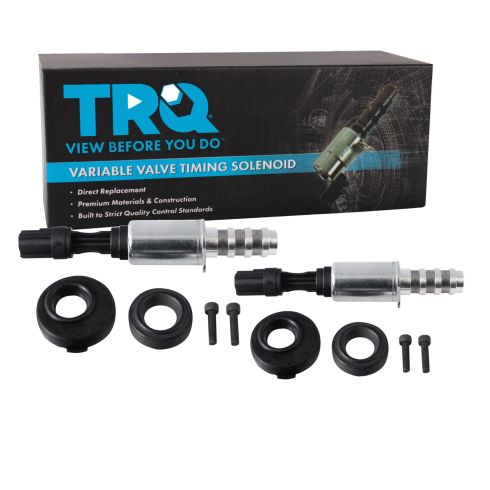
Something to think about when you're removing this screw is you wanna make sure that it does not fall out and drop down into the engine. So just be very careful for that. Let's give this a little wiggle. I'm gonna hold that screw. There it is, friends. All right, friends, now it's time to get our new solenoid in here. Let's carefully slide it right down and in. We'll start in our mounting bolt, snug it up, and then we'll torque it to 44 inch-pounds.
All right, friends, so we took our valve cover over to the bench. And just a small disclaimer, I'm gonna be replacing the valve cover and the gasket. But more than likely, you're not gonna be replacing the valve cover. So a couple of things that I want you to pay attention to. Looking inside the valve cover, you can see that there's a whole lot of crud that generally gets built up, and it's typically gonna be along the backside of the engine where the valve cover was.
So as you can tell, there's a lot of stuff on this that's gonna need to be cleaned up. You can use some parts cleaner or even a nice parts cleaning machine. Typically not everybody has one of those. So a little bit of parts cleaner, wipe it down with a rag or scrape it down if you need to. After you've gotten everything on the inside clean, you also wanna make sure that you clean up the area where the gasket's gonna ride. Typically, you can do that with a nice, flat razor blade. Just go nice and flat along the valve cover like this. That's gonna ensure you get the majority of the debris along the edge, that way there you can make a nice bond. And, of course, if there's anything in the center, just take a nice, flat screwdriver and get in there as well.
Once you get all that clean, we're gonna come along to removing and replacing this gasket right along here as well. Typically, to do that, you just find a socket that fits right inside there, right up against the seal, and then we're just gonna give it a couple of loving bonks and drive it out. There's our seal. Obviously, you can tell that this is in very poor condition and this is very typical. Now from the top of the cover, let's clean out the insert where the seal is gonna ride. Now once you have that nice and clean, you will take your new seal. Obviously, this one's used. We'll start that in there, so it's gonna be as flush as possible. You wanna take something that's gonna sit across the entire top of this, and that way there, we can press it down into the valve cover.
All right. So like I said, this one was damaged anyway. But typically, what you actually wanna do is just make sure that the seat is sitting all the way around perfectly flush, and you wanna make sure that it's bottomed out. You don't want any way of debris or anything making its way inside of there. Okay. So let's go with the assumption you cleaned up the valve cover it looks amazing. Now it's gonna be time to reinstall it. When you reinstall it though, you don't wanna go ahead and reuse the old original gasket. Typically, with these, you're gonna notice that they're hard and brittle, and a lot of times they're gonna be very cracked. If that's the case, they're not gonna make a very good seal and it really doesn't make any sense to just go ahead and reuse the old stuff.
So, we're gonna make sure that we use a brand new gasket. This is nice and soft rubber and we know we're gonna make a good seal. So now it's gonna be time to get our new gasket into the valve cover. A couple of areas that I like to pay attention to is the areas that have these nubs. You're gonna see that there's gonna be two of them on your valve cover gasket, and there's also gonna be two on your valve cover itself. That's gonna kind of let you know where this is gonna be situated. I'm gonna start this in right like this and just go right along the line. What essentially we wanna do is make sure that all the curves line up with their corresponding curves on the valve cover. If they don't, more than likely the gasket's just kind of twisted.
All right. Once you have it situated, just kind of go around one more time and make sure everything's pushed in as far as it can. We're gonna try to make it so this does not fall out during the installation process. Now we're just gonna take a little bit of engine oil and just go around the inner portion of the seal. That's gonna help lubricate it so the solenoid can go through. All right, friends, back over at the truck, we wanna grab some black RTV gasket maker. Let's get a little bit of that on our finger and we're gonna go along those two areas that we cleaned up. You wanna make sure that you fill in the cracked area, that way there you'll have a nice seal when we put our gasket and our valve cover on.
Now it's gonna be time to get our valve cover back on. Something that we wanna pay special attention to is the solenoid right here. You wanna make sure as we're putting on the valve cover, we don't bonk on this and potentially break it. Carefully slide this in. You wanna pay special attention to that gasket as well. Make sure that it doesn't fall out of there and get caught on something and potentially ripped, torn, or damaged in any way. Okay. Now that I have it close, I'm just gonna kind of feel around that gasket, make sure it's still up and inside the valve cover before I completely set it down and on. Let's slide this down, paying attention to where our solenoid's coming through the seal. Okay. Perfect.
Now we're just gonna go ahead and start in all of our mounting bolts. And when we tighten these up, the way that we wanna do it is starting from the center and then working our way out. That way there as we tighten it, it's gonna potentially push the gasket a little bit away, instead of bunching it up towards the center. Now let's torque this to 89 inch-pounds. Come up diagonal. Now it's gonna be time to get our ignition coils reinstalled. To do that, you wanna make sure you use a little bit of dielectric grease and come right inside this boot area where the actual spark plug's gonna ride. We'll do that on all of these, and then we'll get ready for our install.
As we reinstall these, we wanna make sure we put them back into their corresponding cylinders right back where we got them from.
Start in that bolt, snug it up, and then torque it to 53 inch-pounds. Do the same to all. Now that the coils are on, let's get this back on to the valve cover as well. Okay. Reconnect it to your brake booster. Make sure that's nice and secure. It needs to have good vacuum. Very important. This looks great. Let's continue on by connecting in some of our wiring. As we connect in the wiring, you're gonna happen to notice that there is black connectors and gray connectors.
The two of them are gonna be located very close to each other, and the black one is gonna go to your ignition coil. Give it a nice clip, give it a nice pole, and make sure it's completely secured. The grays are gonna go to your fuel injectors. Do the same down the line. Working our way back up here, we have our forward connectors as well. Let's make sure we get this connected in. And then, of course, we have over here. Put that into its securing point. Now let's resecure the rest of this and bring it down here. Coming down along the front, we've got our forward sensor, and, of course, resecure that wire.
Feeling down along, let's continue on with securing everything. We don't want anything dangling or moving around on its own. Okay. Double-check everything. Make sure you don't have any loose connectors. If anything's falling out or you have a connector that isn't connected somewhere, obviously, that's gonna be an issue. This looks good. So let's move along. Let's get this out of the way. Let's get this vapor line back on here. It's gonna clip on right here and then right down here. We wanna make sure that we get this off of there. Set that aside for recycling. Click this pin, make sure you lift up on it, make sure it's completely secured. Same thing with this one. That feels great. Let's get this back on here as well.
Just gonna grab that clamp. Slide this right onto the intake. Bring it down so it matches up right here. Make sure this is completely fastened and it's all the way up against there. You don't wanna suck any dirty air into there. Start in this mounting bolt, snug it up, and then torque it to 89 inch-pounds. Now let's go ahead and resecure our oil dipstick tube. We've got our little mounting bolt. I'm just gonna reach down here, I'll start in the bolt and snug it up.
All right, friends, now it's time to get our intake back on here. Let's get this right up against this one up here. As you go to install this, you wanna make sure that it's completely flat up against. We'll snug it up. There we are. Do the same thing for this one. You wanna pay special attention. Make sure it's completely flat up against here and secured. You wanna make sure that there's no way that dirty air can get sucked into the engine. Okay, friends, after you've gotten that oil change done, go ahead and start up the truck. You wanna make sure that you don't have a check engine light on. Assuming there's no check engine light, take it for a road test.