WARNING: This product can expose you to chemicals including Lead and Lead Compounds, which are known to the State of California to cause cancer, and birth defects or other reproductive harm. For more information, go to www.P65Warnings.ca.gov.
Lifetime Warranty
This item is backed by our limited lifetime warranty. In the event that this item should fail due to manufacturing defects during intended use, we will replace the part free of charge. This warranty covers the cost of the part only.
FREE Shipping is standard on orders shipped to the lower 48 States (Contiguous United States). Standard shipping charges apply to Hawaii and Alaska.
Shipping is not available to a P.O. Box, APO/FPO/DPO addresses, US Territories, or Canada for this item.
Expedited is available on checkout to the United States, excluding Alaska, Hawaii.
Final shipping costs are available at checkout.
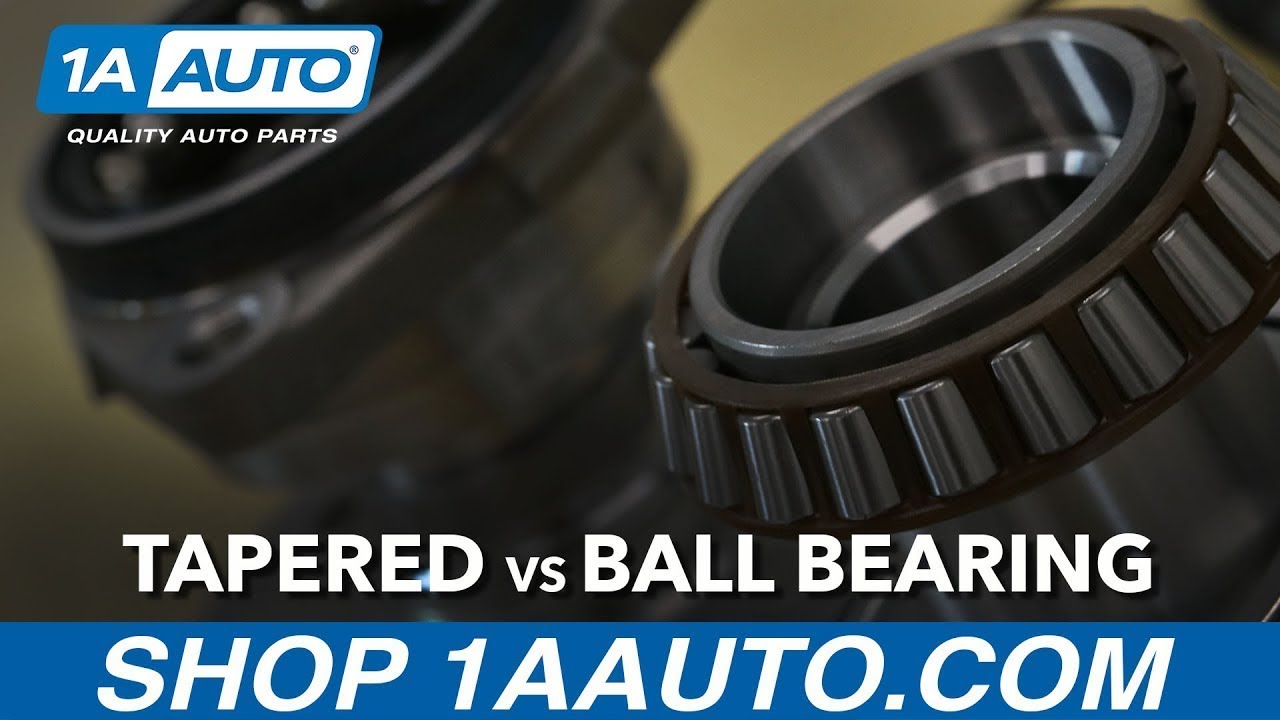
Differences Between Tapered Bearings and Ball Bearings
How to Replace Wheel Bearing Hub Assembly 2002-05 Mercury Mountaineer
Created on:
Tools used
No Tools Needed
1. Tapered Bearings vs Ball Bearings
Tapered rollers shaped like flat top cones provide more contact area, which increases their capability at receiving forces excreted by trucks and large cars.
Ball bearings are good for small cars as they do not need to sustain as much weight as the tapered roller bearings.
Hi everyone. Sue here at 1A Auto, and today we're gonna talk bearings. The difference between a roller bearing and a ball bearing type.
While both a roller bearing and tapered bearings work in the same manner. Tapered bearings use tapered rollers shaped like flat topped cones and two races angled from the outside to the inside of the bearing. The rollers have a large contact area which is what makes them better than roller bearings at handling forces exerted on the bearing during cornering in trucks and large cars.
For applications that require it, the TRQ brand offers tapered roller bearing style wheel bearings that match OEM specifications where other brands do not.
Roller ball bearings work well for small cars but replacing a tapered bearing with a roller ball bearing will result in increasing wear and faster failure.
So now that you know all parts aren't created equal, you can purchase your TRQ bearing at 1aauto.com.
Tools used
A Piece of Pipe (for leverage)
Torque Wrench
14mm Socket
15mm Socket
Jack Stands
18mm Socket
19mm Socket
5mm Hex Wrench
Flat Blade Screwdriver
White Grease
30mm Socket
Ratchet
Floor Jack
1. Removing the Wheel
Pry off the center cap with a flat blade screwdriver
Remove the hub nut with a 30mm socket and ratchet
Loosen the lug nuts with the vehicle on the ground
Raise the vehicle with a floor jack
Secure the vehicle on jack stands
Remove the lug nuts
Pull off the wheel
2. Removing the Brake Pads
Pry the ABS sensor wiring out of its clips with a flat blade screwdriver
Remove the two 14mm bolts from the brake caliper
Pry the brake pads into the caliper with a flat blade screwdriver to push in the pistons
Pull the caliper aside
Hold the brake caliper aside with wire ties
Pry the brake pads off with a flat blade screwdriver
3. Removing the Brake Rotor
Remove the two 18mm bolts from the brake caliper bracket
Pull off the brake caliper bracket
Pull the rotor off
4. Removing the Hub
Disconnect the ABS sensor wiring harness in the engine compartment
Unclip the ABS sensor wiring
Pull out the ABS sensor wire
Make sure the axle can move freely in and out of the hub
Apply rust penetrant to the hub bolts
Remove the three 15mm bolts from the hub
Pull off the hub
5. Installing the Hub
Push the hub onto the axle with the ABS sensor on top
Insert the three 15mm bolts into the hub
Tighten the hub bolts to 75 foot-pounds of torque
Feed the ABS sensor wire into place
Fasten the hub nut onto the hub
6. Installing the Brake Rotor
Slide the rotor on
Thread on one lug nut to hold the rotor in place
Put the bracket back into place
Start the two 18mm bolts by hand
Tighten the bolts to 85 foot-pounds
7. Installing the Brake Pads
Apply brake grease to the brake pad tabs
Install the new brake pads into the bracket
Remove the wire ties from the caliper
Put the caliper on
Thread the two 14mm bolts by hand
Tighten bolts to 25 foot-pounds
Push the ABS sensor wire into its clips
Clean the brake rotor
8. Reattaching the Wheel
Remove the placeholder lug nut
Slide the wheel into place
Start the lug nuts by hand
Tighten the lug nuts preliminarily
Lower the vehicle to the ground
Tighten the hub nut to 180 foot-pounds
Tighten the lug nuts to 100 foot-pounds in a crossing or star pattern
Reattach the center cap
9. Connecting the ABS Sensor
Connect the ABS sensor wiring harness inside the engine compartment
10. Testing the Brakes
Pump your brakes repeatedly until they feel firm
Test your brakes at 5 miles per hour and then 10 miles per hour
Road test the vehicle
Brought to you by 1AAuto.com, your source for quality replacement parts and the best service on the Internet.
Hi, I'm Mike from 1A Auto. I hope this how-to video helps you out, and next time you need parts for your vehicle, think of 1AAuto.com. Thanks.
In this video, we're going to show you how to replace a front hub on this 2003 Mercury Mountaineer. We show you on the passenger's side, but the driver's side is the same procedure. It's the same part and similar process on these Mountaineers for 2002 to 2005. The items that you'll for this are a new front hub from 1AAuto.com; a 14, 15, 18, 19 and 30mm socket and ratchet; a piece of pipe for some extra leverage; 5mm Allen bit or Allen wrench; flat blade screwdriver; jack and jack stands; and torque wrench.
Use a flat blade screwdriver to pry off the center cap. Once it comes off some you can just put your fingers underneath and pull it off. Then, use a 30mm socket to loosen up that center hub nut and remove it with a ratchet and a pipe for some extra leverage. You can also use a larger breaker bar. If you have the benefit of air tools, you can do this step later as you'll see us do but we're just showing you how to do this in the beginning. Here you'd also want to loosen the lug nuts up with a 19mm socket and breaker bar or ratchet and pipe. We're just going to speed it up here. We've raised and secured the vehicle and we're using a ratchet or an air gun to remove the lug nuts, wheel and tire.
Now, just open up this clip with a flat blade screwdriver. You just have to pry the tab and pull it open. Then just pry the harness out of this clip and pull it out of these three. Then you want to remove these two 14mm bolts. We'll just fast forward as Mike does that. Now using a flat blade screwdriver, just pry right here and that will push the piston in on the caliper and make it easier to pull the caliper off, do it again down here, and pull the caliper free. Then you want to set it up and out of the way so we're just going to put it up here. Just to make sure it doesn't fall down use a wire tie to just secure it up there.
Now, pry out your brake pads. The best way to tell the life left in your pads: this little slot right here is a wear mark so you can see it pretty much goes away once you have about an 1/8 of an inch of pads left. Like I said before, these pads have quite a bit of life left on them.
Now, remove these two 18mm bolts. You can see he's using a piece of pipe for some extra leverage. When you pull out the last bolt, the caliper bracket pulls free. Now pull your rotor off.
Now up here, you just want to reach down here behind your radiator reservoir and just push on the tab on this harness and pull the harness free. Then just open up this clip up here with a flat blade screwdriver and pull the harness down.
Now if you don't have air powered tools, you want to remove this 30mm nut with the tire on and the wheel on the ground. If you do have air powered tools, you can remove it right now. Then just make sure the axle moves in and out. Then come back here and you want to remove these three 15mm bolts. We're just going to start off by spraying them with some penetrating oil and then using a piece of pipe for some extra leverage, just break them free and remove them. Now a tip on these: I start with 1/2 inch sized tools which are larger, heavier duty tools and once I get them loose I switch to 3/8 inch drive tools which are smaller and get in to the area a little better. It makes it a lot easier if you just turn your wheel so that you can get better access to this bolt back here.
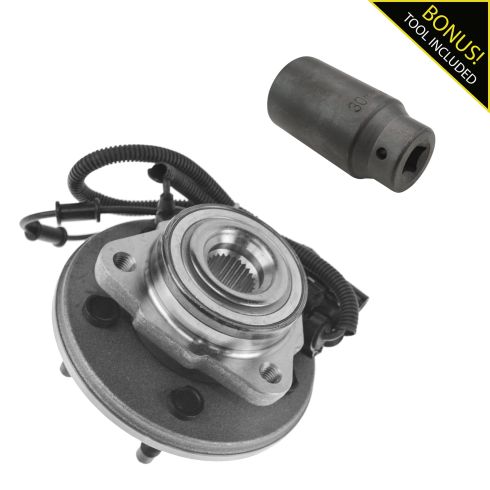
Tap the hub with a hammer until it starts to move out. We realize that we have a bolt still in the hub a little bit so we're just going to remove that and then pull the hub free. We'll push the axle out of it.
On the left is the old hub. On the right is the new one from 1A Auto. You can see they're identical and they'll fit exactly same. Take your new hub and push it onto the axle with the ABS harness on the top and then just push it back into place. When you have it lined up, just replace those three 15mm bolts and tighten them up. Then torque each of those to 75 foot-pounds. Now we're just going to use our old clips, so we're just going to pry off the new clips and you could always just pry out your old clips and push these ones into place. Ours are in good condition so we're just going to use them. Feed the harness back up and get it up over the control arm and then just clip it back into that clip and push it back up into place. Replace the hub nut and just tighten that up preliminarily.
Take your rotor and push it into place and then replace a lug nut just to hold it there while you reassemble the caliper bracket and caliper. Now take your caliper bracket, line it up and then just replace those two 18mm bolts and tighten them up. Then torque both of those to 85 foot-pounds.
Just push your brake pads back into place and it helps if you just apply some brake grease to the tabs to help them go back in. Now remove your wire tie and pull your caliper back down. Move the C-stand and the brake pad and the caliper piston is pushed all the way in. Then take your caliper and push it back into place over your brake pads. You want to make sure that those slides push down underneath and line up. Once they're lined up, replace those two 14mm bolts and tighten them up. Then torque both of those to 25 foot-pounds.Then just push this back into those three clips, and then back into this bracket, and then close that final clip.
Wipe down any dirt that may have gotten on your rotor while replacing the caliper and then remove that lug nut, replace your wheel and then replace all of the lug nuts and tighten them preliminarily. Then you want to lower the vehicle and tighten them the rest of the way and then torque each of these in a crossing pattern to 100 foot-pounds. Now torque that hub nut to 180 foot-pounds. Now replace your hub cap. Just line it up and hit it back into place.
Then just grab your harness up here and push it back into the connector until it clicks.
Whenever you've done any work on your brakes, you just want to pump the brake pedal until it firms up. Then you want to do a stopping test from 5 miles per hour, then 10 miles per hour.
We hope this video helps you out. Brought to you by www.1AAuto.com, your source for quality replacement parts and the best service on the Internet. Please feel free to call us toll-free, 888-844-3393. We're the company that's here for you on the Internet and in person.
BHA84978
In Stock
Product Reviews
Loading reviews
5.00/ 5.01
1review
5 Stars
4 Stars
3 Stars
2 Stars
1 Star
1
0
0
0
0
Worked great
Matt
December 8, 2018
This part fit and worked great. No more grinding noise
Customer Q&A
No questions have been asked about this item.
Customer service
877-844-3393
Monday - Friday 8:00am - 9:30pm ET Saturday - Sunday 8:00am - 4:30pm ET
Lincoln is a registered trademark of Ford Motor Company. 1A Auto is not affiliated with or sponsored by Lincoln or Ford Motor Company.See all trademarks.
Enter Vehicle Year Make Model
Specify your vehicle's year, make and model to guarantee fit.
Year
Make
Model
Options
Drivetrain
This part doesn’t fit a . Select from parts that fit.