Brought to you by 1AAuto.com, your source for quality replacement parts and the best service on the Internet.
Hi, I'm Mike from 1A Auto. I hope this how-to video helps you out, and next time you need parts for your vehicle, think of 1AAuto.com. Thanks.
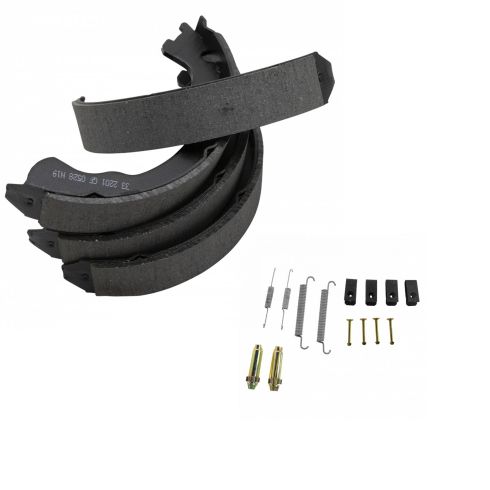
In this video, we're going to show you how to replace the emergency brake shoes as well as the emergency brake hardware on this 2003 Mercury Mountaineer. We show you on the passenger side, but the driver side is a similar procedure. The items you'll need for this is a 10mm and 19mm socket and ratchet, a flat blade screwdriver, a pair of pliers, locking pliers, wire, wire cutters, jack and jack stands and a torque wrench.
Start off by prying off your hub cap, then remove these 19mm lug nuts. If you don't have air powered tools, you want to loosen them up while the vehicle is on the ground, raise the vehicle and then remove them the rest of the way. Now just pull the wheel free.
Then remove these two 10mm bolts back here on the back of your caliper. You can see we're using a wrench and then another wrench for some extra leverage. However, you can also use a socket and ratchet. We'll just fast-forward as Mike removes those two bolts. Once you remove both those bolts just pull your caliper off and set it up here on your upper control arm. Then pull the rotor off.
Using a pair of locking pliers and needle-nosed locking pliers are best for this procedure. You just want to grab that spring, pull it out of that shoe, and then disconnect it from the other brake shoe. Just pull it down and out. Now do the same thing to this spring. Then, for this clip, just pry the clip down and off of that pin. Then pull it free. Then do the same thing on this one down here. Now you can just pull your brake shoe off and out of the adjuster, pull your adjuster off, and then the other brake shoe.
If you plan on using your old adjuster, just spray it with some rust penetrant. You just want to loosen it up and make sure that you can turn it by hand. We're going to replace our hardware, so you just knock out that old pin, push the new pin in. We'll do the same thing with this one, but to get the new pin in, you have to be a little creative. So we're going to take some wire, just feed it through that hole, and pull it down. Using a pair of wire strippers, you just want to strip the wire, take your pin, just wrap the wire around the pin. Then pull the wire and it will pull the pin up and through that hole. Just disconnect the wire, we'll take our brake shoe, and put it over that pin.
Then take a clip and just hold the pin from the other side so it doesn't push out. Then push the clip into place. To turn the pin, you want to just push in with some pliers and turn it. You do want to make sure that your clip's in the right position when you do this. We'll just do that again real quick. Then repeat the process on this brake shoe.
Now we'll take our new adjuster and just bring it in, slide into the new tube. Now line up the slots on the adjuster with the slots on the brake shoes. Just push the shoes together and that will hold the adjuster into place.
Now take your spring, push into the hole on this shoe, and then, using pliers, pull the spring into place on the other shoe. Then make sure that these are aligned, take your spring, and reclip it up here into this brake shoe. Make sure this brake shoe's in place, take your locking pliers, and pull the spring and push it in that brake shoe. Just use a flat blade screwdriver to push the spring in the rest of the way if it doesn't go in. Then take mineral spirits and wipe down your brake shoes to clean off any oil or residue that you got on them while you were installing them. Then we're just going to use a flat blade screwdriver and scrap up this backing plate, just remove all the leftover metal on it so it doesn't scrap on our rotor.
Now push your rotor back into place, and you just want a little bit of resistance from your brake shoes. If you don't have a little bit of resistance or you have too much, you just want to turn the adjuster. You can help out by using a flat blade screwdriver. If you have to do it a lot then it's a lot easier if you actually just remove this spring. So just take your pliers and unclip the spring.
Now you can just turn this easily by hand and adjust it to whatever you need. Before putting the spring back on, it's a good idea to just test and if you have the right amount of resistance, just pull the rotor back off and reclip your spring. Then just slide your rotor back into place. Now, using a wire brush, clean up the brake pad slides on your caliper bracket. Then take your caliper and push it back into place. You just want to line up those tabs on the brake pads onto the slides on the bracket. You may need to give it a little force to get it on there all the way. Then we'll fast-forward as Mike replaces and tightens up those two 10mm bolts.
Now replace the wheel and then replace the lug nuts. We'll fast-forward as Mike tightens those up. You want to tighten them while the vehicle is in the air just preliminarily, and then lower the vehicle and tighten them the rest of the way. Then you want to torque each of these to 100 foot-pounds in a crossing pattern. Take your hub cap, line it up, and hit it back into place.
After doing any work on your brakes, you just want to pump the brake pedal until it firms up, and then do a stopping test from 5 miles per hour and then 10 miles per hour.
We hope this video helps you out. Brought to you by www.1AAuto.com, your source for quality replacement parts and the best service on the Internet. Please feel free to call us toll-free, 888-844-3393. We're the company that's here for you on the Internet and in person.