Replaces


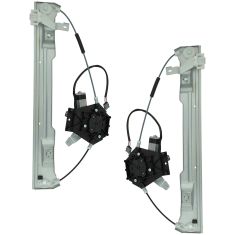
Recommended for your 2002 Mercury Mountaineer
Part Details
Specifications
About TRQ:
TRQ is a trusted brand dedicated to making every repair a success story by combining premium parts with easy installation. Each TRQ part is engineered by a team of automotive experts to meet or exceed OEM standards, delivering enhanced performance and maximum longevity. With rigorous in-house testing, the brand ensures superior fit and function across every product line. TRQ also provides customers with best-in-class, step-by-step installation videos—so you can complete repairs with confidence, whether you're a first-time DIYer or an industry professional.
Attention California Customers:
 WARNING: This product can expose you to chemicals including Lead and Lead Compounds, which are known to the State of California to cause cancer, and birth defects or other reproductive harm. For more information, go to www.P65Warnings.ca.gov.
Lifetime Warranty
This item is backed by our limited lifetime warranty. In the event that this item should fail due to manufacturing defects during intended use, we will replace the part free of charge. This warranty covers the cost of the part only.
FREE Shipping is standard on orders shipped to the lower 48 States (Contiguous United States). Standard shipping charges apply to Hawaii and Alaska.
Shipping is not available to a P.O. Box, APO/FPO/DPO addresses, US Territories, or Canada for this item.
Expedited is available on checkout to the United States, excluding Alaska, Hawaii.
Final shipping costs are available at checkout.

Created on:
Tools used
Brought to you by 1AAuto.com, your source for quality replacement parts and the best service on the Internet.
Hi, I'm Mike from 1A Auto. I hope this how-to video helps you out, and next time you need parts for your vehicle, think of 1AAuto.com. Thanks.
In this video, we're going to show you how to replace the rear window regulator on this 2003 Mercury Mountaineer. We show you on the driver side but the passenger side is a similar procedure. It's the same part and similar process on these Mountaineers from 2002 to 2010. The items you'll need for this are a new rear window regulator from 1AAuto.com; a flat blade screwdriver; a 6, 7 and 11mm socket and ratchet; and a 3/8 drill bit and drill.
Start off by prying out on the bottom of this panel and then pulling out to release the clips, and then sliding it towards the front of the car and off the door handle. Now, roll this panel out while pulling up on the front and then slide it forward, and then push the tab on this harness and disconnect it. Then, remove this 7mm bolt and this 7mm bolt right here. Now, lift your door panel up and out, and your door panel's free.
Remove this 6mm bolt and these four 6mm bolts that hold in your speaker. We'll fast forward as Mike removes those. Then, pull your speaker out. Push the tab on the harness and disconnect it and your speaker's free. We'll fast forward as Mike pulls down the water shield. You can see he uses a razor blade to help separate the adhesive. Reach in behind your door handle and lift up this yellow clip and pull your lock rod free and slide the door handle forward and pull it out. Push the door handle cable from the bracket and then pull the cable free.Then remove your water shield the rest of the way. When you get to this point push the tabs on this harness; disconnect it and then feed the harness through the water shield. Pull the other end from the body of the door. Pull that through the water shield and your water shield will peel off.
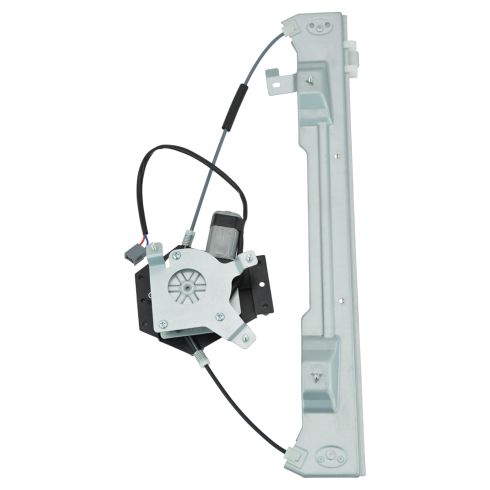
This is a cable actuated regulator. It's kind of hard to show, but usually what happens is when they break they fall down into the door. What you'll need to do is have somebody hold it right about in this position, so that through this hole down here, this hole here, you'll be able to see a rivet right there. Now, using your 3/8"� drill bit and drill, just drill out that rivet. You want to make sure you don't break it. That way the rivet's fully removed. Once the rivet comes out, you can separate the window from the regulator and bring the window up and it should stay right up here. For added safety, we added some tape to help hold the window up. Now you want to remove these five 11mm nuts. We'll fast forward as Mike does that. Push the regulator studs through the door and feed the harness through. Then pull your regulator up through this hole. Now push the tabs on this harness and disconnect it.
Take your new window regulator and plug the harness into place. Then feed the window regulator back into the door. You want to maneuver it around until you can get those studs through the door. Once you get a couple, replace the nuts to help hold what you have so far in place. Then push the rest of the studs through. We'll fast forward as Mike replaces the rest of those nuts and tightens them up.
I've got my key on. I reconnected my switch. Reconnect my motor and then you can test your new regulator. Really, what you want to do is get it so that you can see the mounting point for the window pretty easily right through here. Once you have it in position, disconnect your window motor again and take your switch off and turn your key off as well.
Now, remove the tape. Slide the window back down into the regulator. I went to connect it and there's still a piece of the rivet in the back of the window frame. I'm using pliers, grab onto it, and pull out. You'll want to secure the window to the regulator with a nut and bolt and usually an M6 size, which is usually a 10mm head and then a locking lock washer and a nut or a locking nut. Fast forward as I reach in with a wrench and hold the nut on one end and tighten up the bolt.
Take your door handle cable and re-clip it into the handle, and then clip this part back into that bracket. Push those pins through and slide the door handle back. We'll fast forward as Mike replaces that 6mm bolt and tightens it up. Take your lock rod and make sure the door is unlocked. Then put it into the yellow clip while you're holding your lock switch in the unlocked position. When you clip it down into place, re-clip that yellow clip and then feed your harnesses back through your water shield and push the water shield back into place.
Reconnect your motor harness and re-clip it to the door. Reconnect your speaker, push it back into place, and replace those four 6mm bolts. The door panel's held in by all these hooks. If you take the water shield off for any reason, make sure that everything's lined up so the hooks can go in easily. Then you can actually put the bottom ones on first, push the panel up, you might have to lift it up a little bit. Make sure it goes against the door all the way and slide it down. Now, replace those two 7mm bolts and tighten them up. For the top one, it helps if you feed it back into place with an extension. Reconnect the harness. This tab slides in first. Take this panel and slide it behind your door handle and push those tabs back into place and then push the clips back in on the front.
We hope this video helps you out. Brought to you by www.1AAuto.com, your source for quality replacement parts and the best service on the Internet. Please feel free to call us toll-free, 888-844-3393. We're the company that's here for you on the Internet and in person.

WRA52250