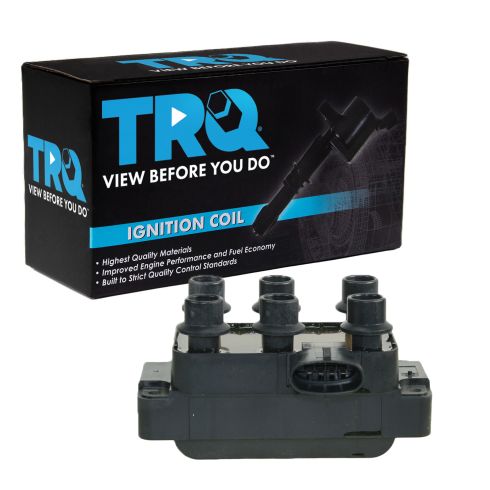
TRQ ignition coils will have your engine running like new. TRQ ignition coils are manufactured to precise specifications using premium raw materials to optimize each vehicle's ignition system. To ensure peak performance, TRQ recommends replacing ignition coils in sets to prevent electrical output imbalances. All products are fit and road-tested in our Massachusetts R&D facility to ensure we deliver on our promise of Trusted Reliable Quality.
Product Features
High dielectric epoxy and reinforced bobbins for extended service life
Rubber, Silicone, or Phenolic Resin Shell: Prevents premature boot wear
Application Specific Design: No modifications required
Item Condition:New
Attention California Customers:
WARNING: This product can expose you to chemicals including Lead and Lead Compounds, which are known to the State of California to cause cancer, and birth defects or other reproductive harm. For more information, go to www.P65Warnings.ca.gov.
Lifetime Warranty
This item is backed by our limited lifetime warranty. In the event that this item should fail due to manufacturing defects during intended use, we will replace the part free of charge. This warranty covers the cost of the part only.
Returns: Parts with electrical components cannot be returned once installed.
FREE Shipping is standard on Orders shipped to the lower 48 States (Contiguous United States). Standard shipping charges apply to Hawaii, Alaska and US Territories. Shipping is not available to Canada.
Expedited is available on checkout to the United States, excluding Alaska, Hawaii and US Territories as well as P.O. Boxes and APO/FPO/DPO addresses. Final shipping costs are available at checkout.
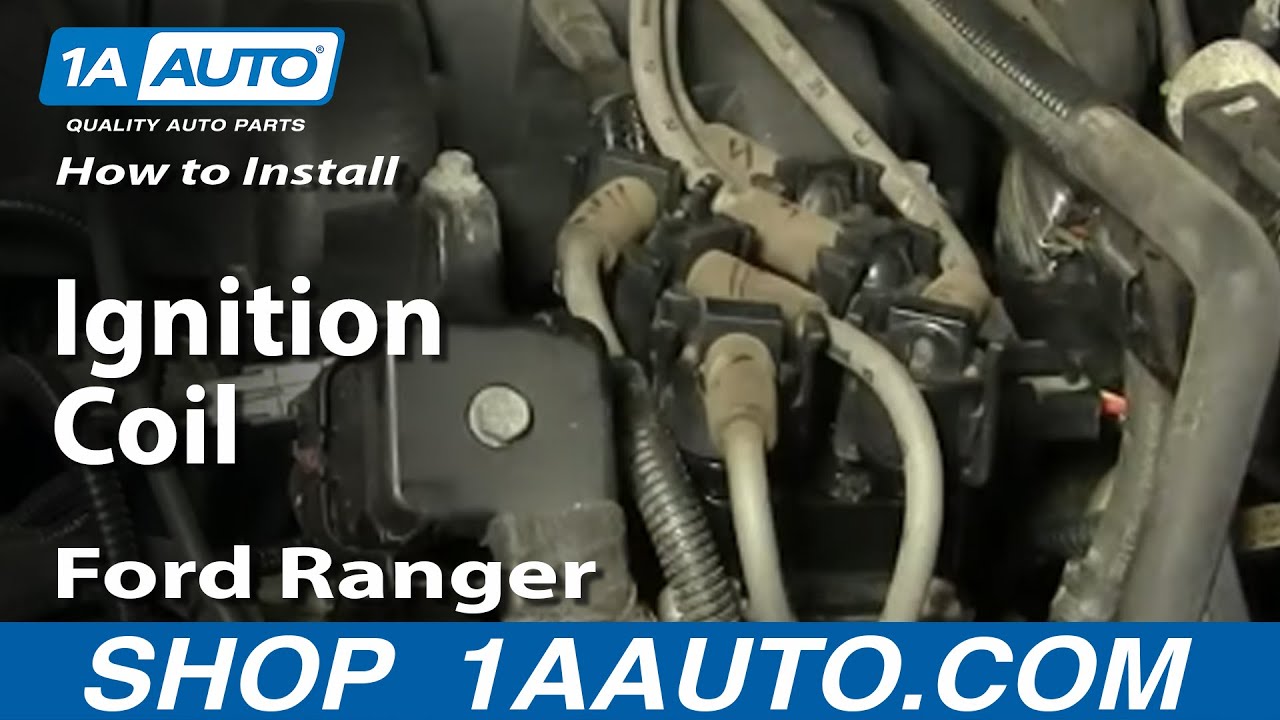
How to Replace Ignition Coil Pack 1990-2011 Ford Ranger
How to Replace Ignition Coil Pack 1991-2010 Ford Explorer
Created on:
Tools used
8mm Socket
7mm Socket
Ratchet
1. Remove the ignition coil.
Mark the plug wires to keep track of where you pulled them from.
Unplug all the plug wires.
Disconnect the wiring harness from the ignition coil.
Unbolt the two 7 mm and two 8 mm bolts to remove the old coil.
2. Install the new ignition coil
Mount the new ignition coil and bolt it in.
Make sure the little resistor attached with the bolts gets reassembled into the ignition coil assembly.
Plug in your plug wires in the order that you pulled them, using your marks.
Brought to you by 1AAuto.com- your source for quality replacement parts and the best service on the internet. Hi, I'm Mike Green. I'm one of the owners of 1A Auto. I want to help you save time and money repairing or maintaining your vehicle. I'm going to use my 20-plus years experience restoring and repairing cars and trucks like this to show you the correct way to install parts from 1AAuto.com. The right parts, installed correctly that's going to save you time and money. Thank you and enjoy the video.
In this video, we're going to replace the ignition coil on this '04 Ford Ranger with a 4.0L. This coil does fit many Ford V6s from 3.0L up through 4.2L V6s. The only tool you'll need for this truck is a 7 mm and 8 mm socket and ratchet.
Coil on this is a 4.0L in a Ranger; this coil is the same for anything from a 3L to a 4.2L V6. To change the coil, the first thing I've done you can see I've marked these plug wires. I've just marked them basically one, two, three, four, five, six, closest to me then going around in clockwise order. For those of you that know engines, it has nothing to do with the firing order or what number plug these go to. It's just so that when I put them back on the coil, I'll put them on in the right order. If you're planning on changing plug wires, I suggest you replace the coil first and put the plug wires back on, and then just replace the plug wires one at a time.
For this video, we're just doing the coil. I'm going to remove all these wires. It's just a matter of squeezing the kind of lock here, and pulling up and off. These wires from over there, out of the way and these wires over here. Now your connection is right back here. Pull up on here and pull that connector right off. The coil is held on with four well, two bolts and two nuts. These are 7 mm bolts here and 8 mm nuts on the back, and I'll remove those.
Once those four bolts are out, coil comes right up and off. Here's our old coil. Here's our new coil from 1A Auto. You can see everything's the same. It's going to bolt up all the same. You can screw it right down on there. There's a little resistor or capacitor or something here that goes on with the bolt, so make sure you get that correct.
Check these and make sure they're as tight as I want them. Put our connection back in, then our wires. I guess I've got number three here. Again, the marks I have on these wires have nothing to do with the cylinder number. They only pertain to the closest one to me, one, two, three, four, five, six and then around clockwise. Four, five, and six. Now we can start it up and everything should be nice and smooth.
We hope this helps you out. Brought to you by www.1AAuto.com, your source for quality replacement parts and the best service on the internet. Please feel free to call us toll-free, 888-844-3393. We're the company that's here for you on the internet and in person.
Tools used
Flat Blade Screwdriver
8mm Wrench
8mm Socket
Ratchet
Marker / Writing Utensil
1. disconnect the battery
Use your 8 mm wrench to disconnect the negative battery cable.
2. Uninstall the ignition coil
Mark the spark plug wires so you know where they plug back in.
Twist and pull to remove the wires.
Unplug the wiring harness from the ignition coil
Unbolt the four 8 mm bolts and remove the coil.
3. Install the new ignition coil
Bolt in the four 8 mm bolts to install the new ignition coil
Plug the ignition coil into the wiring harness
Put the spark plug wires back in the same order they were in before, in accordance to your marks.
Reconnect the negative battery terminal with your 8 mm wrench
Brought to you by 1AAuto.com your source for quality replacement parts and the best service on the internet.
Hi. I'm Mike Green. I'm one of the owners of 1A Auto. I want to help you save time and money repairing and maintaining your vehicle. I'm going to use my 20 plus years' experience restoring and repairing cars and trucks like this to show you the correct way to install parts from 1AAuto.com. The right parts installed correctly; that's going to save you time and money. Thank you and enjoy the video.
In this video we're going to show you how to remove and then reinstall an ignition coil in this 1998 Explorer with a 4.0 liter V6 with the EFI. This is basically the same as quite a few trucks with that motor in it. The only tools you'll need are an 8 mm wrench or socket and ratchet and a flat-blade screwdriver.
Disconnect the negative battery cable with an 8 mm or 5/16 wrench. Okay, so on this motor the ignition coil is right here, right on top, really easy to get to. If I'm just replacing the coil what I like to do, and actually even if I'm replacing the coil and the wires you want to do one at a time. You don't want to just pull all the wires off and pull them all off the plugs and then it will be kind of a mystery of how to get them back on. What I like to do is I just number them front to back. I don't worry about which cylinder on the engine they are technically, but I just make a mark. There's one and I make two marks on that one and then I know the one without a mark is the third one. Same thing on the other side. One mark on the first one and two marks on the second one. Okay.
Now I can pull my plug bars off by squeezing on here and then twisting and then off. Okay and then you've got your harness connection here. Use a screwdriver pull up. You'll have to pull pretty hard and it comes right off. Then four 8-mm bolts. Okay, this first one over here has kind of a harness connection. So you want to make sure that when you put it back together you put that back on where you just remove those four bolts. Two bolts are in the back kind of blind but they're just right at the corner. Okay and once those bolts are off the coil comes right up and out.
Okay, so here's your original coil, new coil from 1A Auto. You can see the 1A Auto coil is exactly the same. It's going to go in there and it's going to connect up the same. Now on this vehicle since it's kind of a demonstration vehicle and this coil is actually working fine I'm just going to reinstall the original one. Reinstallation, pretty straightforward. I'm going to lift those up and out of the way. Okay. Just make sure everything is pretty clean right there. Coil goes right down into place. Get one of the bolts started and then I'll get them all started and then tighten them up.
Okay then you remember, on this one over here you've got this bracket that you want to put on. Okay, and when you tighten these you want them firm, but they don't have to be incredibly tight. Okay, and now we've marked our wires here so there's my two. There's my nothing, so here's my one. So, that was closest to the front. Push it on. Two is the second one, and no mark is the third. Okay, we'll actually plug in the power connection there. No mark on that one; that's probably three. Grab our two over here. One mark and two and we're all set.
We hope this helps you out. Brought to you by www.1AAuto.com your source for quality replacement parts and the best service on the internet. Please feel free to call us toll free 888-844-3393. We're the company that's here for you on the internet and in person.
ICA61396
In Stock
Product Reviews
Loading reviews
4.80/ 5.010
10 reviews
5 Stars
4 Stars
3 Stars
2 Stars
1 Star
8
2
0
0
0
Quick service/fast delivery.
Joseph
August 1, 2017
The part was as advertised, fit perfectly and was easy to install. I found the price very reasonable compared to local part stores in my local area. I have bought from 1 A AUTO IN THE PAST AND WILL CONTINUE IN THE FUTURE.
Good experience
Steven
August 1, 2018
All went well parts received in a timely manner correct parts the video on installation was very helpful and I learned about some new install procedures that made things easier. I will check A1 auto for parts first.
Amazing
D
May 3, 2019
I would reccomend 1A Auto cuz they stand behind their products. And my vehicle is runnin better and not having any issues, im gonna buy more parts for my car then take it to a shop and over price.
Shirley
July 28, 2019
Great low price and durability
Great
Emory
September 28, 2019
I love the service
Ignition coil
G
November 14, 2019
Arrived on time, was easy to install and works great
Good company
D
November 21, 2019
I'm very happy with the prices and quality of product, no more flashing check engine light so I'm thinking I replaced the correct part.
Anthony
October 30, 2021
So far so good
Excactly what I expected
Martin
November 2, 2021
It work fine
Jason
August 13, 2023
Awesome product, just like the original Equipment.
Customer Q&A
No questions have been asked about this item.
Customer service
877-844-3393
Monday - Friday 8:00am - 9:30pm ET Saturday - Sunday 8:00am - 4:30pm ET
Mercury is a registered trademark of Ford Motor Company. 1A Auto is not affiliated with or sponsored by Mercury or Ford Motor Company.See all trademarks.
Enter Vehicle Year Make Model
Specify your vehicle's year, make and model to guarantee fit.
Year
Make
Model
Options
Drivetrain
This part doesn’t fit a . Select from parts that fit.