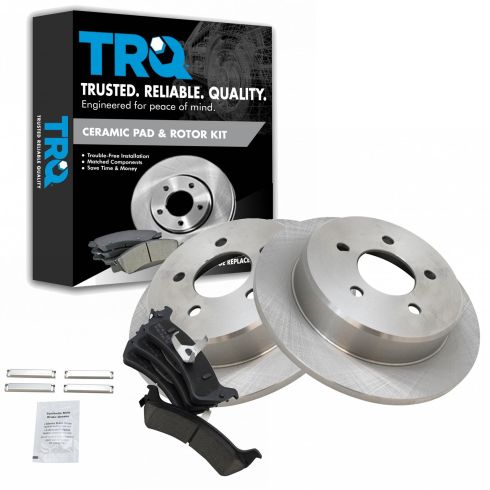
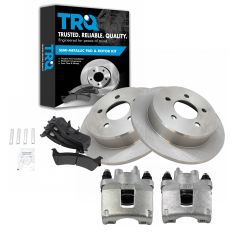
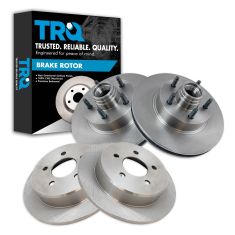
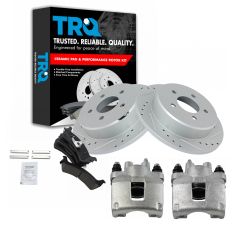
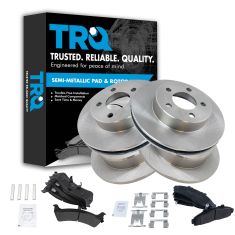
Kit Includes: (2) Rear Brake Rotors (1) Rear Ceramic Brake Pad Set with Contact Point Grease & Hardware
Brake Pad Bonding Type: Premium Posi
Wheel Lug Count: 5 Lug
Rear Brake Rotor Venting Type: Solid
Brake Pad Friction Material: Ceramic
Rear Brake Rotor Diameter: 11.22 in. (285mm)
Specification
Trim
Eddie Bauer
Location
Rear
TRQ brake kits are designed to restore your brake system to like-new performance. TRQ brake pads are positive molded, thermal scorched, chamfered, and utilize a multi-layer shim for enhanced performance and service life. TRQ rotors have a non-directional finish that reduces the break-in period for new rotors as well as reducing vibrations throughout the rotor’s lifecycle. All products are fit and road-tested in our Massachusetts R&D facility to ensure we deliver on our promise of Trusted Reliable Quality.
Product Features
Positive Molded - Less dust resulting in clean wheels
G3000 Casting Alloy - Reduced noise and improved wear resistance
Application Specific Design - Extended service life, no modifications
WARNING: This product can expose you to chemicals including Lead and Lead Compounds, which are known to the State of California to cause cancer, and birth defects or other reproductive harm. For more information, go to www.P65Warnings.ca.gov.
Lifetime Warranty
This item is backed by our limited lifetime warranty. In the event that this item should fail due to manufacturing defects during intended use, we will replace the part free of charge. This warranty covers the cost of the part only.
FREE Shipping is standard on orders shipped to the lower 48 States (Contiguous United States). Standard shipping charges apply to Hawaii and Alaska.
Shipping is not available to a P.O. Box, APO/FPO/DPO addresses, US Territories, or Canada for this item.
Expedited is available on checkout to the United States, excluding Alaska, Hawaii.
Final shipping costs are available at checkout.
How to Replace Rear Disc Brakes 1995-2002 Ford Explorer Part 2
Created on:
Tools used
Flat Blade Screwdriver
Torque Wrench
Rust Penetrant
Jack Stands
White Grease
10mm Socket
Lug Wrench
Ratchet
Wire Brush
Floor Jack
Assistant
1. Consulting Part 1 of the Video
This is part 2 of a 2 part video
Please refer to part 1 for the preceding steps
Perform the procedure from part 1
2. Checking the Emergency Brakes
Enlist the help of an assistant
Instruct the assistant to press and release the emergency brake
Check that the brake shoes move correctly
Instruct the assistant to press and release the emergency brake
Check that the brake cable moves
3. Adjusting the Brakes
Turn the adjuster wheel with a flat blade screwdriver
Apply penetrating oil if necessary
4. Replacing the Emergency Brake Shoes
Pull down the tab
Remove the springs
Pull off the shoes
Replace the shoes
5. Replacing the Brakes
Slide the disc on
Reattach the brake pads to the piston
Inspect the slides. They should move freely
If necessary, remove the slides, clean and grease them, and then slide them back in
6. Cleaning the Brake Shoe Slides
Clean the brake shoe slides with a wire brush
Apply grease to the brake shoe slides
7. Reattaching the Brake Pads
Slide the brake pads into place
Insert the 10mm bolts from the back
Tighten the bolts to 20 foot-pounds
8. Replacing the wheel
Slide the wheel into place
Start threading the lug nuts by hand
Tighten the lug nuts
Lower the vehicle
Tighten the lug nuts to 90 foot-pounds in a star pattern
Replace the hub cap
9. Road Testing the Vehicle
Pump the brakes repeatedly to return fluid to the cylinder
Test the brakes at very low speed to ensure they work
Brought to you by 1AAuto.com, your source for quality replacement parts and the best service on the Internet.
This part two of two in a two part video about replacing the rear brakes on a Ford Explorer. Please check our other videos for the first part of this video. Go ahead and press it and release it."? You can see now that moves independently. Press again and release it."? That's how you want it to work. If you're inspecting your emergency brake you always want to make sure this, the cable moves. So, have somebody press the brake and watch the cable. Make sure the cable and the arm moves, and the shoe should spread out when that happens. You can adjust your brakes. Down here you see this little star shape. That actually is a slot right here that you reach a screwdriver through and adjust that, although, most of them are, like this one, frozen up. Use a little bit of penetrating oil again. Let it sit for a while to see if you can get that to move so you can adjust that.
As far as these shoes, you can see they look pretty thin, but these are emergency brake shoes. Really all they do is hold the car in place they don't really do any braking, so they don't need much pad. There's almost never a reason to replace your shoes, just a matter of making sure everything's working freely and they're providing the emergency brake function. If you did want to replace them, these clips here you push down. You can see this little tab right here. You push those clips down on each side, and removed these springs, and then this shoe would basically come apart and off. To put them back together, I'm just going to show you parts from 1A Auto, they're going to go on just like the original. Like I said that these brakes from this vehicle are fine. So, I'll put the original stuff back together.
We'll put our disc back on. They press back on when you put the wheel back on and tighten the lug nuts up. We'll put the pad back in, pretty easy. There are three keys. Make sure they all go inside the piston. Squeeze. Then your outer one slides in. Come on. What you want to do is, you need to pull this slide out some. You want to make sure these slides are in good shape. They need to be nice and free like these are. If they're not, what you want to do, is pull them right out, clean them up, and put a little grease on them. Put them through the hoop, push it back in, pull that hoop on this side, and make sure they're sliding back and forth well. Another important thing to do, is . there's some stainless steel slides here that the brake shoes slide on . make sure you use a wire brush and clean those up. There's also one here. This one is actually broken, so I'll have to clean it up and put in on there before I put the disc together.
On these slides I just put a little tiny bit of grease. Put this one up and kind of hold on to it. Push that and slide back. Push it down and on. Put our 10mm bolts back in. You can tighten it up probably to about 20 foot-pounds. Tighten them up, but you don't have to wrench them really tight. Then we'll put the wheel back on, and we want to make sure before you road test the car, you pump the brake a bunch of times. When you move this cylinder back into itself it needs time to get the fluid back in there and fill itself back up. So, before you road test, pump the brakes a bunch of times, and then do a slow stop from like five miles an hour and make sure everything is working. Now I'll tighten these up to about, usually, 90 foot-pounds. Use the star pattern.
We hope this helps you out. Brought to you by www.1AAuto.com, your source for quality replacement parts and the best service on the Internet. Please feel free to call us toll-free, 888-844-3393. We're the company that's here for you on the Internet and in person.
BKA11345
In Stock
Product Reviews
Loading reviews
5.00/ 5.03
3 reviews
5 Stars
4 Stars
3 Stars
2 Stars
1 Star
3
0
0
0
0
Great experience
G
December 17, 2017
Parts were easy to identify and find. Order arrived in 5 buisness days (with free shipping). Watched how to video as I haven't done a break job in 20 years. My fiancee watched it with me and said she could probably do the job. Good video! Break job took less than 2 hours and saved me $250. Not often do I make $125 hr. I will shop here again for parts.
Excellent
Jay
January 31, 2020
Exceeded all expectations
Great Kit for Great price
Sarah
April 12, 2022
Great quality and fit. Super easy to install, solved my pulsing breaks.
Customer Q&A
Does the engine specification matter when ordering this set?April 1, 2017
Steven B
10
That will always depends on the year, make and model.
April 2, 2017
Tim K
Customer service
877-844-3393
Monday - Friday 8:00am - 9:30pm ET Saturday - Sunday 8:00am - 4:30pm ET
Ford is a registered trademark of Ford Motor Company. 1A Auto is not affiliated with or sponsored by Ford or Ford Motor Company.See all trademarks.
Enter Vehicle Year Make Model
Specify your vehicle's year, make and model to guarantee fit.
Year
Make
Model
Options
Drivetrain
This part doesn’t fit a . Select from parts that fit.