Brought to you by 1AAuto.com, your source for quality replacement parts and the best service on the Internet.
Hi, I'm Mike from 1A Auto. I hope this how-to video helps you out, and next time you need parts for your vehicle, think of 1AAuto.com. Thanks.
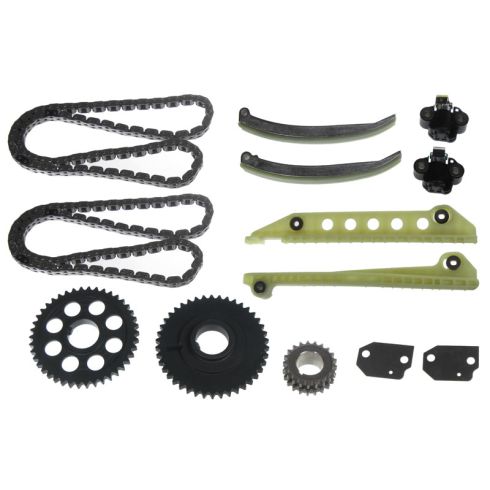
In this video, we're going to show you how to replace the timing chain on this 2003 Mercury Mountaineer with the 4.6-liter V8 engine. To pull off this repair you're going to need quite a breadth of tools. You'll need a very good socket and ratchet set along with screwdrivers, wrenches, pliers and things like that. You also need some specialty tools, we've listed them here, and you'll see how we use stuff within the video to take things apart.
The first part is disconnect both your battery cables, and then you're going to want to basically take the front of the engine apart to get to the front of the engine, and that's going to vary somewhat by different vehicles, so we'll show you on this Mountaineer what we did. Lift up on the panel and pull it free. Then remove these two 11mm nuts. Once you remove those, lift the engine cover up and off and then pull the hose free. Lift up on the tab on this harness and disconnect it, pull this hose free, and then loosen up this hose clamp with a flat blade screwdriver. Then just pull that hose free. Now you just want to lift your air intake box out so pull those two hoses out, pull the air intake box from the side of the vehicle. Then lift that and the hose assembly up and out.
Slide a drip pan underneath and then, using a pair of pliers, push the teeth together on this clamp. Slide it back and pull the hose free. You want to lift it up so no more coolant will splash out. Just tuck this end over here. Now remove this 13mm nut, and we'll fast-forward as Mike does that. Remove the bolts that hold either side of the upper radiator shroud, and also undo the clip for the refrigeration line. Using a 10mm wrench, just remove these fan bolts.
We're going to remove the fan belt this is the cheap and easy way. Just take the screwdriver and pry it out and off of this idler pulley down here. Once you get it off of there, actually pulling up on the belt and off the alternator. Then just remove the belt the rest of the way. I'm going to get my 10mm wrench on here, and then I'm going to put my large adjustable there to hold it. I'm going to use another wrench to hook on my 10mm to give me some extra leverage and loosen that bolt.
For now, I'm going to loosen all four bolts, but I'm only going to remove two so that I can get the tools in there. I need to remove the fan clutch. I'm going to take this tool, and the peg goes into the hole there. Then I'm going to put it right against that stud to hold it. I think I've got it here. I use that fan pulley wrench, put it into one of the holes that I've taken one of the bolts out of, and then was able to hold onto it and loosen the fan clutch with the larger adjustable wrench. We're going to use a piece of wood to make a tool to hold the crank. If you look down here, you'll see I've got three, these bolts are M8 by 125, they are holes in the harmonic balancer pulley, so I've put those bolts there. I'm just going to put the piece of wood against them and hold it on there firm and just make a mark at the top of each one.
Here's my three marks. All right, if I draw a line, let's see, straight, between these two, it doesn't have to be perfect. Straight between these two and straight between these two that's the center. I've got my three dots, and then I made a center hole, so I'm going to use a 3/8 drill, that will be big enough for my bolts and to have a little bit of movement for adjustment. Now I'm going to drill a 1/8 inch pilot hole in the middle. Now we're going to use a 1 inch wood bit because that will allow my socket to get through there pretty easily. I've got my wood, this is the large hole that the socket and ratchet can go through to the crank bolt.
I'm going to bolt it on with my three other bolts. As you can see, I've got my board on there, and that can actually hold the crank shaft. 18mm socket and ratchet right through that large hole. The board allows you to hold the engine in place while you remove the bolt for the harmonic balancer.
This is a harmonic balancer puller tool, you can see we've threaded this on. We're going to put this end on it so that it doesn't go down the crank. Then we're going to use our three long bolts and bolt the three bolts to the harmonic balancer. You can see we've got our puller mounted with the three bolts into the balancer, and we just tighten up the puller and pull it free. Now just pull your harmonic balancer up and out. Pull off your water pump pulley. Now we're just going to remove, basically, anything that's bolted to the front cover: pulleys, tensioner, there's some brackets, and then over here more pulleys and brackets, and even down lower there's some smaller brackets holding hoses at the bottom. When the last of those bolts that holds in the tensioner is removed, it just pulls free.
Once you remove the nut down here, you just want to pry that bracket off the stud. Just for safe keeping, I just thread all the bolts back into their holes. Next is removing the power steering pump, and it's probably the hardest part of the whole thing. There are two studs right down here. First you remove the nuts and then you remove the bracket that's on there as well as the negative battery cable. Then those nuts are actually on stud bolts, so you have to remove those bolts. They're all 13mm. You'll need a 13mm long socket.
For these two studs, I was able to get one out with my big impact socket here. The one that's closer to the front of the vehicle, you need a narrower deep socket, 13mm, to be able to get up in there and clear everything and then remove it. Now down here, on your lower fan shroud, there's two more 8mm bolts; just go ahead and remove those. Then pull the fan shroud up and out. You have to angle up one end and then just feed it up and out.
There's another 10mm bolt right under here, and there's actually a line that goes right underneath it. You can get a 10mm wrench through your pulley onto the bolt, and you can just do it a 1/16 of a turn at a time. When I said that removing the power steering pump was the hardest part, this bolt is actually hardest part of this whole procedure both taking it out and putting it back on. You've got to get your 10mm wrench in there, you can turn it about an 1/8 to a 1/4 of a turn at a time, and flip the wrench over. You have to angle it and move the power steering pulley a little bit as you're turning. Eventually it'll come down and out.
Now we're going to get into removing the valve covers. You want to pull the harnesses up and off, and you can actually disconnect the harnesses from all the coils and fuel injectors, and that will give you a little extra room. Pull all the hoses from the valve covers. Then remove the 8mm, and I think there's even maybe a 13mm bolt on one side. Just remove all those, and then you can pull the valve covers up and out. I'm just going to move this out of the way, and then a 13mm bolt right here that holds it.
Now just tap this lightly with a hammer to separate it. Then you just want to lift up on the valve cover and just move all the harnesses out of the way. We're just going to fast-forward as he keeps working it out. Once you get it to a certain point, you can just pull the valve cover free. You're going to want to do the same thing on this side but first, there's a bracket right here with an 8mm bolt. Just remove that bolt and pull the bracket free. Then repeat the procedure to remove that camshaft cover.
On the timing chain cover there are four 13mm bolts that go up through bottom of the oil pan. There are one, two, three, and four. They hold the oil pan into the timing chain cover, so we'll remove those first. Some of the studs that hold the timing cover on have wire harness clips on them so pry those off. Then you'll need a deep socket to remove the 18mm stud bolts that hold the cover on. Then it's held on also by eight 13mm bolts. There's actually one more bolt right here under the water pump, so just remove that. You want to just push the tab on this harness and disconnect it. Do the same thing with this harness up here. Carefully remove your camshaft or valve cover gaskets, you want to be sure not to tear them or rip them because you'll be reusing them. They have a little bit of gasket sealer to hold them in place, and plug the cracks between the timing cover and the engine.
Now, at the top, there are little ears that you can pry very lightly. It should come off. If it doesn't come off for any reason, just make sure that you have all the bolts out but it should come out. Then, carefully, you just want to lift this up and out. It is sealed up a little on the bottom, so you have to pull at the bottom a little bit, and then just carefully feed the front of your engine up and out. It does take some maneuvering. Now we have access to the timing chain.
We hope this video helps you out. Brought to you by www.1AAuto.com, your source for quality replacement parts and the best service on the Internet. Please feel free to call us toll-free, 888-844-3393. We're the company that's here for you on the Internet and in person.
