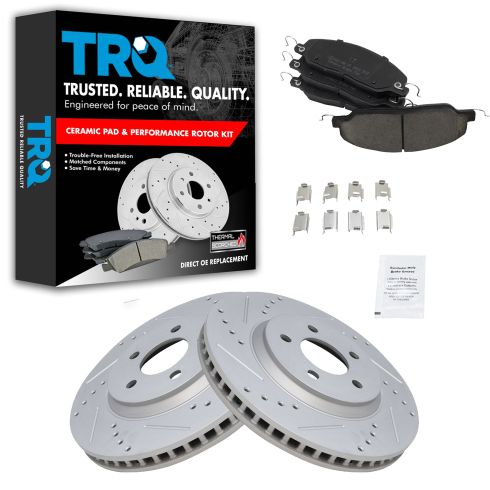
Once your vehicle is raised and supported safely, you're gonna remove all five lug nuts using a 21-millimeter socket. Remove your wheel. The next thing we're gonna do is take a nice small pry bar. We're gonna come right in between the caliper and the rotor and just try to pry back like this. And that's gonna push in those pistons. This is the dual piston caliper, so you need to make sure you push in both those pistons at the same time. Just gonna go like this, nice and slow. Once you're sure you have your pistons pushed back fully, you can continue. The next thing we're gonna do is remove these bolts right here that hold the caliper to the slider pins of the bracket. Use my 14-millimeter. Take out both those bolts. I'm gonna continue with that pry bar, just get this caliper out of the way. Let's get these pads out of here. Next, I'm gonna use my 15-millimeter and take out these two caliper bracket bolts. Remove that bracket.
The next thing you would wanna do is just take one of your lug nuts, start it on one of the studs here. If the rotor is stuck on, which this one isn't, you would just take your hammer, give a little bonk, break it free. The lug nut is gonna keep it from possibly coming off and hurting you. Get the rotor right off here. The next thing you wanna do is clean up the hub mating surface where it touches the rotor. That looks pretty good. All right. Let's go over to the bench and clean up the bracket.
So, we're on the bench, we've got our bracket here. One of the first things we need to do is get all this gear off of it. Let's get these tins off here. Now, it's time to get the sliders out of here. Just grab onto them like that. Slide the boot off. You want to take a peek at those boots just to make sure they're not ripped or torn. That looks good. Slider is decent. That one off of there. Take the boot off of here, take a look at it. Okay. Looks decent as well. We're gonna move along to cleaning out the bracket. Wanna make sure you have your safety protection because we're gonna be using chemicals. Gonna put some of this inside here, a little bit of parts cleaner. Same one for this one. Bore brush. Let's dump it out. Oh, yeah. That's nasty. Give another spritz. This one. Just take a peek inside. Make sure they look decent. If for some reason they don't, just go and hit 'em again with the bore brush.
Something to pay attention to is along this area. You wanna make sure you don't have any buildup coming along this. That's right where this boot is gonna ride. It needs to make a good connection all the way around to keep moisture out. So, we have those edges all nice and cleaned up. The next thing we wanna pay attention to is right inside here. That's where those tins are gonna ride and on top of the tins, you're gonna have the brake pad in between. So, if you have any raised areas right here, it's gonna cause an issue with those pads being able to slide around. So, use a screwdriver, chisel, little brush, or even one of these little sanding discs. Looks like this. And clean that up nice and pretty. Once those look good, of course, we're gonna do all four, once they look good, we'll move along. Let's continue on to cleaning up our sliders. Give them a nice wipe. Then you wanna check all these areas right along here. It should be very smooth. If there's any rust or pitted areas, you'd wanna clean that up. Then you also need to pay special attention to this area right up along here. That's also where the slider boot is gonna sit. So, if it's not clean, moisture can get in and mess up this whole area. It's gonna make it freeze inside there and the slider is not gonna work as it should.
The next thing we wanna do is clean up our slider boots. Just take your rag, slide it right on through just like that, and then grab that boot and just give it a little twist just like this. That's gonna roll the rag all around inside and get off all the crud that's on the inside. Do the same to both. So, next, I'm just gonna add a little bit of this brake caliper moly grease. It's important to make sure you use the right stuff. Your kit should come with a little packet of it. I like to use a brush. Do all four corners. Next, it's time to put on your tins. You're gonna notice with the tins you have a large flippy-do side and then you have one that goes up and then over. And you're also gonna notice that you have this little side and then a big, old flippy-do on that. When you install these, you need to have the large flat end facing down, and then the hook facing out and away from the rotor. So, it's gonna go just like this. Do the same to all. Continuing on with that brake caliper moly grease, we're gonna go right along this slider. And then it's important to remember to get right up along that edge that I told you to make sure you cleaned up. That's right where the boot is gonna ride, and having grease in there is gonna keep the moisture out. We'll grab our boot, slide it on there, give it a little twist. If you feel like you need a little bit more grease, go ahead and put it on there now. That looks good. Now, I'm gonna go up along the caliper bracket, right on that lip. And at least try to get a little bit up along that lip. Super important. Put the slider in. Once it's in, give it a nice twist. Perfect. Do the same for the other side.
Just gonna rest our rotor up on here for a second. Some parts cleaner, clean down the braking surface, and of course, do the same to the other side. Let's put a little bit of copper never seize on here to your rotor. Put it up on there. I have a spare nut and then one of my lug nuts. That's just gonna hold the rotor from moving around too much on me. Now, if you look at your mounting bolts, if you see threadlocker or a whole bunch of rust, you need to make sure you clean up those threads, and then we're gonna reapply threadlocker. Now, it's time to get the bracket on here. I've got my bolts nice and clean with a little bit of threadlocker. We're gonna start them both in, bottom them out, and then we'll torque them to manufacturer's specifications. Let's torque these bolts to 85 foot-pounds. Torqued. Let's get our brake pads on here.
So, these little pins right here hold the pad away from the rotor. So, as soon as you release the brake pedal, they're gonna wanna separate and then the rotor is gonna be able to cool down as you drive. Next, we're gonna grab the caliper. And we're going to coat along the area with the pistons, and then along these areas right here where the caliper meets up against the pad. We're gonna use some more of that brake caliper moly grease. We're gonna go all along these pistons. Then like I said, on these ears, only on the mating places where this caliper is gonna be touching up against the pads. The reason why we're doing this is for noise reduction and vibration dampening. You're gonna notice your slider pins have the flat area and then the rounded area. You want these flat areas to be up against the flat area on the caliper. That's gonna hold them from spinning. Squeeze those pads in, of course. Start in both of these, then we'll bottom them out and torque them to manufacturer's specifications. Let's torque these 25 foot-pounds. Let's get the wheel back up on here. Start on all your lug nuts and then bottom them out. Now, we're gonna bring this down and torque it to manufacturer's specifications.
Now, with the vehicle's wheel touching the ground but most of the weight of the vehicle off of it, we're gonna torque these in the star pattern to 100 foot-pounds. Torqued. We're just gonna pump up the brake pedal until it's nice and firm. Do that nice and slow. It's getting close. Oh, yeah. There it is right there. I've got a nice, firm brake pedal. It's not sinking any further to the floor. Let's go check that brake fluid. So, right under the hood is where you're gonna check your brake fluid, you have your master cylinder. You can see a maximum line and, of course, there's a minimum line. Just wipe off this area along the lid. Make sure there's no dirt or debris. Turn this counterclockwise and lift it up. You'd take a peek inside and make sure that it's full. If it's not at the maximum, you're gonna add some. If it's above the maximum, take a little bit out. This little piece right here, just push that in like that. If you need to know what kind of brake fluid to use, generally speaking, it'll be located right on the top of the cap. This one says use only DOT 3 brake fluid. It's very important to use only DOT 3 brake fluid. Once you know what's full, make sure you reinstall the cap, wipe down the area, close the hood, take it for a road test.
