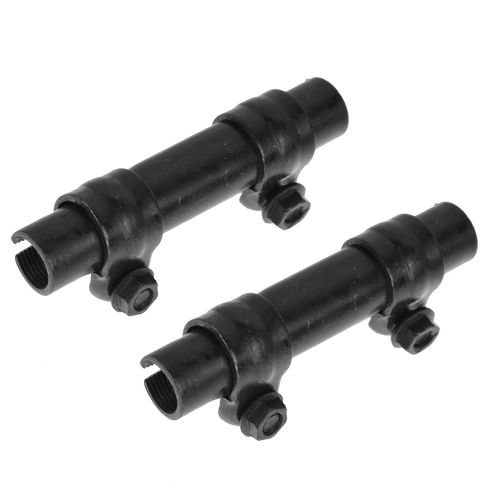
Safely raise and support your vehicle on the frame so your suspension can hang. Now that we've safely raised the vehicle, let's remove this by using a small pry bar right in this little slot. Now you can see your 22-millimeter lug nuts, remove those. And now we'll just do the same thing to the other side. It's a great idea to spray down the area. We're going to let that sit. Obviously, if your tie rod ends look like this around the adjustment area, you're going to want to do the whole thing. If for some reason you aren't, you're going to remove these two bolts and then you'll turn this out and that will break this free.
So now that I know that I am replacing the assembly as a whole, I'm going to turn the wheel all the way to the left. That's going to give me the most area to get to that inner tie rod and stud. To start, I'm going to use my 18-millimeter half-inch drive, come right up here on the outer tie rod end nut, if you need to give it a couple of bonks, make sure you get it on there. Let's loosen this up. I'm just going to take that nut and put it back on there, just a few threads to keep myself safe.
So now we're going to break the outer tie rod end free from the knuckle right here, you can use a large hammer. You could also use a pickle fork with a hammer. If you're going to go with the hammer method, just go right here on the knuckle, it should want to break free. Make sure you have the nut on there and your safety glasses. All right, that broke free, awesome. Let's remove that inner tie right end nut. For this part right here, we're going to use one of these pickle forks. Come right in through in between the inner tie rod end and this right here, going to hammer it in. Start that on just a couple threads here. Okay, that's separated. Let's start the removal process here. Now we can move along to the next step.
So one of the first things we need to do when we get to the bench is, of course, we'll put a little bit of copper Never-Seez on our threaded area, you can go right on the tie rod ends, and maybe inside the sleeve if you wanted to. Once you have done that and you have those prepped, we're going to take a measuring tape and we're going to measure from one end of this all the way to the other end. Take a quick measurement here, and take note, looks like for me it is 16 and seven-eighths. So, what I am going to do now is I'm going to get this started onto both these tie rod ends at the same time, that is called timing the tie rod ends. We'll screw it in, and then we'll keep measuring until we get to 16 and seven-eighths, which is my measurement.
Start this on, just a couple of threads here, okay. Now I am going to do the same thing for this one, just grabbing the first thread is the hardest part usually. Now that I have both those started, I'm going to try to screw this on. Okay. So that looks pretty decent. At this point, what I want to do is make sure that I have the inner tie rod end lined up with the new inner tie rod end. That looks good, and I am going to make sure that this is aiming up in the same direction as the other one. Just like that.
And the next thing that we want to do is get these bolts so they are lined up just like that. So you can see where the open area is, that is exactly where you want the bolt to be when you crimp this down. That's how it is going to hold the threads the best. Just snug this up, and we're not going to completely tighten this up yet because, of course, we're still going to have to give it a little twist when we get in the vehicle. I just want to kind of make it so it can't flop around on me. That's pretty decent. Just snug, time to get that started in there, it's important to pay attention to your inner tie rod end which has this little blank area of the shanked end, then you have the outer tie rod end that has the threaded area pretty much the whole way. Started. Start in the outer as well, let's go ahead and bottom these out. Let's torque both these nuts to 40 foot-pounds.
So now you are going to look for your cotter pin hole. And that should be a hole that goes through the stud. It needs to line up with the castle nut here. I'm going to take one of my cotter pins and just feel around, that feels like it is almost about to go through. Something that's important to remember is if the cotter pin does not go through, or it is not lined up, you don't want to loosen it so you can put the cotter pin through. You just want to tighten to the point that you can get the cotter pin locked in. Do the same to the other one, that one I can see that it is not lined up. Just going to give it a teeny bit more. Put the cotter pin through, of course, lock it down.
The next thing you want to do is make sure that your tie rods are straight so when you're looking at 'em, you want the stud to look like it's coming straight out. If it isn't, just go ahead and give it a little twist, and then double-check the other side to make sure that that one is good. If for some reason when you have one straight and the other one is turned completely like that, that's going to cause premature wear of the tie rod ends. Make sure they are both straight, and then you can torque these down to 14 foot-pounds. We're just going to double-check the tie rods now that those are snug. That looks straight, this looks straight, perfect. Let's get the wheel on, and get it to the alignment shop.
Time to get the wheel up on here. Start on one of those lug nuts. Now we're just going to start on all the lug nuts, we'll bottom them out and then we'll torque them to 120 foot-pounds. Torque these to 120 foot-pounds. That's torqued. We'll get our cover on here, awesome. And now we'll just do the same thing to the other side. The next thing you would want to do is go ahead and get yourself an alignment.