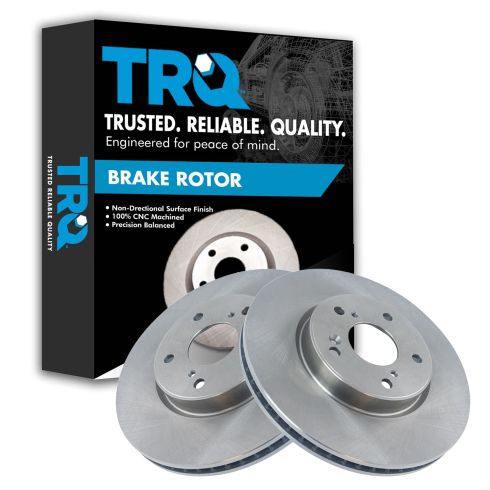
Once your vehicle is safely raised and supported, we're going to remove all 5 of these 19-millimeter lug nuts. Remove the wheel. The next thing we want to do is push back this caliper piston. Generally speaking, you'd want to spray down this area, take off the boot, brake free your bleeder screw. For this application, we're actually just going to push back the caliper slowly doing just like this. I'm coming right in between the caliper and the rotor through this hole. I'm slowly prying. Now, I can do this, and you can see that piston inside. You want to make sure that's in as far as it can go. Take a peek. Actually, that looks pretty great.
The next thing we're going to do is remove the caliper to bracket bolts using a 12-millimeter. Once you have your caliper off, take a look at the piston area in the boot. Make sure you don't see any fluid. If you see any fluid coming from here, you either need to rebuild your caliper or replace it. Rest your caliper, so it's not hanging from the hose. Grab your pocket screwdriver, pull out this pin. Same thing here. Make sure you hold on to these. Next thing we're going to do is move these pads around and try to get them out of here. If you look at the pads, you can see there's one that looks like that. And there's one that has a wear indicator. The wear indicator on this goes on the inside pad and it's up facing the top.
The next thing we're going to do is remove the caliper bracket to knuckle bolts using a 17-millimeter. Grab that bracket. There it is. The next thing we're going to do is use some penetrant, and we're going to go right along this hole, all those studs, and try to get this corrosion out of here. Make sure you spray that screw. Now, once you let this sit for a couple minutes, you can go ahead and try to take out this Phillips-head screw. To remove it, you don't actually use a screwdriver, you need to use an impact driver with a Phillips-head bit. Go ahead and put it in there. Twist it to the left. Give it a couple bonks. It should want to break free. Okay. Came right out. The next thing we're going to do is put one of these lug nuts on just a few threads. Now, we're going to continue on with the hammer, and you can give it a couple bonks on the braking surface assuming you're getting rid of your rotors, or you can go right along here. There we are. There it is.
The next thing we're going to do is clean up the mating surface where the rotor is going to ride. So, you can use a sanding disc or a little wire brush. Get this as smooth as possible. Now, that that's cleaned up, let's go ahead and clean down the area. The next thing you want to do is put on some copper Never-Seez along the areas where it's going to mate. Spread it out all along the whole area.
One of the next things we need to do is clean down the brand new rotor's braking surface. It's going to come with shipping lubricant on there just to keep it from getting rusted along the way. Make sure you do the other side. So, now we're going to put our rotor up on here. You want to line up the inverted hole right along that spot where you can see those threads, so you can put this in. And go ahead and put this in there. Tighten it up as much as I can. And one bonk. That's it.
Okay, so we've got our bracket here on the bench. Next thing we need to do is remove the tins. And then once we get those off, we're going, of course, take these out of here, and then we're going to clean everything up. So, I'm just going to do one side of this, and you can just do the same on the other side. Take off your tin. Grab this. You're going to take your screwdriver, go right along this lip, and that comes right out. At that point, we can wiggle this around. Take out your boot completely. Just take a look at it, and make sure it's not ripped or torn anywhere. That looks great. Once your boot is out of the way, you can take a nice brush, or a little screwdriver, or even a nice sanding disc, and clean this up.
So now, as you notice when you pulled out your pins, you're going to see that they're different. You want to make sure that you have the one that has the boot on it matching up with where you took it from. Okay? But you do need to clean them. So, clean these up as good as you can, especially up inside this area right here. This area is where the boot is going to ride. If it's not cleaned up, there's a possibility for moisture to get in between and, of course, seize up the slider inside of the bracket.
The next thing we're going to do is going to be using chemicals. We're going to go right in here with some parts cleaner. Use a nice bore brush. Go ahead and dump that out. Oh, yeah. Nice. If it looks like it's really nasty in there, you can do that a couple times. It's a good idea to take a peek right inside. If you see any corrosion or pitting, you need to obviously make sure that it's in good condition. Go right along this edge right here with your little screwdriver. That looks great. Do the same to the other side. All right, so that looks great. Let's move along to these boots. Using our rag, go ahead and make a little tunnel just like that. Run it through and then spread that boot, and just rub it along the rag. The rag is going to rub along the inside and clean off any gunk that might be hanging out in there. Nasty. That looks pretty good. Do the same to the other.
Okay, so we've got our sliders cleaned up. We've got our boot cleaned up. We've got our caliper bracket all nice and clean. Everything is ready to be lubed at this point. Go ahead and grab some of your caliper moly grease. We're going to get started. First, what I'm going to do is I'm going to go around all four of these ears. Putting this on here is going to help with noise reduction, vibration dampening, and of course, keeping moisture from getting in between the tins and getting your pads stuck. Let's move along to those sliders. One of the first things I like to do is just go right along the slider hole. I like to put a whole bunch right in there. Awesome. The next thing we're going to do is lubricate the slider. Of course, you do the shaft, and then it's super important to make sure you get all the way up to this point up here. Get right over that ridge. Even if it's just a teeny bit, it's going to make all the difference. I'll tell you why. Next, we're going to grab this boot. Just slide it right in. Give it a little twist. If it falls right out, it's not seated properly. Now, we're going to grab this slider pin, gonna slide it in, and this boot is going to catch right up onto that ridge just like that. You're going to give it a couple spins. That's going to work in that grease. Now, there isn't going to be any ability for water to make its way inside of there. Do the same to the other side. Once we have both those sliders in like they are, we're going to move along to the bracket tins. That's these right here. Go ahead and line them up, and then squeeze them on there.
It's time to get our bracket on here. Go ahead and slide it right up over. We have our two bolts. Little bit of thread marker. We'll call it your prerogative. Go ahead and bottom both of those out, and then we'll torque them to manufacturer specifications. Let's torque these to 85-foot pounds. Torqued. It's time to get the new pads on. Just make sure you have the brake indicator in the same area. You want that going on the pad on the inside. Should slide right into the bracket here. There we are. Do that outer pad. Same thing. Those look great.
So, next, we're going to take a look at this caliper. You want to take a little bit more of that moly grease, go right along the piston where it's going to hit up against the brake pad, and then along both of these ears. Just get a nice little coating on there. That's going to help with vibration dampening and noise reduction. Let's set this here for a second. The next thing we want to do is get these springs on here. Can start with whichever one you want. I'm going to start down low. Make sure you hold a grip on it because it's going to want to separate on you. And get this one on there just like that. If I was to let this go, they're going to go [Vocalization] just like that. Okay. Awesome. Make sure they're all the way in. Go ahead and grab that caliper and slide them over. Slide that right over. Push in those sliders. Now what you want to do is make sure that they're turned, so they line up with this notch right here. So, you can just grab them and turn them. This one, same thing. Awesome.
The next thing we need to do is put on our mounting screws. Start them both in before you tighten them down. Torque these to 25-foot-pounds. Torqued. Let's go ahead and get the wheel back up on here. Start all your lug nuts on, and then bottom them out. The next thing we're going to do is torque these lug nuts to 80-foot-pounds. Torqued. Once your wheels are torqued, you're going to get inside your vehicle and slowly pump up your brake pedal till it's firm.
The next thing you want to do is under the hood. You're going to come over to your master cylinder. You can open it up and take a peek inside. Once you can see where the level is, take a look from the side and you'll see a maximum line. You want to be just about right there. Once you're sure that it's full, make sure that you close it back up. There it is. Close the hood and take it for a road test.


