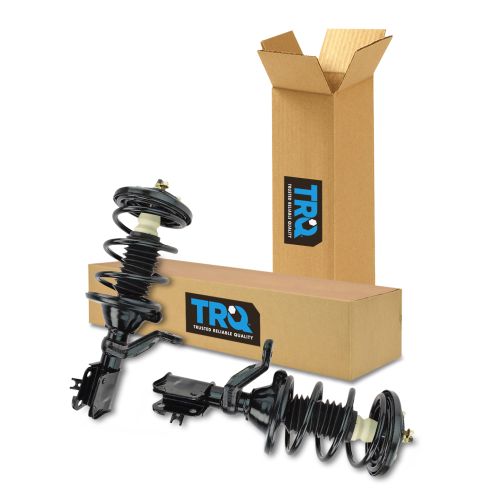
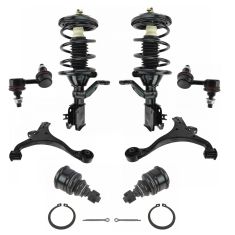
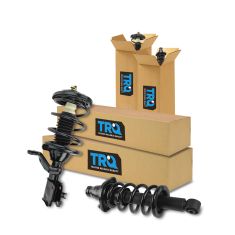
1ASSP00161-Honda Civic Front Driver & Passenger Side 2 Piece Strut & Spring Assembly Set TRQ SCA57007


Replaces
2003 Honda Civic Hybrid Front Driver & Passenger Side 2 Piece Strut & Spring Assembly Set TRQ SCA57007


Product Reviews
Loading reviews
4.48/ 5.0
29
29 reviews
August 18, 2017
verygoodWrite your review here. It must be at least 50 characters long. Consider whether you would recommend this product and what you like or dislike about it.
good ride but not exact fit
November 4, 2017
Bolt holes are not sized for original bolts and don't come with alternate bolts. In fact the top and bottom holes are different sizes.
Easy install
November 13, 2017
Fast and easy install. I would definitely recommend.
Bolts Don't Fit
November 18, 2017
Original bolts don't fit through the mounting bracket. I've generally had good luck with 1A, was very disappointed. Will drill it out tomorrow.
always super service
April 7, 2018
as usual easy to order , shipped right away, great quality , love this service will continue to do bus with you.
Honda struts installed the easy way!
April 11, 2018
Ordered arrived ahead of time, and was a breeze to install! Ride is like new, and have no complaints! Way to go with strut replacement!
1A Auto came to my rescue
April 17, 2018
Three weeks ago my wifes 2002 Honda Civic was diagnosed with some major suspension, handling, and brake issues. This required changing the front shock kit, driver side control arm, and front brake kit. I knew that I was looking at $1000 repair job including labor. However, 1A Auto not only provided me quality advice and excellent products but also made the expense bearable and reasonable. Bottom line is that I was able to accomplish everything within $270 approx. for parts and $300 in labor. I am a big fan of advance auto parts however 1A Auto changed my perception and showed me it is ok to look for options online even if one feels a little uncomfortable and doubtful. Hats off to the entire 1A Auto team and I will surely consider you guys anytime I need auto parts going forward. Thank you! Thank you! Thank you!
Ok
August 16, 2018
Okokokokokokokok
SI le qued muy bien
Y llegaron a buen tiempo
Everything fit like a glove
August 20, 2018
Ordered the strut assemblies for my 2001 Honda civic LX. Ordering was simple, parts arrived within a few days and were a perfect fit for the car.
One side note. The car must be aligned after installing new struts.
Great installation instruction videos.
September 10, 2018
4 out of 5 stars only because one of the welded nuts for the brake sensor fell off when I was installing the drivers side strut.
When installing the passenger side strut I had to break off the nut because it didnt line up with the hole in the bracket which made it impossible to install the mounting screw for the brake sensor.
Does the job!
October 28, 2018
Ordering was easy. Shipping was as expected. Came ready to install, took no time at all. This is the first time I've ordered parts from online and I'll be back!
November 18, 2018
Received my order on time, got the correct parts and good quality for the money, they always are my number one choice w when to buy on line
Pleased.
December 11, 2018
These replaced two front Monroe spectrum that for whatever reason, started clunking after 20k. These don't clunk at all and everything feels better, tighter. A few creeks here and there but they seem to be less lately. They've probably only gone 200/300 miles. I was nervous about these parts but they seem pretty solid.
I'm a fairly skeptical guy and I know only time will tell with schocks and struts. For the price, quality, and all the money I've saved watching your videos I got to give 1A a five star all the way.
Perfect fit
April 10, 2019
Parts fit like a glove now car is running like new!!
Five star parts.
July 21, 2019
Fits perfectly for my Honda civic. Easy to install riding smooth again. Thanks 1aauto. Will buy again and will recommend.
Excellent Deal!
November 16, 2019
They arrived on time, fit perfect, for an affordable price too! Keep up the excellent service. Outfitted my entire suspension from 1aauto!
Thanks !
Scott R
Fit like a glove
January 29, 2020
Super fit
Civic struts and ball joints
February 21, 2020
The products were as advertised, they also arrived when indicated. The parts are great, but the insight from 1aauto YouTube clips are an even bigger selling point.
No comment
September 17, 2020
Its good product and Ill recommend to everyone who need auto parts
No complaints!
June 8, 2022
Exactly what I needed. Thank you.
Struts
July 11, 2022
Rides like new, very easy to install
July 13, 2022
Awesome
July 20, 2022
Fit and no issues
March 30, 2023
I had a great experience. Everything arrived on time.
garbage
April 10, 2023
3 weeks into using them on my 01 civic i can already hear popping sound from the front driver side strut when i make right turns or if i take off too fast. if you have the money just buy kyb this is trash i wish i could get a refund
November 7, 2023
I have ordered here a couple times I highly recommend using this site. Five stars here
March 19, 2024
Shocks fit as expected on my 2002 civic ex 5 speed.A little firmer than expected but has been a lOOOOOOOOOOOOOOng time science it had new shocks..They will settle .Only be on 5 week butno noise and smoother ride.
Exact fit & effortless checkout
March 21, 2024
Hands down best prices around & shipping was fast, car runs & drives well the parts were really well made and exact fit for the vehicle, easy checkout all I used was my Apple Pay & bam delivered in 48 hours
2001 civic ex coupe
June 8, 2024
Oem parts. Now my car rides level and smooth!
Customer Q&A
Would these be considered economy or OEM ride quality struts?
February 8, 2017
10
These assemblies are made to meet or exceed OE specifications. They are intended for an OEM ride quality.
February 11, 2017
Alex P
The bolt holes were about 1/8 inch to small, can I drill it out and still have structural integrity?
November 18, 2017
Will these fit my 2004 Honda Civic Ex?
November 18, 2019
10
This is not the correct part for your vehicle, but we do carry the one you need. The correct part number is 1ASSP00158.
Please let us know if you have any other questions. Thank you!
November 18, 2019
Emma F
Is this fit on Japan built honda civic 2001? I'm from the Philippines who owns such unit.
January 10, 2022
10
Yes, this part will fit your vehicle.
January 10, 2022
Emma F
I have a 2001 honda civic 1.7 lx but have three bolts on top of the struts /does SAC57007 fits my car?
October 27, 2022
10
Yes, this part will fit your vehicle.
October 27, 2022
Emma F
I have a 2002 Honda Civic ex 4 door will this fit?
January 29, 2023
10
Yes, this part will fit your vehicle.
January 30, 2023
Jean O
Will these fit my 2003 Honda Civic EX?
June 27, 2023
10
These parts are listed for the 2003 Honda Civic Hybrid.
June 29, 2023
Kemal S
Will it fit 2005 Honda civic hybrid sedan?
June 20, 2024
10
Yes, this part will fit your 2005 Honda Civic Hybrid.
June 20, 2024
Jean O
Honda is a registered trademark of Honda Motor Co., Ltd. 1A Auto is not affiliated with or sponsored by Honda or Honda Motor Co., Ltd.
See all trademarks.


