Hi, I’m Mike from 1A Auto. We’ve been selling auto parts for over 30 years!
In this video, we're going to be replacing the front brakes on a 2010 Honda Pilot. If you need these parts or other parts for your vehicle, click the link in the description and head over to 1AAuto.com.
We're going take the tire off before we lift the vehicle off the ground. We're going to loosen up the lug nuts. I have a 22 millimeter socket and a breaker bar. Crack these free while it's on the ground, and it'll be easier if you wait 'til you put it in the air. Then the tire will just spin on you. Loosen these up. You can take out all the lug nuts. So we've got the lug nuts off. Now we'll take the tire off.
First, we're going to take off this caliper. We're going to use a 17 millimeter wrench to take off this lower caliper bolt. Once you crack it free, you can generally take it out by hand. Break the top one free. There we go. Once those are, we can take and shake the caliper back and forth a little bit. That'll compress the piston. Pull this aside. Slip our bungee cord through here and the spring. Hold the caliper. You can put it out of the way.
Next we're going to remove our pads, but there's these little springs that keep tension going out on the pads. We're going to pull these off, and then right here, take these out. They're like pad springs. Next, we'll remove the pads. Pull those out. Now we're going to take the caliper bracket off. We're going to use a 19 millimeter socket and a breaker bar to break these free. Once you broke them free, then you can switch to a ratchet. For the upper one, I need an extension to get past the strut 'cause the strut is in the way. Now that those are loose, you can just do it by hand. Pull the bracket off.
All right, so next we're going to take these screws out that hold the rotor on. Sometimes these can be difficult. You could try with a screwdriver. If it doesn't work, you may need an impact driver. What do you do is, you stick this on. You're going to make sure it's set to loosen. So, for this one you'd push it down and turn it to the left. Then you know it's set to loosen. And what you're going to do is put the correct bit in, hold it, and you're going to tap the back with a hammer, and that'll loosen the screw. Then you can take it out with a regular screwdriver. Same with this one. Just tap it and spins it free. Take these Phillips head screws out. Grab the rotor. It's pretty tight. Put a lug nut right there. Grab a hammer. We can hit it right here, here, here, all around there, and that broke some of the rust free and pumped it up. Take the lug nut off. Then we can pull the rotor straight out.
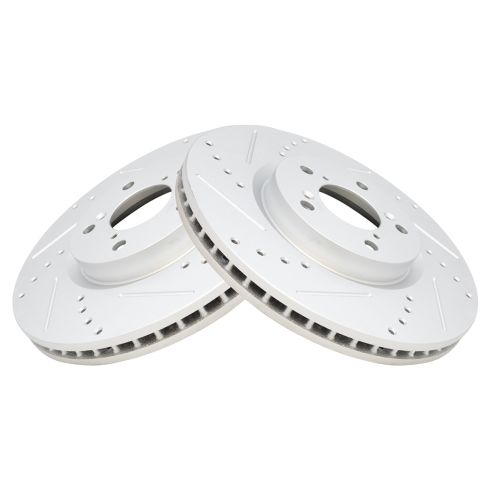
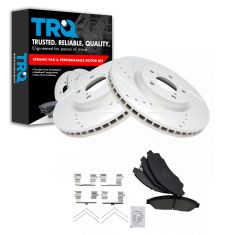
Here's our old brakes. Here's our new brakes from 1AAuto.com. As you can see, the pad configuration is the same. All the tabs are the same. The squealer is on the same side. The friction material has the same. As you can see, the rotor, it's machined the same way. The holes or the same. And flipped over, it's the same height, same size. Get yours at 1AAuto.com, and you'll be ready to rock and roll.
Now, we're going to pull this caliper slide out. This one's sticking a little bit. Grab it with some channel locks. Pull it back and forth, and pull back the dust boot. There we go. Then pull this one off. This one's coming off much easier. Use a little brake parts cleaner. I'm going to put it in for the guide pins. Use a little paper towel and clean it out a little bit. Take a little bit of brake parts cleaner on the guide pin. Clean this off. Take a little bit of brake caliper grease. Put a little brake caliper grease on the guide pin. Slide it back in. Make sure the boot is clicked on.
Now, we're going to clean the pad slides. We'll use a wire brush. Clean these up. You can also take the pad sides off. Use a screwdriver. Pry it up right here and right here. Check underneath. Use a little wire brush to get a little bit of the rust off. Clean right there on the caliper bracket. You can reinstall. Push back on and do the same for the other side.
Now, we're going to take a wire brush around the hub. A lot of the rust buildup was around this area right here, so we want to take the wire brush and get all around in there. Now we're going to installer rotor backwards 'cause we're going to clean this surface. Take some brake parts cleaner around, and wipe this. Get this off because there is a coating on the rotor to prevent the rotor from rusting. Flip it over. I'm going to line up the two holes, these two holes just like that. So, those two line up, and clean this side with the cleaner. Wipe it with a rage.
Next, we can install our Phillips head screws that hold the rotor on. Put that in loosely. You really don't want to tighten these up too much. Just snug. That's good. Next, we'll install this caliper bracket and our two 19 millimeter bolts on the backside. Next, I'm going to torque these bolts with a 19 millimeter socket. For the top one, I have to use an extension because the strut is in the way. So we'll torque these to 101 foot-pounds, and for the bottom one, I can just use the socket and a torque wrench.
Next, we're going to install the inboard brake pad. Use a little bit of brake caliper grease on the ends, and then some grease on the backside of the pad. Stick this on here. Right there. Put a little more on brake grease on this area of the brake pad, and then a little bit on the back side, just like that. Then install the brake pen to the outside, just like that. Before I put the caliper on, we have these brake pads springs. I'm going put these on. Just slip it into the holes like that. One there, and one there. Then we can take our brake caliper and slide it on. Put those bolts [inaudible 00:12:36]. Install our caliper bolts. Now, we're going to torque these with a 17 millimeter socket and a torque wrench to 53 foot pounds. And torque the top one.
Next, we're going to mount the tire. Take the lug nuts, install the lug nuts. I'll snug these all down by hand with the socket. Next, we're going to torque these lug nuts to 95 foot pounds. We're going to do it in a star pattern. You want to do that so that the wheel gets torqued down evenly. The next thing we want to do before we drive the vehicle is, we want to pump the brake pedal. As you can see, it almost goes all the way to the floor, and then you pump it a couple times, and it should be good. What that's doing is, there's an air gap between the caliper and the brake pads, so when you're squeezing that, that squeezes that air gap away to where it's supposed to be, and then you'll be good to go.
Thanks for watching. Visit us at 1AAuto.com for quality auto parts, fast and free shipping, and the best customer service in the industry.