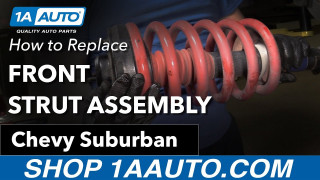
How to Replace Front Strut Assembly 2007-13 Chevy Suburban
Created on: 2017-09-14
If the front strut assembly is worn or failing and needs to be replaced, check out this how-to video and follow the steps to DIY
-
step 1 :Removing the Wheel
- Pry off the center cap
- Loosen the lug nut covers with a 22mm socket
- Pry off the center cap with a flat blade screwdriver
- Loosen the lug nuts with the vehicle on the ground
- Raise the vehicle with a floor jack
- Secure the vehicle on jack stands
- Remove the lug nuts
- Pull off the wheel
-
step 2 :Removing the Strut and Spring Assembly
- Support the suspension arm assembly with a jack
- Loosen the 15mm bolts on the top of the strut
- Loosen the 15mm lower strut bolts
- Remove the lower bolts
- Hold the shock
- Lower the jack
- Tighten a nut to the top of the strut with you hand
- Pry out the strut with a pry bar
- Undo the top nut
- Pull the strut down
- Lift the strut out through the upper control arm
-
step 3 :Installing the Strut and Spring Assembly
- Remove the nuts from the top of the strut
- Lower the strut down through the upper control arm
- Lift the strut up
- Pry the control arm down with a pry bar to wedge the shock into place
- Hand-tighten the lower bolts
- Tighten the upper nuts with a ratchet
- Counterhold the bottom nut
- Torque the bottom nuts to 37 foot-pounds
- Torque the top nuts to 37 foot-pounds
-
step 4 :Reattaching the Wheel
- Slide the wheel into place
- Start the lug nuts by hand
- Tighten the lug nuts preliminarily
- Lower the vehicle to the ground
- Tighten the lug nuts to 140 foot-pounds in a crossing or star pattern
Tools needed
-
13mm Socket
Socket Extensions
Torque Wrench
15mm Socket
Rust Penetrant
Pry Bar
Jack Stands
21mm Socket
Rubber Mallet
Flat Blade Screwdriver
Center Punch
Ratchet
Floor Jack
1/2 Inch Breaker Bar
Hi, I'm Mike from 1A Auto. We've been selling auto parts for over 30 years.
Remove the center cap with a large flat-bladed screwdriver or a plastic prying tool you can get from 1AAuto.com. Push in here and pop it off. Use a 22 millimeter socket and breaker bar to loosen the lug nuts while the vehicle is still on the ground. Raise and support the vehicle and finish removing the wheel.
Support the suspension arm assembly with a jack or a jack stand. We're using this because we're working on a two post lift. The suspension is going to want to drop when we remove the strut and spring assembly, so that's why we need to have it supported. At the top here, there are three studs with nuts. We will start by removing those. And then, loosen the two stud and nuts on the bottom and pull the strut assembly out.
I will spray some rust penetrant on the nuts and bolts here. Use a 15 millimeter wrench on the top ones. If they are stuck, use a dead blow, break them free. With those broken free, I'm going to switch to a ratcheting wrench, make things go a little quicker. These two lower mounting bolts go through the control arm. There is a 15 millimeter head on this side, and an 18 millimeter nut on this side. I'm going to try to break this nut free first. Take my wrench and then hit it with my mallet.
So it looks like it's actually turning the nut, and not the bolt, which is good. Free it up. I'm going to try to do the same for the other side. With the nut loose, I'm going to kind of hold it with my 18 millimeter, and take a 15 millimeter socket and ratchet. Now I've got it loose, I can undo it with my fingers. Slide the long bolt out. I'll put these together and put them aside. So repeat the removal for the other bolt. I'm going to hold the shock and I'll lower the suspension down. I'm going to capture one of the top nuts just so if the strut and shock combination comes loose, it doesn't fall completely out. I'm going to take a pry bar and sort of push against the bottom. Reach up, hold the strut up, and undo that top nut. Pull it out of the mount. It's not going to come down this way, so it's going have to come out through the top. We have our strut and spring assembly.
Here's our old strut and spring assembly from our vehicle, and our brand new assembled strut and spring from 1AAuto.com. So the nice things is you don't have to worry about swapping these springs, which can be very difficult. It comes fully loaded, ready to go. As you can see, it's got the same mounting bolt holes in the bottom. It has the same three studs on the top to mount. It has the same three mounting studs on the top as the original that came out. And this should go in your vehicle great and give you a good ride. This is just a warning sticker. You can remove this before you install it. You don't need to mess with this center nut. It's all set.
The spring is assembled. The warning's telling you not to undo it. Just leave it alone. You can take the sticker off. So we're going to go ahead and install this in the vehicle now. Before we install it, just remove these nuts that it comes with. Place them aside. I'm going to loosen this one and hold onto it, because when I install it, I'm going to use it to just hang the strut in place so it doesn't fall. So just keep that in a handy spot. When you install this, there are two mounting holes in the back. They are slotted, so they give you a little bit of room to work with.
I'm going to line the strut up with the two studs in the back and the one in the front, faced the way that it's already set up. And these are lined up to match up with the control arm. We're going to go in the reverse the way we took the old one out. Slide it up into place. That's why I kept the nut handy. I can reach up and capture one so it doesn't fall on me. I'm going to use that one nut I installed and a ratcheting wrench to just draw the strut up into place. I'm going to pry up on the suspension a bit, on the strut, do this. I have a large pry bar on one side of the suspension arm, so I basically just pried the control arm down, and then pried the shock into place. Take a punch and align the bolt holes.
You're going to have to spend some time moving the shock around to get these bolts to line up, either using an awl or a punch or a little pry bar to try and pry it around. This one doesn't quite line up. I've got the other one captured, so we'll take a pry bar and sort of pry the strut around. Try to wiggle it in. There it is. I captured the other two nuts on the top studs. These are locking nuts. And if they're torqued, they'll be locked in place. The bolts that we're replacing these with, the head is a 13 millimeter, the nut is still a 15. I'm just going to snug these up. And we'll use a 15 millimeter ratcheting wrench. Tighten up the top nuts. I torqued these lower bolts to 37 foot-pounds. Caught a hold of the top of the bolt and nut. Repeat the other one. Torque the top nuts to 37 foot-pounds using the deep socket and torque wrench.
Place the wheel back on the car. Thread the lug nuts on by hand. With the vehicle on the ground, I'm going to torque the lug nuts. Torquing these 140 foot-pounds. Going in a cross pattern. Reinstall the center cap. Line up this valve stem picture with the valve stem on the wheel. Just pushing it into place.
Thanks for watching. Visit us at 1AAuto.com for quality auto parts, fast and free shipping, and the best customer service in the industry.
Shop Products


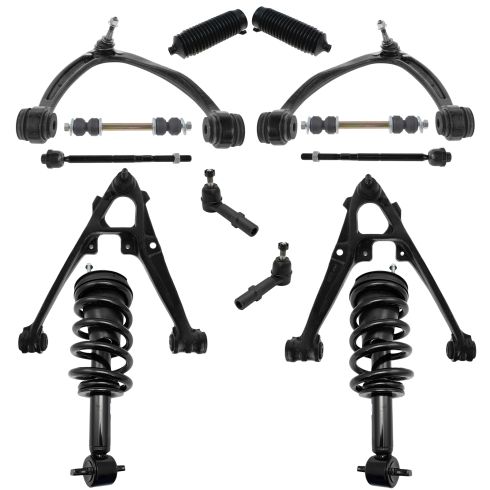
Chevrolet GMC Front 14 Piece Steering & Suspension Kit TRQ PSA81017
Part Details:
- (2) Front Sway Bar Links
- (2) Front Steering Rack & Pinion Bellows
- (2) Front Shock & Spring Assemblies
- 14 Piece
- (2) Front Lower Control Arms with Ball Joints
- (2) Front Outer Tie Rods
- (2) Front Inner Tie Rods
- (2) Front Upper Greaseable Control Arms with Ball Joints
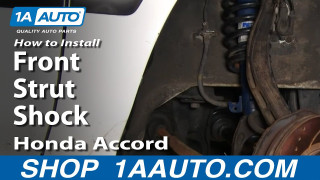
How to Replace Front Struts 1994-97 Honda Accord
Learn how to replace clunking or bouncy struts on your 94-97 Honda Accord by watching this tutorial video from 1A Auto.
