How to Replace Front Window Regulator 1999-2007 Chevy Silverado
Created on: 2020-07-17
This video shows you how to install a new window regulator on your 1999-07 Chevy Silverado.
Tools needed
-
Socket Extensions
Socket Driver
7mm Socket
10mm Socket
Painter's Tape
T20 Socket
Trim Tool Set
Pocket Screwdriver
Make sure our window is all the way up. Okay. So, what we need to do first is remove our door panel. Grab yourself a nice plastic trim tool. Come right up along here, or even up here and just try to pry this away. You're going to see it's got a couple of little clippy-dos. We're going to move along to this right here. Come down along here with your trim tool, pry up on all this. Disconnect all of your wiring. Just going to use the smallest pocket screwdriver. If you press right here, there's a little piton, and then you can pull this down and remove this as well. Let's get this trim piece off of here as well. Now, if you look right up onto your handle, you're going to see a bolt that's right there. You can either use a 9/32 or even a 7-millimeter socket, whichever you have. Next, we're going to get this little door lock bezel out of the way. I'm just going to use my small pocket screwdriver just to kind of get this started, and I'll use my trim tool. Pop it right off. That exposes our screw. Get this out of here as well. Now we're going to remove this little cap right there. You can use anything, a small pocket screwdriver, whatever you've got. Pops right off. Underneath there, you're going to see a T20. Remove this screw. There it is. On the far end, we'll go ahead and remove this push clip as well.
So, now if you feel along the bottom, you're going to find this bolt right here. Once again, either use a 7-millimeter or 9/32. Get that out of there. Go ahead and grab onto your door panel, lift it straight up, and draw it away from your vehicle. Just use your small pocket screwdriver. Come right underneath this area right there, and you should be able to draw the wire out. There we go. The next thing we need to do is get behind this vapor barrier here. You can do this without removing your handle, but for me, it's much easier just to get the handle off and out of the way that way there, I can peel this right back and have a nice clear view. I'm going to take my small pocket screwdriver. I'm going to pry on this little clip and move it away from the rod. Once I've done that, I can lift up, and now it's unattached. Use your 10-millimeter socket, remove this bolt. Now we'll just go ahead and grab onto that handle, slide it forward and get it out of the way. Grab your vapor barrier. You want to be very careful not to tear this because it's fairly important, okay? So just do the best you can to get it all apart without tearing it. The next thing we need to do is make sure that our window can not fall down once we get our window regulator out. The best way to do that is to use some form of tape as I found. So I'm just going to go ahead and use this tape and I'm going to make some nice long strips. Tape is much cheaper than glass, so I'm really not too worried about using too much tape. Now, if you were to look in this square hole right here, you can see the bolt that holds your window to the window regulator. If you were to follow straight across towards the front of the vehicle, you'll find another one that looks exactly the same. Remove both of those. There's the bolt. Do the same to the other one. Next, we're going to take our small pocket screwdriver and we're going to remove this right here. If you were to press on this gray area, you should be able to draw this straight down.
Next, we're going to remove our mounting bolts. You're going to see three over here, and then if you were to follow your way over here, you'll find one there, one here, and one located down at the bottom. Let's remove them all. For your last one, I like to hold onto the motor here so it just can't fall over, and remove that bolt. You're going to notice you have a little hooky-do here. If you were to lift up on this, it should pop right out of there. Now I'm going to lay this down, do the same for this side. Lift up because there's a little hooky-do. Pop it out of its spot. Lay it down and now carefully remove it all. There it is, friends. Time to get our new window regulator installed. If you were to look at it, you're going to find those two little hooky-dos. Don't forget those go right up top. The side with the motor is going to go towards the front of the vehicle. Okay. I'm feeling around to find my hooky-do. I'm going to set it up into where it's supposed to go right there. That lines up my bolt hole. I'll do the same to the other side. Feel for my hook. There it is. Now we're going to start in all six of our screws before we tighten any of them down. Awesome. Okay. Let's get this connected in. Should click right in. Give it a nice tug. Make sure it's secure.
Go ahead and tuck that into the door. If you wanted to use a wire tie to hold it to this, it's probably a great idea. So that's what I'm going to do. Now on the new regulator, it's important to make sure you loosen up these bolts before we bring this up to the window. Nice and loose. I can open this right up. Now it's going to be time to get our window switch on here real quick because we need to bring this window regulator up and down. If you were to look at the back, you can see that there's writing. It tells you where all these go in. So I'll just go ahead and connect them into their corresponding holes. Make sure you flip over that gray piece right there. I'm just going to put this one in just because. Put the key in the on position. We're going to bring the window regulator down so that this bolt right there is right down here so we can get to it. And now after we loosen that up, we'll bring it all the way up so we can tighten it up. Let's bring this down. Don't go too far. Okay. I can see my bolt. I'm going to loosen this up so it's the same as the other side. Reach in there and make sure I separate it. Perfect.
Now we're just going to bring this up so we can see the clamshells going right up over that glass. Okay. It's completely bottomed out at this point. So assume that this is the glass right here and this is the piece. Bring it all the way so it's 100% matched up. Now we're going to put the bolts right through and tighten them up. Make sure it's nice and tight. So now I'm just going to grab the tape off of here. I'm going to leave it hanging right there just in case I have to reuse it for any reason. Everything should be good, but why waste it? Grab that window, down, up. As you can tell, it's going up and down on the tracks perfectly. This looks good. Let's go ahead and get the switch back off of here. At this point, we can bring this right back over. Make sure you grab your wires. We've got our little holes here. Make sure you put your wire through that as well. Let's get this rod through this little slot right here. Pull our wire. There we go. Make sure you stick this on. Now, looking at inside door handle, we can see we have a little hooky-dos. We're going to put this on, slide it in, and then, of course, we'll put in our bolt. Grab this, line those up. Slides right in. Put the rod in there. Make sure it's locked. Okay. Put on the screw. Go ahead and tighten it right up. Let's get this light reconnected. Slides right in.
Coming up here, we want to make sure we grab all this wiring, pull it right through like this. Now we've got our handle. It's going to come right through this hole. Now, as we push in the panel, you're going to see you have hooky-dos all coming down along here. You have one here, there, there, and then a couple along the bottom. All those need to fit into their slots that are on the door. Once you have them so they're starting in there, we'll slide them all down. Put our screws in here. Get this one right here. Nice and short. Right there. The long one goes right underneath this handle. Tight. Get this one. Put it right back in there. Get our little cover, push that right on there. Get our push clip.
Now it's time to put back on our lock. Make sure you've got the red area facing towards the rear of the vehicle. If you were to look at the backside, you're going to see there's a hooky-do here, and then there's a couple of little ones right there. This forward end needs to go in first, and then you roll the backside in. There it is. Make sure it's unlocked, of course. Now it's time to get this back on there. If you were to look at this, you're going to see there's a little hooky-do. That needs to slide in there. So, we'll just go right over the handle, put in that forward side first with the hooky-do, and then go ahead and clip this in. Perfect. Put this back on there, get another hooky-do, goes down, and then, of course, the pitons push right in. Let's get this back reconnected now. If you look at the backside, you can see, of course, the colors. Black, we're going to skip one and go blue. We'll take that green. Take the big one, slide it right in. Make sure it's locked in. Grab this, put it on. Now when you put this in, there should be like a little hooky-do here that's going to go under there, and then there should be a little clip that's going to force down in there. Both of ours are broken, so you're just going to have to imagine I'm going in from the front, sliding it down, making sure my wiring is where it needs to be. There we are.
Shop Products


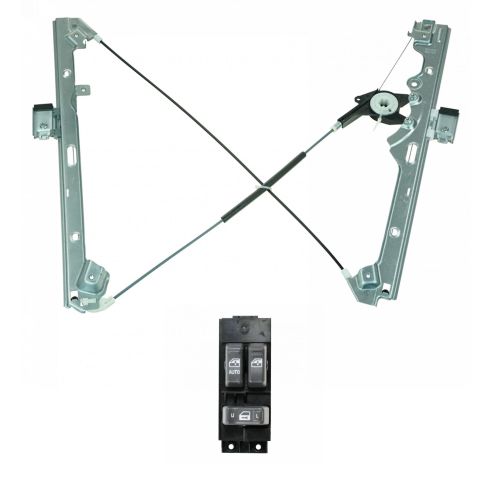
Chevrolet GMC Front Driver Side Power 2 Piece Window Regulator Kit TRQ WRA87312
Part Details:
- without Motor
- Gray
- Power
- Rigorously Tested
- Highest Quality Materials
- 2 Piece
- (1) Front Driver Side Power Window & Door Lock Switch
- (1) Front Driver Side Window Regulator
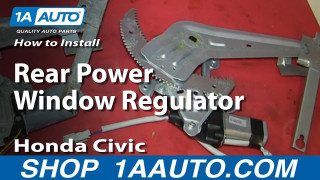
How To Replace Rear Power Window Regulator 1996-2000 Honda Civic
How to repair, install, fix, change or replace a weak, noisy, damaged or defective power window motor on Honda Civic, years 96, 97, 98, 99, and 00.
