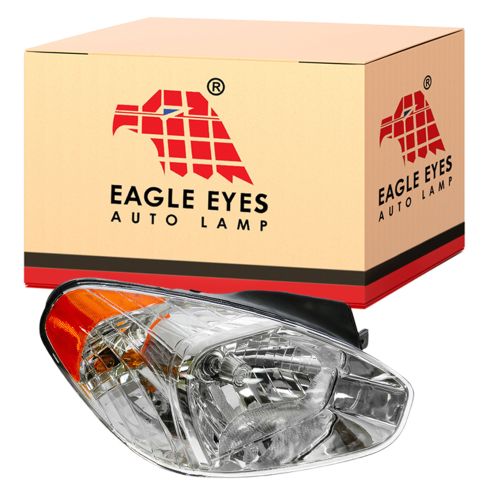
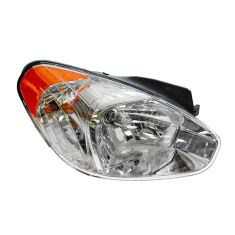
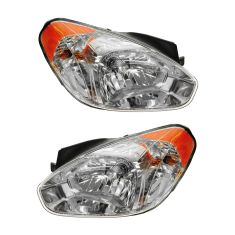
Assemblies may include halogen or incandescent test bulbs that should be replaced before installation.
Features and Benefits
Direct Fit - No vehicle or wiring modification necessary
DOT, SAE, and FMVSS Compliant - Meets on-road use regulations
Matching set for a restored look
Item Condition:New
Attention California Customers:
WARNING: This product can expose you to chemicals including Chromium (Hexavalent Compounds), which is known to the State of California to cause cancer, and birth defects or other reproductive harm. For more information, go to www.P65Warnings.ca.gov
This item is backed by our limited lifetime warranty. In the event this item should fail due to manufacturing defects during intended use, we will replace the part free of charge. This warranty covers the cost of the part only.
The bulbs are for testing and not covered under our warranty. Our warranty applies to the light assembly only.
FREE Shipping is standard on Orders shipped to the lower 48 States (Contiguous United States). Standard shipping charges apply to Hawaii, Alaska and US Territories. Shipping is not available to Canada.
Expedited is available on checkout to the United States, excluding Alaska, Hawaii and US Territories as well as P.O. Boxes and APO/FPO/DPO addresses. Final shipping costs are available at checkout.
How to Replace Headlights 2005-10 Hyundai Accent
Created on:
Tools used
Socket Extensions
Flat Blade Screwdriver
Phillips Head Screwdriver
10mm Socket
Ratchet
1. Removing the Headlight
Open the hood
Remove the seven plastic rivnuts from the grille cover with a Phillips screwdriver
Remove the two 10mm bolts from the grille cover
Remove the 10mm bolt from the back of the headlight
Pull up the grille cover
Remove the 10mm nut from the front of the headlight
Disconnect the electrical connectors from the light
2. Installing the Headlight
Remove the plastic shipping cover from the light
Line up the headlight mount on the radiator support
Connect the headlight electrical connectors
Pull the grille cover around the headlight
Install the 10mm bolt for the front of the headlight
Install the 10mm bolt at the rear of the headlight
Install the two 10mm bolts into the grille cover
Install the seven rivnuts into the grille cover with a Phillips screwdriver
Close the hood
3. Aiming the Headlights
Make a dot at the center of your low beam light with a dry erase marker
Measure from the ground to the center of the dot
Line up your vehicle with a dark flat surface
Mark the center of each headlight on the aiming surface
Draw a straight line between the two marks
back the vehicle up 25 feet from the aiming surface
Turn the headlights on
Adjust the passenger side aiming screw until the focus of the passenger side light beam is two inches below the line on the aiming surface
Adjust the driver side aiming screw until the focus of the driver side light beam is four inches below the line on the aiming surface
Open the hood. The prop rod is on the underside of the hood. I'm going to use a Phillips head screwdriver to unscrew these seven rivnuts. Once you unscrew them, it releases the tabs. Just pull them straight out.
Use a 10 mm socket to remove this bolt here and repeat for the other side. Remove this 10 mm bolt here with 10 mm socket. Peel this plastic up. It'll actually pop out of a little clip there. There's a 10 mm bolt hidden back here. I'll use my 10 mm socket ratchet and extension. The headlight will now move out from the fender.
You may have to remove this plastic here to get it around the tab. It's still connected to the connectors in the back. Disconnect the connectors from the lights, pushing the lock tabs down, working the connectors off. It might help to reach in this way and wiggle. Pushing the lock tab down, wiggle the connector back and forth to work it off. The headlight will lift out.
Here's our old, yellowed, discolored headlight from our vehicle and our brand new headlight from 1AAuto.com. It comes with a protective plastic on it during shipping. I'll just peel this off real quick so you can see it. It's nice and pristine and clear. If we flip these over, there's the same mounting tabs on both, the same lower mounting tab, and the same connectors, and the new one comes with bulbs installed. This will fit great in your vehicle and really help you see down the road.
If you need to adjust the aim in your headlights, this is the left and right, and this is the up and down adjustment. Turn them clockwise, counter clockwise, depending on how you want to set your headlights. From the front of your headlight, there's also an adjusting reference point dot molded into the plastic.
This mount here is going to go into the mount here on the radiator support. It will just slide in and clip. We'll lower the headlight down in here. I'm going to connect the bottom connector and make sure it clicks. Move the headlight in a little closer to the top connector, and we'll slide the light in and move this trim plastic here around.
Install the bolt that's hidden behind the plastic trim here. When I feel them get tight, I'm just going to stop. Install the top bolt. When I feel it get tight, I'm going to stop. If you're going to replace the opposite side, just follow the same exact steps. Reinstall the 10 mm bolts on the front of the bumper.
These are similar to a push-in style clip except they're a threaded screw, and as you screw it in, it pushes these tabs out. The easiest way to reinstall them is to have them threaded out a bit. This way the prongs can be squeezed in and then reinserted into the spot where they go. So there's seven of these. One was actually missing, so I've only got six to replace, but normally you should have seven across the front of your grille here. So we'll slide them in with a Phillips head screwdriver. They don't have to be tight. You just get them down. Just insert them so the head is flush, and then they'll lock in. Then close your hood, and the job is complete.
This is a basic tutorial on how to aim the headlights on your vehicle. Find the axis of your headlights. This is usually indicated with a small dot or the headlight bulb size on the lens. If not, it's the actual center point of your headlight bulb. Transfer this mark to a vertical wall with a preferably dark color that will allow you to back up 25 feet.
Pull up and find the center line of your vehicle, as well as the center line of your headlight axis. Mark the wall with the height of the headlights and a straight line going across at that axis height. Back your vehicle up 25 feet from the wall to the front edge of your vehicle's headlights.
Turn your headlights on and locate the adjusting screw, usually on the backside of your headlights. You'll want to rotate this until the passenger hotspot or focus of the beam is approximately 2" below the line and the driver side is 4" below the line. We change the heights on each side so you can still get a good beam to the offside of the road on the passenger side and have the driver side low enough to not blind oncoming traffic.
Thanks for watching. Visit us at 1AAuto.com for quality auto parts, fast and free shipping, and the best customer service in the industry.
HY035-B011R
In Stock
Product Reviews
Loading reviews
3.67/ 5.03
3 reviews
5 Stars
4 Stars
3 Stars
2 Stars
1 Star
2
0
0
0
1
Paulette
February 26, 2017
The person I dealt with was very pleasant and got my merchandise on time I am very pleased and yes I would recommend you to other people thank you again
Mirror and headlight
R
July 26, 2019
I needed headlight and mirror for my Hyundai the dealer wanted allmost 400.00 and had to order the mirror. I got both from. 1A for 125.00 fit perfect and look just like the ones on my car. Quick delivery very pleased
Terrible
Tanner
August 7, 2021
Headlights were not aimed from the factory. They caused a short in my car that made the high beams indicator light to come on when I did not have them on. I bought the brights sylvania headlights there are and it made them very dim.
Customer Q&A
Do they come with headlight bulbs?May 10, 2022
David L
10
New light bulbs are not included with this assembly. Occasionally, manufacturers leave test bulbs in the lights. If you receive test bulbs, you'll want to replace them with your original bulbs or with new bulbs.
May 10, 2022
T I
Customer service
877-844-3393
Monday - Friday 8:00am - 9:30pm ET Saturday - Sunday 8:00am - 4:30pm ET
Hyundai is a registered trademark of Hyundai Motor Company. 1A Auto is not affiliated with or sponsored by Hyundai or Hyundai Motor Company.See all trademarks.
Enter Vehicle Year Make Model
Specify your vehicle's year, make and model to guarantee fit.
Year
Make
Model
Options
Drivetrain
This part doesn’t fit a . Select from parts that fit.