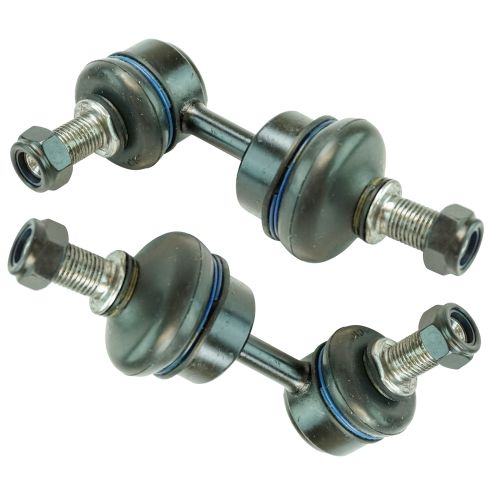
Kit Includes: (1) Rear Passenger Side Sway Bar Link (1) Rear Driver Side Sway Bar Link
Quantity: 2 Piece
Specification
Side Location
Driver & Passenger Side
Drivetrain
Front Wheel Drive
Location
Rear
Our steering and suspension components are pre-greased and sealed for long life and do not require the extra maintenance typically required by greaseable versions.
Item Condition:New
Attention California Customers:
WARNING: This product can expose you to chemicals including Lead and Lead Compounds, which are known to the State of California to cause cancer, and birth defects or other reproductive harm. For more information, go to www.P65Warnings.ca.gov.
Lifetime Warranty
This item is backed by our limited lifetime warranty. In the event that this item should fail due to manufacturing defects during intended use, we will replace the part free of charge. This warranty covers the cost of the part only.
FREE Shipping is standard on Orders shipped to the lower 48 States (Contiguous United States). Standard shipping charges apply to Hawaii, Alaska and US Territories. Shipping is not available to Canada.
Expedited is available on checkout to the United States, excluding Alaska, Hawaii and US Territories as well as P.O. Boxes and APO/FPO/DPO addresses. Final shipping costs are available at checkout.
How to Replace Rear Sway Bar Link 2011-15 Hyundai Sonata
How to Replace Sway Bar Link 2011-2014 Hyundai Sonata
How to Replace Rear Sway Bar Links 2013-2018 Hyundai Santa Fe
Created on:
Tools used
Socket Extensions
17mm Socket
Jack Stands
19mm Socket
Ratchet
Floor Jack
1. Removing the Rear Sway Bar Link
Raise and support the vehicle
Remove the 19 mm nut securing the rear sway bar link to the lower control arm
Remove the 19 mm nut securing the rear sway bar link to the sway bar
Remove the rear sway bar link
2. Installing the Rear Sway Bar Link
Insert the straight end of the rear sway bar link into the lower control arm
Insert the right angle end of the rear sway bar link into the sway bar
Tighten a 17 mm nut onto each rear sway bar link stud
Lower the vehicle
Hey friends. It's Len here at 1A auto. Today I'm working on a 2011 Hyundai Sonata. We'll be doing rear sway bar links. It's very easy. I want to be the guy that shows you how to do it. If you need this or any other part, you can always check us out at 1Aauto.com. Thanks.
So for the purpose of other videos, I removed the wheel. That doesn't have anything to do with this sway bar link video. You can do it all completely without removing the wheel. Okay. Time for the rear sway bar link.
I'm going to take off this nut right here. This one right here. And then theoretically it should come right out. 19. 19. Use your air gun. Use your ratchet, whatever you want to do. Take them out. Those are our two nuts. We're going to be replacing with new ones anyway, but that's all I did. Just take those off. Put those aside for recycling. Take it out of there. Little stuck in here. It's okay.
I'm just gonna grab my hammer. Hold my link so it doesn't come and hit me in the face. And there's our sway bar link. Now we're clear to replace it with a quality 1A auto part.
All right everyone, a quick product comparison for you. We have our rear sway bar link from our 2011 Hyundai Sonata. Just pulled it out. Easy job. Two nuts. And we have our brand new quality 1A auto part right here. We'll just compare them next to each other. Same length. Looks pretty good.
Really isn't much to say, right? This is nice and sealed. No water is ever going to get in there. Nice and sealed. No water's ever going to get in there either. So as you can tell, this is a quality part and if you need this or any other part, you can always check us out at 1Aauto.com. Thanks.
So here we go. Time for the install. We've got our quality part. We're going to go ahead and put it in the bottom first. So I'm going to go up and over. Drop that stud in. Looks pretty good. I can start a nut if I want. Just a 17 millimeter head. I'm not going to tighten it up yet though. I'm going to get it started into this sway bar. Okay. I'm gonna put on a nut. There we are.
Now we're clear to start tightening these up. Just going to use a 17 millimeter. If you have access to an air gun, you can use that, or if you want to use a ratchet, can use that as well. Okay, so now I've got both my nuts tightened on. They're nice and snug. They're going nowhere. Perfect. We are good to go. Great job everybody.
Thanks for watching. Visit 1Aauto.com, your place for DIY auto repairs, for great parts, great service, and more content.
Tools used
21mm wrench
1/4 Inch Ratchet
Torque Wrench
Gloves
1/2 Inch Ratchet
17mm Socket
Jack Stands
Wheel Chocks
19mm Socket
3/8 Inch Drive Ratchet
Floor Jack
Safety Glasses
Tools used
Torque Wrench
Gloves
18mm Wrench
Pry Bar
17mm Socket
Wheel Chocks
Needle Nose Locking Pliers
Ratchet
Swivel
Safety Glasses
PSA56001
In Stock
Product Reviews
Loading reviews
5.00/ 5.01
1review
5 Stars
4 Stars
3 Stars
2 Stars
1 Star
1
0
0
0
0
Amazing
Hussam
June 1, 2022
Amazing parts and fast delivery
Customer Q&A
How to remove the old 2013 Hyundai sway bar links, bolt keeps spinning no way to get a wrench on it?March 6, 2023
Jack C
Customer service
877-844-3393
Monday - Friday 8:00am - 9:30pm ET Saturday - Sunday 8:00am - 4:30pm ET
Kia is a registered trademark of Kia Motors America Inc. 1A Auto is not affiliated with or sponsored by Kia or Kia Motors America Inc.See all trademarks.
Enter Vehicle Year Make Model
Specify your vehicle's year, make and model to guarantee fit.
Year
Make
Model
Options
Drivetrain
This part doesn’t fit a . Select from parts that fit.