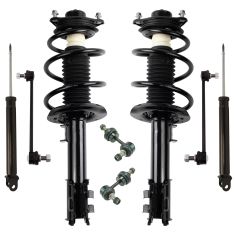
Hey, friends. It's Len here at 1A Auto.
Today, we're working on a 2011 Hyundai Sonata. We're going to be doing rear shocks. It's going to be a very easy job. I want to be the guy that shows you how to do it.
If you need this part or any other part, you can always check us out at 1aauto.com.
Thanks.
First thing we're going to do is we're going get the majority of the weight of the vehicle off the ground, and we're going to keep the tire just barely touching. So, we can use our 21 millimeter socket, loosen up all these lug nuts. Just like that.
Now, we'll bring the vehicle up, we'll remove all the lug nuts, get the wheel off, and we'll get inside.
So, now we're going to take off all our lug nuts. I'd just like to note the first one, I like to remove almost all the way, then leave on a few threads. And then I'll take off the other four, just so the wheel doesn't fall off on me.
Okay. So, we've got our lug nuts off. Last one. I'm holding the wheel as tight as I can. I don't want it to fall.
Here we are. Let's take off the center cover, set that aside. Take the wheel off, and we'll pull that aside.
So, we've got our 19 millimeter nut here. 19 millimeter head on the bolt on the back side. So, I'm going to go ahead and use a 19 millimeter socket and a 19 millimeter wrench. I'm going to hold the bolt side with my wrench, and I'm going to take off the nut side with my socket. You can use a socket with a ratchet, or a socket with an airgun. Whatever you have access to.
Just take off that nut. There it is. Nothing special. It is a locking nut, though. Okay? We'll set it aside.
Put the nut back on here a little bit. And I'm just going to tap it with my hammer, get that bolt so it's ready to come out. Okay? We'll leave that just like that. We'll put our nut aside where we can find it.
Now, we're going to come up top. There's a couple of 14 millimeter headed bolts. So, here we go: 14, 14. We're going to hold onto it. This is going to be ready to come down, okay?
There we go. There's one. I'm going to hold the shock now, take out the second one. There it is. Looks about the same as the first. We don't have to worry too much about mixing those up. Let's set it aside.
So, there we go. Now we can move this around a little bit. And this should give us some wiggle room to get that bolt the rest of the way out. So, I'm just going to wiggle it around, compress the shock if I can. Let's see. Maybe I'll go this way. And now we've removed our rearward shock.
So, here we go. We're going to go ahead and take off this nut right here. It's not under any pressure. This isn't a spring unit like the fronts. The fronts have a coil spring wrapped around them. You would not want to touch this nut in that case. In this case, we don't have to worry about it.
We're going to use a 17 millimeter to remove this nut. If while you're trying to take it off and the shaft's spinning, just look under here. You can go ahead and grab onto that shaft because this one's old and garbage. Just use your locking pliers. But let's give it a try first.
Ready? It came off nice and easy. That's one of the wonders of an airgun as opposed to a ratchet.
We'll pull this off, okay? We're going to reuse this, so don't lose it.
Pull this boot off. We're also going to reuse this, so don't lose that. Now we can move along.
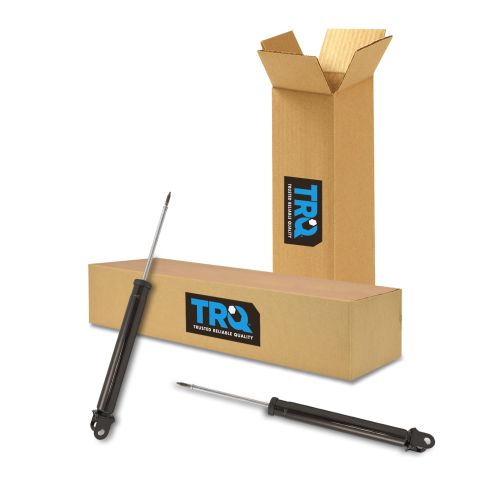
Hey, friends. I have a quick product comparison for you. We have our old shock assembly from a 2011 Hyundai Sonata. I just removed it. Fun job. And I have our brand new quality 1A Auto part right here.
This right here matches up 100%. There really isn't much to it. You just want to basically check for length when it's fully extended. Check to make sure you have the same holes, same pistons, same length. There really isn't much to it. So, I'd say it's good to go.
If you need this part or any other part, you can always check us out at 1aauto.com.
So, when you get your new shock, you're going to want to make sure that you compress it at least a few times, okay? It also comes with this little thing on here. You might be, "How do you get it off?" Well, it's pretty easy. You just push down, and then slide that off.
I like to leave this black thing on here because it gives me something handy to push down with my hand.
I'll just wait for it to come back up. It's all the way up, and push down. I'm going to try to do that at least three to five times. Three times minimum, okay? That just kind of gets everything charged up in here. It gets it ready to go.
All right. So, we've got our quality 1A Auto part here. We're going to get it ready to go.
We're going to take our boot right here. It's got a little dampener in there. We're just going to slide it on. Try to get the shaft through the hole. There we go. It feels pretty good.
We're going to grab our upper part. This is just going to go right in. We'll stand it up, push her down. Perfect.
This right here, we're going to just blast this right on real quick. There it is. Bottomed right out, going nowhere. It feels good.
We can give it another pump if we want. Love it. It's functioning perfectly. Let's install this puppy.
All right. So, let's get this in here. I'm just going to come up and over the hose. Let's see if I can get it lined up. Actually, I'm going to go up and over the hose, but actually into the slot that I want to go into.
What you might have to do is come in through this way, and that's okay. And you're also probably going to have to compress your shock. It's going to be easy enough. Let's get it down to where it needs to go. Let's give it a little push. We'll get it lined up. I've got my two bolts. They're just 14 millimeter heads, just like we took out. You can use Threadlocker if you want.
Get this one going. There we are. Perfect. Very nice. We'll just snug these up, bottom them out, and then we're going to torque them down, okay?
Now, we're going to torque these. 47 foot-pounds with our 14 millimeter socket, okay? You can pick which one you want to start with. Left Twix, right Twix, whatever you're into.
There's one. We'll do the same to the other, and move along.
So, you'll notice that the bottom of the shock doesn't line up with the hole in the bottom of the control arm there, or the knuckle. All I'm going to do is I'm going to take a screwdriver, or whatever I happen to have, and I'm going to go like this. That does all the heavy lifting for me. A little bit of leverage goes a long way.
I'm going to take my bolt, I'm going to go in through the back side. Let's get it going. There we go.
Now I'm going to see if I can tap it in. Okay.
Now we'll just drive it in, get it ready to go, and we'll put the nut on the other side, okay?
There is a torque on this. So, I'm just going to tighten it until it stops, and then I'll torque it.
So, I've got my wrench, I'm going to put it on this back side here, the bolt side. Then I've got my 19 millimeter. I'm going to put it on the nut side. It feels like it's bottomed out. Now let's torque her down.
Okay, I'm holding the back side of that bolt there. I've got my 19, and I'm torquing this to 58 foot-pounds. I could have probably went a little bit tighter, but it's always better to go a little loose when it comes to torquing things.
Okay. Just going to hit it one more time. Here we are. It's nice and tight. Double-check everything. We've got those torqued, bottom torqued. Easy job, everybody. Perfect.
So, here we go. We're going to get the wheel up on here. It's going to be pretty easy. You're just going to lift it up. We've got a hubcap. Perfect.
Grab a lug nut. Get one started, that way then we can release the wheel. It won't fall down. We'll get the rest of them started and bottomed out, and then we'll torque them down.
Here we go, friends. I've got the wheel on the ground, the majority of weight off the vehicle, so it's not all kinked. I'm going to take my 21, I'm going to torque these down. 80 foot-pounds, going in a star pattern.
Just going to go around again now.
We know it's torqued, so now our job's done. Great job, everybody.
Thanks for watching.
If you want the parts to do it yourself, check out 1aauto.com, the place for DIY auto repair.