WARNING: This product can expose you to chemicals including Lead and Lead Compounds, which are known to the State of California to cause cancer, and birth defects or other reproductive harm. For more information, go to www.P65Warnings.ca.gov.
Lifetime Warranty
This item is backed by our limited lifetime warranty. In the event that this item should fail due to manufacturing defects during intended use, we will replace the part free of charge. This warranty covers the cost of the part only.
FREE Shipping is standard on orders shipped to the lower 48 States (Contiguous United States). Standard shipping charges apply to Hawaii and Alaska.
Shipping is not available to a P.O. Box, APO/FPO/DPO addresses, US Territories, or Canada for this item.
Expedited is available on checkout to the United States, excluding Alaska, Hawaii.
Final shipping costs are available at checkout.
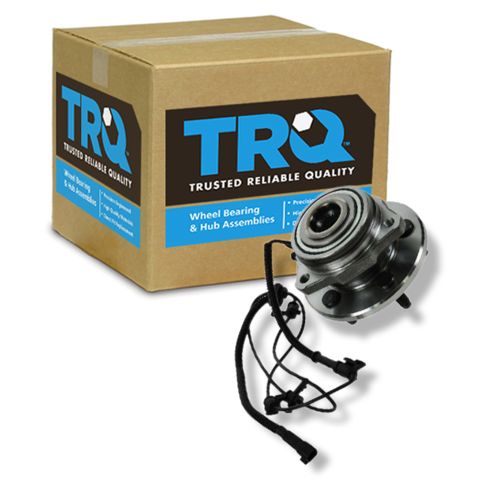
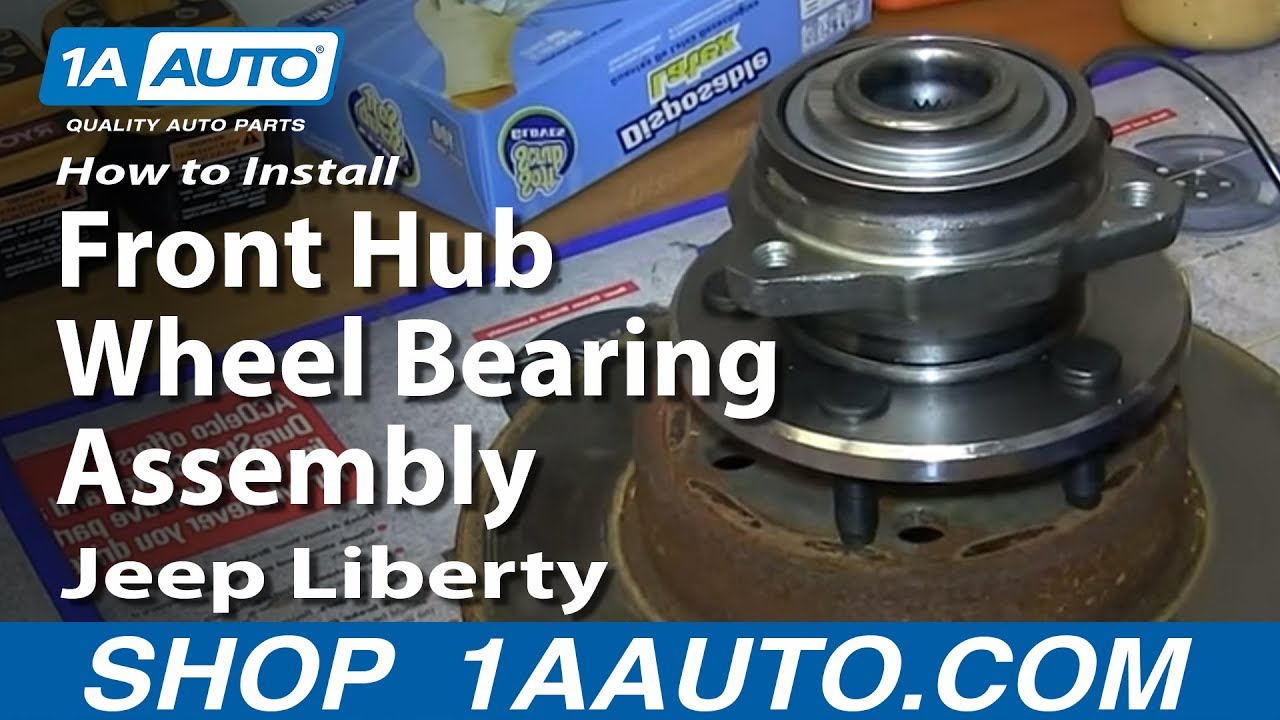
How to Replace Front Hub Assembly 2002-07 Jeep Liberty
Pry off the wheel cover with a flat blade screwdriver
Loosen the lug nuts with the vehicle on the ground
Raise the vehicle with a floor jack
Secure the vehicle on jack stands
Remove the lug nuts
Pull off the wheel
2. Removing the Brake Pads
Turn the rotor by hand or turn the steering wheel to turn the rotor
Pry the rotor back with a pry bar
Remove the two 12mm bolts from the brake caliper
Pull the caliper aside
Hang the caliper with wire ties
Pry the brake pads off with a flat blade screwdriver
3. Removing the Brake Rotor
Remove the two 21mm bolts from the brake caliper bracket
Pull off the brake caliper bracket
Pull the rotor off
4. Removing the Wheel Hub
Disconnect the ABS sensor wire from the wheel hub with a flat blade screwdriver
Pry the wire out of all its clips
Pry the wiring harness clip off of the stud inside the engine compartment
Disconnect the ABS wiring harness in the engine compartment
Pull the wiring out through the wheel well
Have an assistant hold the hub in place with a pry bar
Remove the 35mm hub nut
Remove the three E14 external Torx bolts from the hub
Thread the lower left E14 bolt 1/3 of the way in
Strike the hub with a hammer to loosen it
5. Installing the New Wheel Hub
Clean the hub mounting area with a wire brush
Apply brake grease to the new hub
Put the new hub into place
Insert the three E14 bolts into the hub
Tighten the three E14 bolts to 50 foot-pounds of torque
Have an assistant hold the hub in place with a pry bar
Fasten on the 35mm hub nut
Tighten the hub nut to 100 foot-pounds
Feed the new ABS wiring into place
Connect the ABS wiring harness at the wheel hub
Clip the wiring into place
Connect the ABS wiring harness in the engine compartment
Clip the ABS wiring on the stud in the engine compartment
6. Reinstalling the Brake Rotor
Slide the rotor on
Put the bracket back into place
Start the 21mm bolts by hand
Tighten the 21mm bolts to between 85 foot-pounds of torque
7. Reinstalling the Brake Pads
Install the new brake pads into the bracket
Cut the brake caliper free
Put an old pad in the caliper
Use a large C-clamp and the old pad to push the pistons back
Put the caliper on
Thread the two 12mm bolts by hand
Tighten bolts to between 20 - 25 foot-pounds
8. Reattaching the Wheel
Slide the wheel into place
Start the lug nuts by hand
Tighten the lug nuts preliminarily
Lower the vehicle to the ground
Tighten the lug nuts to 100 foot-pounds in a crossing or star pattern
Reattach the wheel cover
9. Testing the Brakes
Pump your brakes repeatedly until they feel firm
Test your brakes at 5 miles per hour and then 10 miles per hour
Road test the vehicle
Brought to you by 1AAuto.com, your source for quality replacement parts and the best service on the Internet.
Hi, I'm Don from 1A Auto. I hope this how-to video helps you out, and next time you need parts for your vehicle, think of 1AAuto.com. Thanks.
In this video, we're going to show you how to replace the front hub on this 2006 Jeep Liberty. We show you on the passenger side, but the driver side is a similar procedure. The items you'll need for this are a new front hub from 1AAuto.com; flat blade screw driver; 12mm, 19mm, 21mm, and 35mm socket and ratchet; torque wrench, jack and jack stands; piece of pipe for leverage; a pry bar; a hammer; an E14 external Torx socket and an additional person would help but isn't necessary.
Pry off your wheel cover if you have one, and remove the 19mm lug nuts. If you don't have air-powered tools, you want to loosen the lug nuts up while the vehicle's on the ground. Jack the vehicle up and then remove the lug nuts. Once they're removed, the wheel pulls right off.
Turn your wheel so that you have better access to the brakes. Pry the rotor back. This will make it easier to get the caliper off. Now, you want to remove this 12mm bolt and this 12mm bolt and we'll fast forward as Don does this. Pull your caliper off and for safety purposes, you should wire tie it somewhere so it doesn't swing down and hit you while you're working on the brakes. Pry your brake pads out.
On the back of your caliper bracket, you'll see this 21mm bolt and this 21mm bolt and we'll just fast forward as Don removes those and you can see he does use a piece of pipe for some added leverage to help break them free. The bracket pulls right off and so does your rotor.
Using a flat blade screw driver, pry the harness out of this clip as well as this one. You want to just follow this harness and pry it out of each clip. Now, you want to lower your vehicle and get the rest of the harness. There is this one last clip right here. You just have to pull it up and off that stud. You also need to pull that harness up and off the clip. Now, disconnect the harness, using a flat blade screwdriver. Pry that red clip down and then push the tab on the harness and pull it apart. Now, you can pull that harness down and out.
You can have another person hold the hub with the pry bar, as we do here, or before you remove the brakes you can have somebody hold the brakes and then loosen the hub nut. That's a 35mm nut. On the back of the hub, there are three E14 bolts. There's one here, one here and then one up top right over here. We'll just fast forward as Don removes all three of those. Put the lower left one back in just a third of the way. That will keep the hub from flying while you're hammering it. You just want to hammer it until it falls like this. Now, you can remove that E14 bolt and that hub pulls right off.
On the right is the old hub. On the left is the new one from 1A Auto. They're identical and they'll mount exactly the same. Using a wire brush, clean up the area for the hub and then apply some brake grease along the outside of the hub and just feed the hub into place and replace those E14 bolts. It helps to get it started by hand. Then, tighten it up and it will help pull the hub into place. We'll just fast forward as he replaces the other two bolts and tightens them all up. You want to torque each of those bolts to 50 foot-pounds. Again, having another person here would definitely make this a lot easier. You just keep it from moving while the other person tightens up that hub nut. And you want to torque this to 100 foot-pounds.
Now, you want to put your harness back into place and re-clip it in all the same areas. If there's been a modification or one of your clips isn't the same, then just take the clip from your old hub wire and put it on to this one. Back up top, you want to reconnect your harness and push that clip back on to that stud.
Put your new rotor into place, and then, put your caliper bracket back into place and replace those two 21mm bolts. We'll just fast forward as Don does this. Torque both of these bolts to 85 foot-pounds.
Push your new brake pads into place. Take your caliper and place and old brake pad in front of the piston and using a large C-clamp, push the piston in. Put your caliper into place and replace those two 12mm bolts. Torque these bolts to 20 to 25 foot-pounds.
Replace the wheel and replace the lug nuts and you want to tighten them preliminary. Lower the vehicle and then tighten them the rest of the way and then torque each of them in a crossing pattern to 100 foot-pounds. If you have a wheel cover, replace it.
Any time you have the brakes apart, just get in the vehicle, pump the brakes a bunch of times. Make sure that the pedal is nicely firm and then do test ops from 5 and 10 miles an hour. Make sure everything is working correctly, before you road test the vehicle.
We hope this video helps you out. Brought to you by www.1AAuto.com, your source for quality replacement parts and the best service on the Internet. Please feel free to call us toll-free, 888-844-3393. We're the company that's here for you on the Internet and in person.
BHA53972
In Stock
Product Reviews
Loading reviews
5.00/ 5.010
10 reviews
5 Stars
4 Stars
3 Stars
2 Stars
1 Star
10
0
0
0
0
As expected
barry
February 25, 2017
Came as described, installed quickly after removing the old one which was not as difficult as i thought it might be. Great price! No troubles!
Great bearings for 2005 Jeep Liberty
P
September 22, 2020
Almost a perfect fit for a 2005 Jeep Liberty Limited - the only thing that was different was one of the mounting harnesses for the ABS cable - but this was so minor it's not worth taking a star off. Product works great and installation was easy (aside from getting the old bearings off!).
If your lug nuts are rusty like mine were, I recommend getting new lug nuts to go with the new bearings - my old lug nuts didn't hold their torque on the studs of the new bearings, probably because the rust on the lug nuts' threads was preventing them from mating well.
Also, don't be alarmed if your ABS light is lit up the first time you turn the car on after installing these - mine did and it went away within a matter of seconds.
Gregory
November 30, 2020
Was a perfect fit for my 2007 jeep liberty. Super easy to install after watching the install video. Will be getting more parts from this website.
Excellent Company
Jeff
August 11, 2021
Part was exactly what was needed. Helpful videos make the job that much easier. Fast shipping. I will continue to do business with 1A Auto; they are a trusted and preferred vendor.
2006 Jeep Liberty
Randy
September 8, 2021
Came on time! Installed well and drove like new. Liked the great deal on it.
MARTIN
December 2, 2021
Good quality part.
Exactly what I expected.....
William
August 17, 2022
I received exactly what I expected. And fast shipping.
2006 Jeep liberty
Esmeralda
June 24, 2023
Fits perfecto!
Good part, fair price.
Joel
August 14, 2023
Fair price, fast shipping and part looks like good quality, probably as good as the original which lasted 150k miles. Fit perfectly and works fine.
Juan
January 1, 2025
Good
Customer Q&A
No questions have been asked about this item.
Customer service
877-844-3393
Monday - Friday 8:00am - 9:30pm ET Saturday - Sunday 8:00am - 4:30pm ET
Jeep is a registered trademark of FCA US LLC. 1A Auto is not affiliated with or sponsored by Jeep or FCA US LLC.See all trademarks.
Enter Vehicle Year Make Model
Specify your vehicle's year, make and model to guarantee fit.
Year
Make
Model
Options
Drivetrain
This part doesn’t fit a . Select from parts that fit.