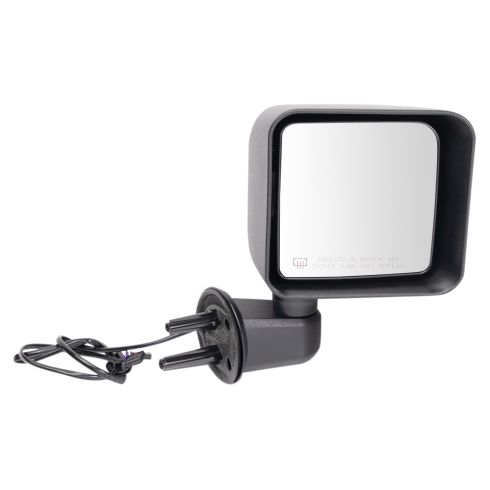
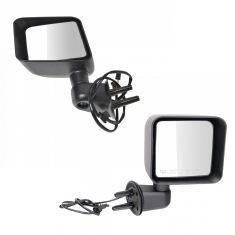
Hi everyone, Sue here from 1A Auto, and today we have a 2015 Jeep Wrangler and I'm going to show you how to remove the driver side and passenger side mirror. If you need this part or any other part for your car, click on the link below and head on over to 1aauto.com. Tools we're going to use to do this side mirror is a Torx T40, ratchet, trim tool, Phillips screwdriver, and then a another T25 Torx bit screwdriver.
First thing I'm going to do is I want to put the window down so I can hold onto the mirror. Okay, once we have the door open, these are the two bolts that hold the mirror on the door, but we're going to leave those on because right now we want to get this whole panel off so we can access the wiring harness. Then we'll undo the bolts there.
Pull on the inside handle. Take this little trim piece off. There's a cover right here, and just pop that out. I didn't want to break the little tabs because there are little plastic tabs. Now this looks like these bolts do come out, but you don't need to take these out. It's actually just for aesthetic look. So I'm going to take my trim tool, see if I can find a good spot. Let's try right here and then pop that out.
And inside here we have two Phillip head screws. Screws With a Phillips, and I'm going to take those right out. The plastic clips on these door panels are really tough. You think that you're breaking it but you're not, they're like a double stage pull tabs. And down here we have two Torx bits. This is T25. And then last inside here, the handle. Now I'm going to remove these. T25. You'll see one when you open it up, it's right here. The top one holds the inner door handle trim bezel on, and the bottom one here is a bigger bolt, so when you take it apart and put it back together, remember the bigger one goes on the bottom and that's basically helps the panel stay on, on the top here. They make kind of a tight fit.
There we go. See, it's a threaded bolt, not a screw. Now you can just grab this bezel piece. Get that out of the way. Now here we go all the way around. There are little clips holding this on. Once you get the first one, just a matter of pulling firmly. There we go. You don't have to take that off. I didn't on the other side. I'm going to put that back. That was just from the vibration. Lift up on it, and then just lift up. Now you can see all those clips. Now if you want to right now, you can just take your finger and pop off this little connector for the power lock. Now we can set our panel aside.
Now the fun begins. So the harness for the outside mirror is a right here. Follow it along. Keep an idea of where it goes. These two connectors right here. So what I like to do is take my trim tool and disconnect this clip right here, where it mounts. It's just a squeeze tab. Then you get a better view of the release clip. Push down on that, then pull. Now I can really get to the bottom one. Do the same thing.
So this is my harness to my mirror. There's a rubber little boot here, keeps any noise out and moisture. So what we're going to do is put that grommet inside like that. Now here comes the trick. The mirror is melted over here, and here is the access hole for the wires. You don't want to unbolt this mirror and just pull it right out because then you never going to get that from there to there. It's a big S. So we're going to tie a piece of twine to it, and that way we can just get it right back.
So here we have our harness for the mirror. Just have a piece of twine. I'm just going to tie a knot in it. Make sure it's tight. You do not want it to come undone. That kind of defeats point. Nice. There you go. Now we're going to do our two bolts here. That's a T40. I have it set up on a three eighths ratchet. And that's why I have the window down because I can undo these bolts and then hold onto that mirror. Now the bolts are really long. It has a door that's kind of thick for a Jeep. They make it a little bit more soundproof nowadays.
Give it a tug. Now you'll see the harness coming through here. Don't step on the string. Perfect. Now we have that out there. Now I can go around. You still have string on this side. Just cut the twine. Looks like I have to sharpen my twine.
Here we have our replacement mirror. This is the one from 1A Auto, and this is the actual mirror we just took off our 2015 Jeep Wrangler, and it is the factory mirror. Harnesses are the same length. They have the same nice protective grommet for the sound. Connectors are perfect. They match right up, identical. This mirror has heated glass, so we give that option, and we also have the option without. Make sure you know which your vehicle has when you look up the part. And it mounts just as easy as the original one did. Has a nice seal here. And we're ready to go.
This is flat black. You can paint it or leave it the way it is. It's got a texture to it. So I'm going to leave it. We do sell Chrome ones. If you want a Chrome trim, that's up to you. So if you need this part or any other part for your car, click on the link below and head on over to 1aauto.com.
So now we have our new mirror, the harness, and I have my piece of twine going through the mounting hole. So I'm going to tie the twine to it nice and tight. Now we're going to get ready to pull the harness through. First thing I'm going to do is grab this side of the string, so it doesn't accidentally fall through. So I can grab my mirror, bring it around the antenna. I'm going to pull on this harness with the string. Guide this through.
Now you've got to bring the mirror up, give yourself some slack. Just like that. Then you got that rubber grommet you have to pull through also. There we go. Now I've got the mirror there and I can come around, put the bolts in. Pull up on that. I'm going to start them by hand. And the bottom one. I'm going to tighten this up because I don't want it to fall or loosen up. I'm just going to grab that T40 again and tighten that right up.
Once it starts to get snug, I'm going to grab the mirror with the other hand, and keep moving it so it's centered. Just want to snug it. You don't want to crack that plastic mounting bracket. That's probably why the bolts are so long too. Anti vibration. Make sure it stays nice and tight. I remember the good old days when Jeeps mirrors were metal. You'd go down the road, you couldn't see anything behind you. They just vibrated nonstop. But it was fun. You know? That's what Jeeps are about.
So this rubber grommet, as you can see, has a inverted bezel to it. So we're going to pop it back through. I'm going to grab that tab, just pull it out gently. Really get to seat in that all the way around. Here we go. Remember how it ran, over there, down there, down there. Now we're going to undo that string. I'd love to say I'm going to untie it and not have to cut it.
All right, so we've got two connectors. The smaller of the two goes right here. You can see how it lines up. Get that little tab on the bottom. They make that what I call monkey proof. And then this one goes right in the bottom. Until you hear the click, or you get mad. There you go. Line up the tab on top, make it click. Now we can grab our panel and remount the panel.
So we made sure that all the tabs are in place. Sometimes they fall out, but we look like we got them all in. So I'm going to connect the lock switch. And here comes the fun. So we got to get this groove right here, lined up in that groove. You got to bring the panel out to you, your body. Line that up. I like to go one side first. If you're vertically challenged like me, you just have to guess at it. So once you've got those pins lined up, you're going to just push it down like that, and then follow the trim all around. Get some aggression out, and you hear them all snap, lock right in. Good to go.
Two main holding screws in here. Those are the ones with the Phillips head on them. Tighten those up. I'm going to put the bezel in, and if you look at this, you get two back tabs that slide in first. Then this will click on, right up in front here. So pull the handle out, line up those two bezels with that little notch. Pops right in. This is the one that we had the T25. You have a bottom, and a top. The bottom one is the bolt, and the top one is the screw. That's a screw thread and that's a bolt thread. This one goes in the bottom behind that handle. And the top one is easier to see. Top one right there.
Let's put that plastic piece back in. See how it's designed, it turns the corner right here on that handle. Then you have your lock clips. So, pull that handle out, line everything up and just snap it right in. Now we have two screws down on the bottom here. That's the T25 again. That's the one thing about these nets, they stretch. You got one there, and then one right here. Last but not least, nice little trim piece here. Line it up, make sure it looks good. Get your push lineup pins and a little snap around the ends. That's it. Good to go.
So last thing you want to do is put your ignition key in the on position. Get your mirror button, turn it to the right if it's the mirror you did and you're checking. And then let's see if the motor works. Hi there. Works perfect.
Thanks for watching. Visit 1aauto.com for quality auto parts shipped to your door. The place for DIY auto repair. And if you enjoyed this video, please click the subscribe button.