Replaces
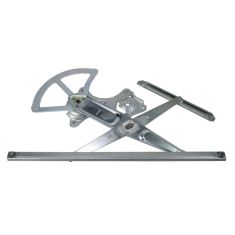
2005 Lexus GS300 Front Driver Side Window Regulator TRQ WRA51786
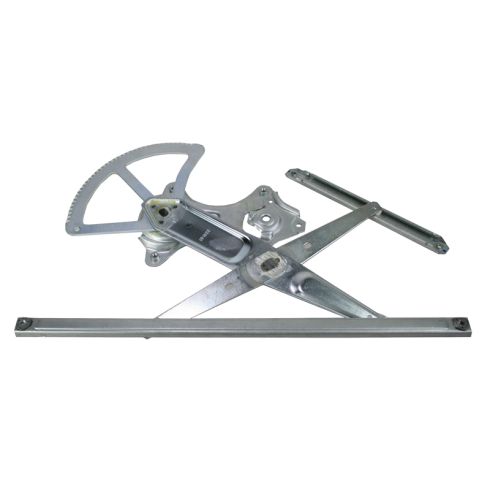

WRA51786
This part doesn’t fit a . Select from parts that fit.
Specify your vehicle's year, make and model to guarantee fit.
This part does not fit a .
Buy in the next and
Recommended for your 2005 Lexus GS300
Frequently bought together
Specify your vehicle's year, make and model to guarantee fit.
This part does not fit a .
Part Details
- No
- No
- Galvanized Steel
- Electric
- No
Specifications
- Driver Side
- Front
About TRQ:
TRQ is a trusted brand dedicated to making every repair a success story by combining premium parts with easy installation. Each TRQ part is engineered by a team of automotive experts to meet or exceed OEM standards, delivering enhanced performance and maximum longevity. With rigorous in-house testing, the brand ensures superior fit and function across every product line. TRQ also provides customers with best-in-class, step-by-step installation videos—so you can complete repairs with confidence, whether you're a first-time DIYer or an industry professional.
Product Features
Note: This window regulator is designed to work with factory style motors only. Due to variations in aftermarket designs, replacement motors may not have the correct gear style.
Attention California Customers:
![]() WARNING: This product can expose you to chemicals including Lead and Lead Compounds, which are known to the State of California to cause cancer, and birth defects or other reproductive harm. For more information, go to www.P65Warnings.ca.gov.
WARNING: This product can expose you to chemicals including Lead and Lead Compounds, which are known to the State of California to cause cancer, and birth defects or other reproductive harm. For more information, go to www.P65Warnings.ca.gov.
Lifetime Warranty
This item is backed by our limited lifetime warranty. In the event that this item should fail due to manufacturing defects during intended use, we will replace the part free of charge. This warranty covers the cost of the part only.
FREE Shipping is standard on orders shipped to the lower 48 States (Contiguous United States). Standard shipping charges apply to Hawaii and Alaska.
Shipping is not available to a P.O. Box, APO/FPO/DPO addresses, US Territories, or Canada for this item.
Expedited is available on checkout to the United States, excluding Alaska, Hawaii.
Final shipping costs are available at checkout.

Created on:
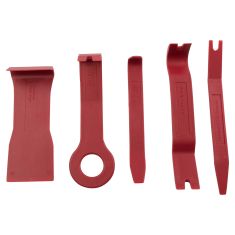
Tools used
- Remove the handle trim piece with a pick Remove the Phillips screw behind the door handle Remove the Phillips screw inside the rubber trim piece Remove the Phillips screw below the door pull Remove the Phillips screw above the door latch Remove the four Phillips screws along bottom of the panel Pry out the door panel with a flat blade screwdriver Lift door panel up Disconnect the interior door handle cables Disconnect the three electrical connectors
- Raise the window by hand Hold the window in place with painter's tape Carefully peel back the water shield with a trim tool Remove the two 10mm bolts that hold the window to the regulator Turn the key to the on position Connect the electrical connector to the master switch Lower the window regulator from the window Turn the key to the off position Disconnect the electrical connector Remove the four 10mm bolts from the regulator Disconnect the window motor electrical connector Pry out the electrical connector from the door with a trim tool Press the rubber boot on the connector wiring into the door with a flat blade screwdriver Pull the window regulator out through the door
- Remove the three T25 Torx screws from the window motor on the old window regulator Remove the window motor Inspect the window motor gears for rounding or strips Transfer the window motor to the new window regulator Tighten the T25 Torx screws to the window motor
- Insert one of the bolts into the window regulator Push the regulator into the door Hang the regulator by its bolt Pull the wiring connector and rubber boot through the door Connect the electrical connector Clip the wire to the door Tighten the four 10mm bolts to the window regulator Connect the electrical connector to the master switch Raise the window regulator from the window Turn the key to the off position Disconnect the electrical connector Remove the painter's tape from the window Lower the window onto the regulator Insert the two 10mm bolts that hold the window to the regulator
- Press the water shield into place Connect the three electrical connectors Connect the interior door handle cables Lift panel up onto the door, push front end on first Press in door panel clips Replace the Phillips screw behind the door handle Replace the Phillips screw inside the rubber trim piece Replace the Phillips screw below the door pull Replace the Phillips screw above the door latch Replace the four Phillips screws along bottom of the panel Replace the handle trim piece
Hey, everyone. It's Len from 1A Auto. Today I'm going to be installing this window regulator in this 2001 Lexus GS300. It's going to be very simple, and if you need this part or any other, you can always go to 1AAuto.com.
First, you'll need a hooked pick tool, and just go in behind and pull this panel off. Now, there are eight Phillips screws to remove, one right behind that panel, one inside here. There's one right below your door pull here, one with a bumper on it there, and then four right up underneath. Phillips screwdriver to remove those. For a bunch of these, you could use an eight millimeter socket and ratchet. All right, now there's a few clips in the front and the back. So just put your ... Usually, just use your fingers. You might want to use a flat blade screwdriver, but just pull firmly and they release. Okay.
Then, once you've released all those and it's kind of loose, you want to almost twist the top so that this will go by here, pull out, but also pull on this so the top comes up, and then rotate it up, slide it back, pull the top out and off. Then in behind, there are the two cables for your door handle. Pull them out and then pull that up and out like that. Same thing here, pull it out. This one goes down and comes out. And then two electrical connections. Push on the tab, disconnect, and then down here the tab is right at the bottom. Push on the tab and disconnect. One more. Then, way down at the bottom, again little tab, push to disconnect.
All right, everyone. So now we're going to get to the point we're going to tape up the window. The reason for this is, because once we start getting into here, and we're going to take out the window regulator, we don't want this glass to fall. Broken glass bad news at all times. Make sure you're wearing safety glasses. Safety's number one at 1A Auto. I'm going to take a little bit of painter's masking tape. It doesn't stick very hard like duct tape or any other type of tape that will leave glue on your windows. I like to leave a good amount, the more the merrier. It's not very expensive, won't break the bank. Bring it down. You can do two, you can do three, you can do four, five, six strips. Two will do, leaving a little bit of space between each.
I want to try to support as much of the window as possible with them. If for some reason, you don't trust just two, go ahead and slap on a third. Why not? It's not my tape. Here we are. We've got those taped down, so now when we remove the window regulator under here, we don't have to worry about the glass falling down. Our next step, we're going to take this back. There's just a little bit of sticky goo there. No big deal. Behind here, now we can get a clear view of what's going to go on under here, and we'll be able to go from there.
All right. Our next step, we're going to be taking out two bolts. There's going to be one on this side of the window right down in here. It's a 10 millimeter head, and then another one coming down here, also a 10 millimeter head. Those are going to have to come ... All right. Continuing to go to the left to remove these screws. If you have access to a ratchet wrench, it's going to be a blessing. We'll remove that one screw and the second screw's going to be over on this side, as I mentioned. We'll take that completely out and put those aside safely so they won't get lost, and we'll move on to the next step.
Next, you're going to have to bring your hand in with your ratchet wrench through the door panel, being careful for any sharp edges. You're going to find that second bolt, which is located right about here. Put your ratchet wrench on, if you are lucky enough to have one with a 10 millimeter. We're going to take that bolt completely out. A little harder to get your other hand in there to hold the wrench, but we'll see what we can do. Okay. Carefully bringing it out, and there's our second bolt. We're going to put that aside safely so it doesn't get lost as well, with the other one.
Next, we're going to put the key in the on position. We're going to connect our window regulator wire. Goes right to the master switch in your door panel from the bottom side. Latch it in. Left front door window, we're going to bring it down . You can hear the window regulator going down, but the window staying up, that's a good noise. Next, we're going to turn off the key for the vehicle. Remove this wiring harness again. Put our door panel in a safe area, and we're going to move on to the next step.
Next step, we're going to be looking to see where our mounting screws are for our window regulator. You'll notice that they're all the same, 10 millimeter heads. You're going to have one here, one here, and a few others going along the line. An easy way to tell where they're going to be is to line up your window regulator with the holes that you can see where they go, and you'll see where the other bolts are. This one, you might be a little harder for you to see, but this'll show you exactly where everything goes. Once we get those all undone, we'll drop it down, and we'll see about trying to squeeze it out through this hole right here.
Continuing with our 10 millimeter ratchet wrench, we're going to work on our last bolt. Just break it free. Reach inside with your hand if you can to hold up that window regulator. Once you get it loose enough, you can do it by hand if you'd like, or even you can leave it in. Just bring it up to that open gaping hole, and it's good to go right in. Next, like I said, we're going to try to squeeze it out through this hole right here, so I'm going to remove my flashlight and see if we can maneuver it out. Line these up. Should work it's way out.
All right, so next what we're going to be doing, while this is still inside the door panel, we're going to disconnect this wiring harness right here. It's going to be very simple. If you have a small screwdriver or anything that you can put up inside, there's a locking clip. You're just going to lift it up and then pull down. We'll disconnect those. Always check your wiring harnesses to make sure there's no green, blue, brown, rust, anything. That looks great, we'll reuse that. If not, you'd have to probably either solder in a new connector, or you'd have to buy a new wiring harness. This looks good. Next, we're going to try and get this piece off right here. It's connected to the door. We'll use our door trim removal tool, stick it in, give it a little pry, pops right off, not too bad, and then we're going to have to go ahead and push this rubber piece inside the door panel.
The door panel itself is made out of metal. It could be sharp, so you're going to have to watch your fingers for pinch points. You can use your small screwdriver again if you like, you're just going to push down, work it in, go around the sides. That goes in, push it right inside the door panel, once again watching out for any sharp edges. This is nice and smooth, but just in case. Now we're going to come back over, we're going to grab onto our window regulator. We're going to gently try to coerce it out, see if it wants to play nice, and it should. Being very careful of any pinch points, safety first is a main concern at 1A Auto. We'll just keep finagling it, and now we've removed our window regulator system.
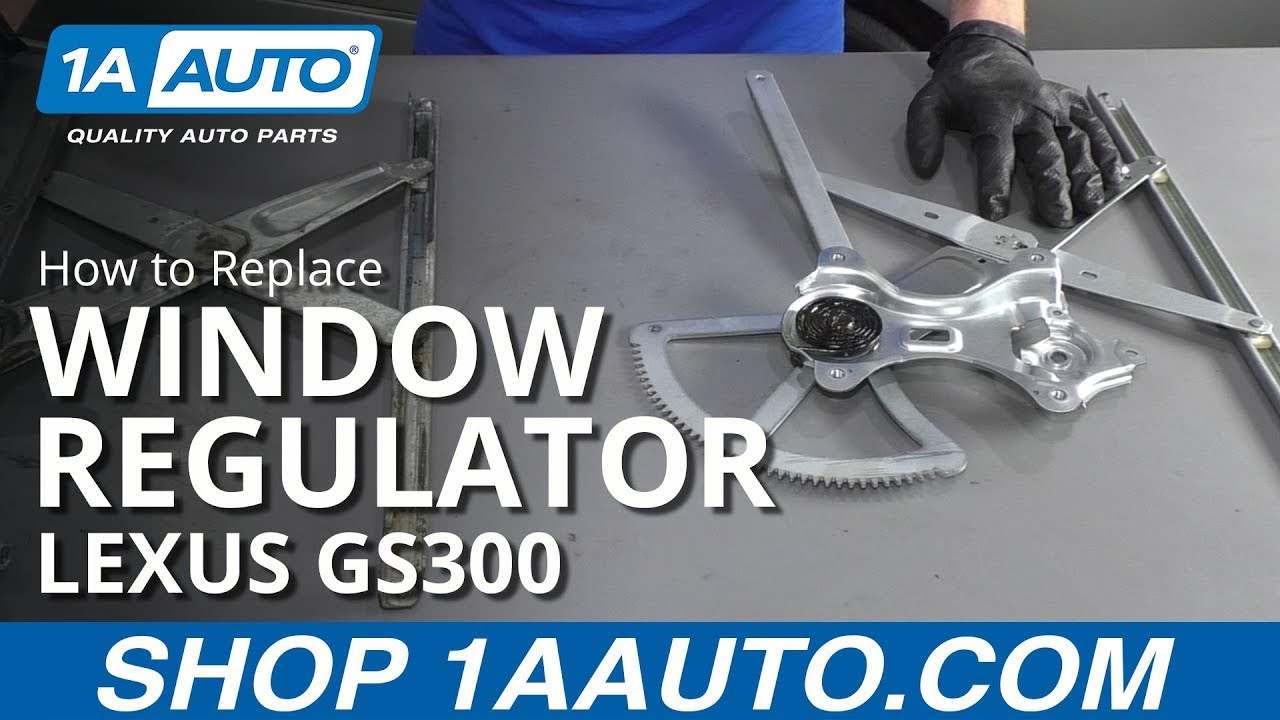
All right, so now we have our window regulator. We have the old and the new. You'll notice that both of them have the same channels. You'll notice that both of them have the same gearing system for where the motor's going to connect into. This one has the original motor in it. That's something that you can swap over, or you can replace if you wanted to. Everything looks about the same on this as it should on the old one, if not better, to be honest with you, so I would go ahead and put this right in without any problems. If you need this part, you can go ahead and head on over to 1AAuto.com.
All right, next we're going to be taking out these T25 Torx head screws. As this appears, you can also use a flat head screwdriver, take more risk of stripping it. If you have access to a T25, go with that. We're going to remove these to the left. Get my socket on there. If you have access to maybe a little electrical drill of some sort that you can attach this to, that might be wonderful. I'll just continue with my ratchet. We're going to remove all three of these screws and we'll move on to the next step. Last bolt.
Now, be very careful removing this motor. It does have spring tension. I'll show you on the new one, this right here is a spring. It requires tension, so when you remove this motor, there's always the possibility that something could move on you. Anywhere inside here, if you get your finger in between there and there, it's a pinch point. Let's not lose any limbs today. Safety first. Oh, yeah. Soon as I popped it out, you saw that one go, so it was here. Spring tension wants it to go. Could have been a pinch point.
Now, we have our motor. You can take a look at it. Make sure that the gears are in good condition, doesn't look like any of them are stripped, rounded, looks good to me. Now we're clear to either replace this or we can reinstall it into our new window regulator. For this video, I'm just going to install it into the new window regulator, and I'm going to go from there.
All right everyone, remembering that there's spring tension on this, what we're going to do is we're going to pull it to about where the beginning, where the motor's going to start. If you have a flat braid ... If you have a flat blade screwdriver or a pry bar of any sort, you can try to stick it through here, and I'll show you why. You see how that is? You stick this through, now we don't have to hold it as much anymore. No hands on you. Next, we're going to take our three bolts, we'll line up our motor. You can see where the bolts are supposed to go through. Line those up. There's a hole on the backside. It should snap right in. Holding this firmly with two hands, making sure you don't have any pinch points, we're going to start our three screws, at least one of them for now. Get it going. Here we are, there's one, give it a couple good threads. Get our second. Also a couple of good threads, and our third. Also a couple good threads.
Next, we're going to take our T25, or your flathead screwdriver. As I mentioned, you can try to use that if you'd like. Get these bolt, or all in, leaving them loose so we can make sure that we get them all nice and close. Nice and snug. There's number two, also nice and snug, and number three, nice and snug. In case you lost count, you can go back around again. I counted out loud. I can remember that. We'll remove our pry bar, screwdriver, whatever you might have, and now this is ready to install into your vehicle.
All right, now that we have our window regulator in the compressed position, pretty much as flat as it can go, we're going to go right back in the same way we came out, except opposite, obviously. It's going to take a little bit of finagling. You saw the way it came out. We're going to go in like this, being careful not to get caught in any pinch points. Should just squeeze its way right in. Go in from the top of this arm. However you need to do it, that's up to you. You do you, boo boo.
Okay, now that we have it in, we're going to try to get the one bolt that we left sticking out of the window regulator to line up with this hole up here. Just have to see if I can find it, without any extra glasses on. Get it up. I can see it, right here. Just try to get it lined up. Perfect. Now that we have it at this point, we can release the window regulator by hand. We can start lining everything up on the inside.
All right, so next what we're going to try to do is we're going to try to grab our window motor harness through this door panel hole. Should come through fairly easily. We don't have to pull it all the way through yet, because we might have to maneuver the window motor inside. What we're going to do now is, we're going to connect this and then we're going to connect this to the the door master switch for the windows. Do this real quick. Perfect. We heard the click. Next we're going to find where this connects into. Right here, clip that in.
We're going to turn the key to the on position, and we're going to try to maneuver the window regulator up and down. We still have our tape holding the window, so that can't go anywhere. The reason why we're doing this is because even though we have one hole lined up, we need to get the other three holes lined up. By maneuvering the window regulator up and down, hopefully that'll give us the maneuverability that we need to line up those holes, while making sure we don't put too much pressure on this window wire switch.
I'm going to turn the key to the on position. I'm going to grab the left front window switch, which is the one on the inside right here. Just going to make it go this way a little bit, and I just want to see if it lines up. That makes it a little closer. Let's try a little more. That gives us plenty of room, pull these up. The next thing I want to do is I want to get my hand out of here. I'm going to take the key, put it back in the off position, and even remove it from the ignition so there's no power. I don't want anything moving in here on its own. And then, I'm going to continue disconnecting the electrical connectors. I'll put in the last three screws, and that'll be our next move.
All right, so next what we're going to do is, we're going to take this bar back down. We're going to get it lined up with where it needs to go. We don't need to mount it in yet, because the first one we want to do is we want to mount the major part of it, which is the rest of the window regulator. We've got one bolt hole lined up here. We'll just get that started. Put down the rest of my bolts real quick. Fumble it. We'll get a few good threads in. Come over to your others. Wiggle your window regulator around if you need to. Grab this one, this one's going to be a little harder to get to. Right down in there. All right. We've got all these.
Now, we're going to move on to the last two right here. We've got our bar. Line it up. Here we go. That looks pretty good. This is all while leaving all the bolts loose so far. Start it in. This one, start it in. Now that we have all these bolts started in, what we can do is, we can start tightening them up. We'll start here and work our way around. Once that's done, we'll move onto the next step. All right. Now for our last two bolts, just going to come right over here. Snug will do. Nice.
Now, we'll just come over here. We've already got this connected from earlier. Just going to go ahead and pull it through, fairly gently, holding the door so I don't pull it and hit myself in the face. Can always use a little screwdriver if you want. We're just going to pull it down so the lip goes around, being careful not to rip on any wires. You don't need to yank, just use a little bit of leverage. We've got all that connected, can put this right back in the door where it belongs so it's safe and secure, and then we'll be moving along.
All right, now that we've used the window master switch to lower and raise the window regulator, to line up where the window lines up with the regulator, I'm going to go ahead and start disconnecting the electrical components on this again, to make sure that it can't do anything that I don't want to do while my hands are inside there. Safety first is key at 1A Auto. Turn off the ignition. Then we'll re-lead the contact point. There it is. We'll put this off to the side.
Now with these holes lined up, I'm going to start the two bolts. There's one over here and one over here. Just like we took them out, they're going to go back in. I'm going to put my hand up in here being very careful. See if I can get these started in. This is not going to be fun, and you're going to be kicking and screaming just like I am. Once this has started, we'll go ahead and tighten those right up. Feels like it's getting pretty snug. We don't want to go too tight. That feels pretty great. Then you're tightening this one back here. This one's going to be even harder to get to. Wish me luck, and I'll wish you luck. We'll both have luck. All right, nice and snug. It doesn't need to be too tight, and those are screwed right in.
Alright, so now we're going to do is we're going to check the window operation before we go ahead and put everything back together. I'm going to connect the contact point for the window. Bring this over. The contact point for the window master switch, clip it in. Then I'm going to put the key in the on position, I'm going to remove these pieces of tape, and I'm going to make sure the function of the window works properly. Here we go. Ooh, not bad. Nice.
All right, now we're going to go ahead and put the vapor barrier back on. Sticks right on, just like it came off. Going right along, and then after that we're going to go ahead and put the door panel back on, making sure that we connect all wires and cables, and it should be good to go.
Reinstall the door panel. There's three electrical connectors, the courtesy light way down at the bottom, our master power window switch right in the middle, and then our power door lock switch up here at the top. Then, these go in. This first one goes from the bottom, from the bottom and then up and around. This one goes in from the top, and then pushes in, and then tilt the back of the panel up, push the front in first, and then as you go forward, bring the panel down and on, and lock those clips into place. The larger screw that has no bolt head goes in behind here, and then the rest of them are the Phillips screw-in eight millimeter bolts.
I always like to start them all first before I tighten them up. That just makes sure that they're all lined up. Then when you tighten them, you don't have to tighten them tight. Just get them snug so you know they're holding. You don't want to strip the plastic clips they go into. This plastic cover, put it in place, kind of push the front in first. Snap it in.
Thanks for watching. Visit 1AAuto.com, your place for DIY auto repairs, for great parts, great service, and more content.
WRA51786
877-844-3393
Monday - Friday 8:00am - 9:30pm ET
Saturday - Sunday 8:00am - 4:30pm ET
Specify your vehicle's year, make and model to guarantee fit.
This part does not fit a .


