
★★★★★
September 24, 2020
A1 is number 1
A1 is easy to use and navigate prompt and delivery is always on time and easy to track. I highly recommend A1 auto parts online

Replaces





About TRQ:
TRQ is a trusted brand dedicated to making every repair a success story by combining premium parts with easy installation. Each TRQ part is engineered by a team of automotive experts to meet or exceed OEM standards, delivering enhanced performance and maximum longevity. With rigorous in-house testing, the brand ensures superior fit and function across every product line. TRQ also provides customers with best-in-class, step-by-step installation videos—so you can complete repairs with confidence, whether you're a first-time DIYer or an industry professional.
Install Tip: When replacing steering components, have a professional alignment performed afterwards. This ensures proper tracking and even tire wear.
Our steering and suspension components are pre-greased and sealed for long life and do not require the extra maintenance typically required by greaseable versions.
Attention California Customers:
 WARNING: This product can expose you to chemicals including Lead and Lead Compounds, which are known to the State of California to cause cancer, and birth defects or other reproductive harm. For more information, go to www.P65Warnings.ca.gov.
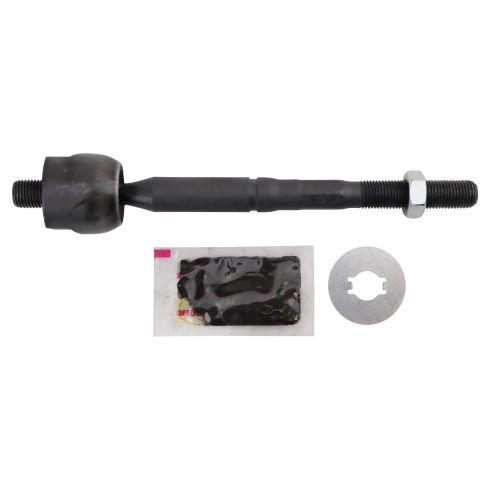
This part fits 6 vehicles spanning 1998-2005.
| Year | Make | Model | Description |
|---|---|---|---|
| 1998-2005 | Lexus | GS300 | Lexus GS300 Front Passenger Side Inner Tie Rod TRQ PSA68403 |
| 1998-2005 | Lexus | GS300 | Lexus GS300 Front Driver Side Inner Tie Rod TRQ PSA68403 |
| 1998-2000 | Lexus | GS400 | Lexus GS400 Front Driver Side Inner Tie Rod TRQ PSA68403 |
| 1998-2000 | Lexus | GS400 | Lexus GS400 Front Passenger Side Inner Tie Rod TRQ PSA68403 |
| 2001-2005 | Lexus | GS430 | Lexus GS430 Front Passenger Side Inner Tie Rod TRQ PSA68403 |
| 2001-2005 | Lexus | GS430 | Lexus GS430 Front Driver Side Inner Tie Rod TRQ PSA68403 |
| Brand Label | Part Number |
|---|---|
| MOOG Chassis Products | EV80600 |
| DIY Solutions | SUS07633 |
| Mevotech | MEV80600 |
| Toyota | 4550339155 |
| Mevotech Supreme | MEV80600 |
This item may be interchangeable with parts from other brands with the above part numbers. This information is provided only for reference and does not guarantee that the item you are purchasing is identical to parts with part numbers from the brands listed above. To confirm that this item fits your vehicle, use the above "Check Vehicle Fit" option.
Lifetime Warranty
This item is backed by our limited lifetime warranty. In the event that this item should fail due to manufacturing defects during intended use, we will replace the part free of charge. This warranty covers the cost of the part only.
FREE Shipping is standard on Orders shipped to the lower 48 States (Contiguous United States). Standard shipping charges apply to Hawaii, Alaska and US Territories. Shipping is not available to Canada.
Expedited is available on checkout to the United States, excluding Alaska, Hawaii and US Territories as well as P.O. Boxes and APO/FPO/DPO addresses. Final shipping costs are available at checkout.

Created on:
Tools used
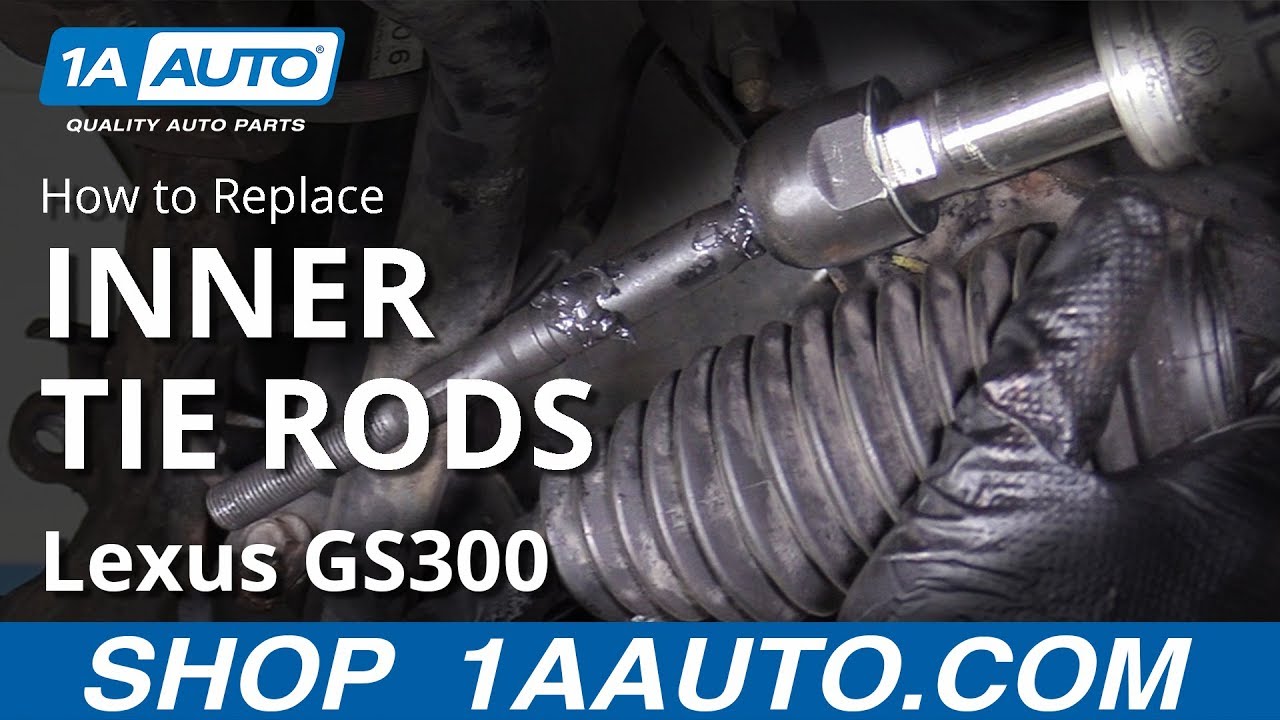
Hey everyone, it's Len down at 1A Auto. Today we're going to be working on a 2001 Lexus GS300. We're gonna be replacing the inner tie rod end. It's a fairly simple job, there are some extra tools that you may or may not need, but we'll discover that once we get the vehicle up in the air.
Something that I wanted to mention to you, if you did happen to have to replace the inner tie rod end, it would be a good idea to get the outer tie rod end that goes to the specific side you're working on, and I'll tell you why. Over time this is screwed together, you know, for your alignment, we'll say it's already together. You got a boot over here, this jam nut's on here, locked in tight. Salts and every nightmare that comes through in the northeastern area, that's gonna rust all this up.
You'll notice on your inner tie rod end, on the older ones, these will all be bunched up, they'll be rusted, rotted. Trying to release this jamb nut, it's going to be darn near impossible without a little bit of heat and a lot of lubrication.
Something that you can do is you can opt to try to get a complete tie rod end set, which would be the inner tie rod and the outer tie rod. That's going to make your life a whole lot easier, and you'll have completely new parts.
Alright, one of the first things that we're going to want to do is, after we have the vehicle semi supported off the off the ground, you want to make sure the wheel is still on the ground firmly. So you take your 21mm socket, and if you have a long ratchet or a breaker bar, one, just a little bit, you don't want to go too far.
Now as we take off this one last lug nut, you want to make sure you hold that wheel on. You don't want to fall off, go bouncing off, hit you in the knee, hurt yourself. Safety is key. Let that down nice and easy.
All right, so now while we're trying to take off these tire rods, we get the outer tie rod here, your jam nut as I mentioned before, and your inner tie rod with the inner tie rod boot. What I want to do is I want to break this jam nut free. Sometimes they'll be really hard to do. We want to do that while it's still attached to your knuckle for added support.
Let's give it a try. I have these right here, a little bit of length. Well the big enough lever you can move the world, as they say. So let's give it a try and see if this puppy breaks free.
Nice, there we go, love it. Alright, next what we're gonna do is we're gonna take off this nut. So come on up, so now we're back up top. We loosened up our jam nut while this was still attached to the knuckle. We've got the same little clip like what we saw before, maybe you haven't seen, but it is in one of my videos. We're gonna pull a little ear off, or off to the side, and then pull it out.
The year that I was talking about is this, and it wraps around the side of this slotted nut. Put that aside so you don't lose it.
Next we're gonna take our 17mm. You can use a shallow socket if you want, it'll probably be better than a long socket because you don't want to be up here, might as well be as close to the to what you're working on as possible. Goes right on, 17mm six-point socket. We're gonna try to break this free. There we go, if you have an airgun, take you ten seconds. We've got a ratchet, it'll take you thirty. That knot right off of there. As always, I pre spray everything so it already worked its way in there.
Now what I'm gonna do is I'm gonna get my big fabulous hammer, and I'm gonna whack the knuckle, try to break this free. What I'm going to also make sure I do is I'm gonna put this nut right back on. You don't need to go all the way on, a couple threads, three, four, five, whatever you want to do, it doesn't have to go all the way down. It's basically just so when you whack it and this does break free, it doesn't come falling down. If you're working on the ground, to get your face near there or whatever, god forbid somebody gets hurt, safety first. Don't let this go anywhere, this will help prevent any safety hazards.
Like I said, using my big fabulous hammer, I'm gonna hit right on the knuckle. I don't need to hit the tie-rod, I don't hate to hit the nut, at some point if it doesn't break free from here, I could use a little chisel or even a hammer on there because we're going to be replacing the tie rod end anyway. If we weren't replacing it, you would not want to hit this. Here we go.
There we go, broke free. Now you can go ahead and hold it up, make sure it doesn't fall, hit in the face, anything. There we are.
Now with our new part from 1A Auto, I wanted to mention once again, is you always want to make sure you match up your part. So I'm going to walk over to the vehicle where I just took the tie rod off of the knuckle, bring it right over. You can see how it has a bend. If you go over the other side of the vehicle, the bend will go the opposite way. So you want to make sure you bring it over, compare, make sure it's just about the same. It should be just about the same, everything's made to the right specs. If it goes this way for some reason, it's wrong. You know the studs going up automatically, that means that this is the other side. It's possible that it happens, people make mistakes, but if it is wrong, just get the right one so it's matched up. It looks good to me.
Next, what we're gonna do is we're gonna unscrew this piece, count how many turns it comes off. I got myself a little crayon here, once I make my count I'm gonna write it down someplace. You can use a pen, a piece of paper, I use a crayon, right in a conspicuous place, just so I don't forget. That's gonna help you try to keep the alignment as close as possible for when you have it off. So if you're off by a thread or two, you might have one of your tires going like this, one going like this, you never know. Get it as close as possible. Anytime you do any type of front-end work, you always want to get it down to a reputable shop and have it aligned. It's gonna help you out in the long run, preserve your tires.
So here we go, we're gonna count it up, counting from where it started. One full turn, two, three, four, who counted it, 15, right? All right, I'm gonna write it down, because I don't know about you, but I forget most things.
So now what we have to do is we have to remove this jamb nut. I've already sprayed everything down, I'm hoping it should break free. A lot of times you'll notice that the threads are very rotted or rusted or even flaking, it might be an issue, it might not. First I'm gonna use my locking pliers, I'm gonna clamp it on to this hexed area. It might not be a hexed area on your particular application, but for me on this it is. Grab, you're right on. If you have access to an air gun, that's the best way to go. You want to turn it to the left to remove it. Remove your locking pliers, and that's how you get the jam nut off.
Next we want to take off this bellows boot. This protects your power steering rack from getting debris or moisture or anything inside where the rack seals are. Once we get this off, we're gonna want to look inside and see if you see any power steering fluid. If you do, the seals in the rack are bad. That's actually, most states, it's a failable item for an MOT or for state inspections, and you'd want to have the rack replaced, but we'll take a look once we get in there and we'll go from there.
Firstly, what we want to do though, is there's a clamp right here, this holds on the outside of the bellows boot. So I'm gonna take my long needlenose pliers, put it on here, give it a little squeeze, nice and easy, pull that right off. You see what would happen if I left that jamb nut on, be stuck. Jam nuts off, not stuck.
Next what I'm gonna do is I'm gonna take this little pry bar, I'm gonna try to get on this little lip right here, and I try to just pop it up and see if that does it. If not, I have an alternative method that I'll show you in that case, and it's not, so we're gonna go with the alternative method.
Taking a longer pry bar so you have more room to throw, you're gonna go on the middle part of the of the clamp, not on the boot. You don't want to get on the boot, you'll pinch it, you rip it, it's bad news, get a new one. At that point, right on the metal part of the clamp, you want what you want to do is bonk it off, and theoretically it should break. That would be the best thing, and then you can replace it with another clamp, or if you happen to have a wire tie, you could also go that route. It's not a structural integrity or anything like that, it's just to hold moisture out. So here we go.
This means a fight or the trusty old cutters. All else fails, brute-force. Lastly, to get this boot off, just give it a twist. Break it free from the rack, keep twisting, hold your inner tie rod, you should be able to pull it right off a lot of times, and there you go.
Now we have access to removing our inner tie rod end. This is the part where the rack was on, this is the part where the inner tie rod came through. We want to just go around it and make sure that there was no rips, tears, cracks, breaks, dry rot, anything like that.
All right, so now that we have full access to our inner tie rod end, we'll notice that it has locks on it. These is, it's pretty much just a washer that's pinned over and it grips on to the sides right here. But first, as always, you want to compare your new part to your old part.
We have our quality 1A Auto inner tie rod end with a brand new jamb nut. Will remove that before we install it. You just want to hold it up kind of close, give it an eyeball, make sure it matches up here, matches up there. It doesn't stick out all the way up to here, because when you do your account, you're gonna be late, well that's what's wrong. It looks like it's just about right to me.
So now let's go ahead and pop these pins. We're gonna push those back out of the way. We've got the little ear right here and one on the exact opposite side. All we want to do is get a pry bar or whatever you might have that can get it in and up against it, put it up against that little locking tab and bend it away. You don't have to go crazy, just has to be a little bit away. I'm gonna come over the other side. It looks like that should do it.
Now I'm gonna grab my long pliers. You want something with some leverage, like always, more leverage the better. Get it so it's nice and tight, break it free. Now we're just gonna unscrew it, you can do that by hand generally, and there we are. This is your locking clip right here.
Alright, so here we have our old inner tie rod end and we have our new inner tie rod end. As you can tell, this thing's a little worn, a little old. This out of here, we have our new inner tie rod end, order directly from 1AAuto.com.
All right, so now we have our inner tie rod, this is brand new 1A Auto quality, you can't beat it. came with a little thing of grease, this is very important. You're just gonna peel off this, put it right inside this, right along there, and then you can take it, work it in. That's gonna help keep moisture out of there, keep it from seizing up on you.
Lastly, this is also very important, this is your lock washer on the power steering rack. You're gonna notice that there's gonna be two slots where these sit into. This is gonna go like this, once you tighten up your inner tie rod end, you're gonna bevel these two pieces, this piece right here over up against the inner tie rod end, and the same thing on the other side. This is once you have it tightened, don't do it yet, we're gonna get to work on the center tie rod end first.
I'm gonna take off the jam nut, we'll be putting that on a little later, so put it aside someplace where you'll be able to find it, won't get lost or stolen depending on your area of location.
I'm gonna take this grease, it gives you a whole bunch, you don't really need a whole whole bunch, but why not, just put it in there. Use the same package just to pack it in, that looks pretty good. Try not to get it all over the outside, because you're gonna need to grab on to that with your hands. I have gloves, who knows if you do.
Now I'm just gonna, do as I mentioned, I'm just gonna try to work it around. This is gonna help keep the moisture out of there, it's also going to keep it a little bit lubricated. Odds are the majority of this lubrication isn't gonna make its way deep down inside, has a nylon bushing inside there that's going to keep the ball moving nice and easily, it's kind of like a lubrication of its own I guess.
I'm just gonna dry this off, make sure I don't have any grease on the outside, and now this is going to be clear to install into the vehicle, having my locking washer. I'm gonna bring it over to the vehicle and I'll show you how to install it.
So we've got the slots on the rack, you can see, one, two. I'm gonna put this washer up in here, the lock washer, put the slots, connect it. I'm gonna start my inner tie rod end in, turning and turning and turning, it being careful for pinch points, safety first always, 1A.
I'm gonna get it nice and snug, and then I'm gonna go ahead and grab my long handle pliers, or if you happen to have a wrench that's this big, I don't personally. You could also have an inner tie rod tool, which is available at 1AAuto.com. I'm just gonna...
Use my pliers, and I'm gonna give that a nice snug. So now I've got my long handle pliers, I'm gonna grab right on to it, I'm gonna pull it. You know we need to go super tight with this because you might turn the inside inner mechanisms of your power steering rack which could cause an issue, but you do want to make sure it's snug. That feels pretty good.
Now in my next step, like I said, is I'm gonna peen these over up against the inner tie rod end, not the opposite direction, your lock washer will be useless at that point. Now using a small hammer, you can use whatever size you want, but use the right tool for the right job. I'm just gonna try to peen this over towards the inner tie rod end. This side's nice and locked in flat up against the side of the inner tie rod end, and now I'm gonna walk over and do the same to the other side.
So now we're gonna go ahead and install our bellows boot onto the inner tie rod end and the power steering rack. One thing that I'd like to mention is the person's gonna be doing your alignment is gonna love this. Take a little bit of this inner tie rod grease, if you still have a little bit left in your packet, put it right on here, and I'll explain to you why.
Now when I put this in, your tie rod boot on here or bellows boot, whatever you'd like to call it, I'm gonna go all the way here, it's gonna be wire tie it on right here and then I'm gonna have the clamp right here. The person that goes to do the alignment, the adjustments right here, as they turn this, if this isn't lubricated, it's going to get stuck, the boot's gonna get stuck on the inner tie rod end, and it might rip the boot on them or just twist it and it'll look like a jumbled mess. Doing a little bit of something like this, it's gonna go a long way for you down the road.
So here we go, I'm just gonna go, having remove the jam nut, I'm gonna go right over the inner tie rod end, bring you right through, put this up on here onto the rack. You can use your wire tie, or if you still have the clamp or a clamp, whatever you want to use, I use a wire tie, I have access to one, put it through.
And this doesn't have to be super tight. What I do like to do is grab it with a pair of needle nose pliers, just give it a little tweak. That's good, and I'll use my cutters, cut off the end of it.
Next thing I'm gonna have to do is I'm gonna put the clamp on this end, put it inside my long nose pliers, right over the inner tie rod end, over the bellows boot or inner tie rod boot, whatever you'd like to call it. And that's on there good, you can move freely, that's gonna be perfect. So now when the alignment is done, it won't rip your boot and won't cause any binding, everything's gonna be good to go.
Now what we're gonna do is we're just gonna apply a little bit of copper never seeds onto here, and that's gonna make it so as we put on this jam nut, first of all it'll screw on nice and easy, not that it probably wouldn't anyway being a brand new quality 1A Auto part, but also for when somebody down the line goes to do the alignment, or if for some reason need to replace this again, because your car sticks around forever.
Now we're going to install our outer tie rod end, have that right here, I've already matched it up. We remember that it's fifteen turns as notated as I wrote down, so here we go. I'm gonna start, C, wait until it gets going here. All right, now we're gonna count it, one, two, three, four, fifteen. This ended facing up, that's where it started, perfect, line up the stud, this right here, we can start our nut turning to the left, find our first thread, get it started.
Next we're going to take our jam nut, we're going to turn it down towards the outer tie rod end, and the jamb nut, with its name being what it is, jams the outer tie rod end in onto the inner tie rod end, so the adjustment won't move on its own. You can take your adjustable pliers, you can take a wrench, you can take whatever you want.
No one, you're just gonna give it a little. Alright, now we have our castle nut started. We're gonna go ahead and lift up on the tie rod, pull it down as close as we can finger tight. If you have a wrench that ratchets, that's great. If you don't, you can wrench it, or if you chose to, you could take off the whole caliper bracket, use a socket and ratchet. It's all completely up to you. I'm just gonna make it nice and snug, that feels pretty good.
Now what I'm going to do is going to check to make sure that the hole is lined up with the castle nut, and remarkably it looks like I did it. So I'm gonna go ahead and put through this little cotter pin, push it through, locks right in into the castle nut. And I just wanted to mention that if you did choose to take off your caliper brackets so you can torque this outer tie rod nut, the torque specification will be 64 foot-pounds.
All right, now it's time to get the wheel up on here. Roll it up onto your leg or your knee. Never lift with your back unless you have to, really shouldn't have to most times. Go ahead and grab a lug nut, we're gonna start one on getting it lined up.
Now that we got our wheel on the ground, you don't want all your pressure of your vehicle on it, because if this isn't tightened down snug enough, you could off-kilter your wheel, and even though you're thinking you're torquing it down to the 76 foot-pounds it's specified to be, it might not be so. With the wheel gently on the ground to the point where it can't spin on you, you're just gonna get start with one, and you're gonna go to crisscross pattern with your 21mm socket, 76 foot-pounds, one click, crisscross, make a star if you're feeling up to it. Let's go around one more time, one, two, three, four, five, puppies all torqued up, good to go.
Thanks for watching. Visit 1AAuto.com for quality auto parts shipped to your door, the place for DIY auto repair. And if you enjoyed this video, please click the subscribe button. You
Tools used
Hey, everyone. It's Len down at 1A Auto. Today we're going to be working on a 2001 Lexus GS300. We're going to be doing an outer tie rod today. All right, one of the first things that we're going to want to do is after we have the vehicle semi-supported off the ground, we want to make sure the wheel is still on the ground firmly. You take your 21 millimeter socket, and if you have a long ratchet or a breaker bar, one, just a little bit. You don't want to go too far.
Now as we take off this one last lug nut, you want to make sure you hold that wheel on. You don't want it to fall off, go bouncing off, hit you in the knee, and hurt yourself. Safety is key. Let that down nice and easy.
All right, so now while we're trying to take off these tie rods, we get the outer tie rod here, your jam nut as I mentioned before, and your inner tie rod with the inner tie rod boot. What I want to do is I want to break this jam nut free. Sometimes they'll be really hard to do. You want to do that while it's still attached to your knuckle for added support. Let's give it a try. I have these right here, a little bit of length. With a big enough lever you can move the world as they say. So let's give it a try and see if this puppy breaks free. Nice. There we go. Love it.
All right, next what we're going to do is we're going to take off this nut. So come on up. Now we're back up top. We loosened up our jam nut while this was still attached to the knuckle. We've got the same little clip like what we saw before. Maybe you haven't seen, but it is in one of my videos. We're going to pull a little ear off or off to the side and then pull it out. The ear that I was talking about is this, and it wraps around the side of this slotted nut. Put that aside so you don't lose it.
Next we're going to take our 17 millimeter. You can use a shallow socket if you want. It'll probably be better than a long socket because you don't want to be up here. Might as well be as close to the ... to what you're working on as possible. Goes right on, 17 millimeter six-point socket. We're going to try to break this free. There we go. If you have an airgun, it takes you 10 seconds. You got a ratchet. It'll take you 30. Take that nut right off of there. As always, I pre-spray everything so it already worked its way in there.
Now what I'm going to do is I'm going to get my big fabulous hammer and I'm going to whack the knuckle. Try to break this free. What I'm going to also make sure I do is I'm going to put this nut right back on. You don't need to go all the way on. A couple threads, three, four, five, whatever you want to do, doesn't have to go all the way down. It's basically just so when you whack it and this does break free, it doesn't come falling down. If you're working on the ground, you get your face near there or whatever god forbid somebody gets hurt. Safety first. Don't let this go anywhere. This will help prevent any safety hazards.
Like I said, using my big fabulous hammer I'm going to hit right on the knuckle. I don't need to hit the tie rod. I don't have to hit the nut. At some point if it doesn't break free from here, I could use a little chisel or even a hammer on there because we're going to be replacing the tie rod end anyway. If we weren't replacing it, you would not want to hit this. Here we go. Here we go, broke free.
Now you can go ahead and hold it up. Make sure it doesn't fall in the face or anything. There we are. Now with our new part from 1A Auto--I wanted to mention once again, is you always want to make sure you match up your part. I'm going to walk over to the vehicle where I just took the tie rod off of the knuckle and bring it right over. You can see how it has a bend. If you go over the other side of the vehicle, the bend will go the opposite way. You want to make sure you bring it over and compare. Make sure it's just about the same. It should be just about the same.
Everything's made to the right specs. If it goes this way for some reason, it's wrong. The stud's going up assumptively. That means that this is the other side. It's possible that it happens. People make mistakes. But if it is wrong, just get the right one. So it's matched up. It looks good to me.
Next what we're going to do is we're going to unscrew this piece, count how many turns it comes off. I got myself a little crayon here. Once I make my count, I'm going to write it down someplace. You can use a pen, piece of paper. I use a crayon right in a conspicuous place, just so I don't forget. That's going to help you try to keep the alignment as close as possible for when you have it off. So if you're off by a thread or two, you might have one of your tires going like this, one going like this. You never know. Get it as close as possible. Anytime you do any type of front end work, you always want to get down to a reputable shop and have it aligned. It's going to help you out in the long run. Preserve your tires.
So here we go. We're going to count it up. Counting from where it started, one full turn, two, three, four. Who counted it? 15, right? All right, I'm going to write down because I don't know about you but I forget most things. As you see here, we have our old outer tie rod end and our new outer tie rod end. They both have the same bent, which is great. They both have the same shaft. Get this off of here. You can see, they both stand about the same height. Get it bent. Move it over. Everything's the exact same on this. It's made to last, quality, durable, 100%, it's got a great warranty and it's non-greasable, comes pre-greased so you'll never have to worry about getting under there and throwing some grease in it. This puppy will last you years and years and years. And you can get this part and any other quality part at 1aauto.com.
Now we're going to install our outer tie rod end. I have that right here. I've already matched it up. We remember that it's 15 turns as notated as I wrote down. So here we go, I'm going to start. Let's see, wait until it gets going here. All right, now we're going to count it, one, two, three, four ... 15. This ended facing up. That's where it started. Perfect. Line up the stud. Put this right here. We can start our nut. Turning to the left find our first thread. Get it started.
Next we're going to take our jam nut. We're going to turn it down towards the outer tie rod end, and the jam nut with its name being what it is, jams the outer tie rod end and onto the inner tie rod end, so the adjustment won't move on its own. You can take your adjustable pliers. You can take a wrench. You can take whatever you want. Get this thing going. You're just going to give it a little.
All right, now we have our castle nut started. We're going to ahead and lift up on the tie rod and pull it down as close as we can finger-tight. If you have a wrench that ratchets, that's great. If you don't, you can wrench it. Or if you chose to, you could take off the whole caliper bracket and use a socket and ratchet. It's all completely up to you. I'm just going to make it nice and snug. That feels pretty good.
Now what I'm going to do is I'm going to check to make sure that the hole is lined up with the castle nut, and remarkably it looks like I did. So I'm going to go ahead and put through this little cotter pin, push it through, locks right in into the castle nut. I just wanted to mention that if you did choose to take off your caliper brackets so you can torque this outer tie rod nut, the torque specification will be 64 foot-pounds.
All right, now it's time to get the wheel up on here. Roll it up onto your leg or your knee. Never lift with your back unless you have to. You really shouldn't have to most times. Go ahead and grab a lug nut. We're going to start one on. Getting it lined up.
Now that we got our wheel on the ground, you don't want all your pressure of your vehicle on it because if this isn't tightened down snug enough, you could off-kilter your wheel, and even though you're thinking you're torquing it down to the 76 foot-pounds it's specified to be, it might not be. So with the wheel gently on the ground to the point where it can't spin on you, you're just going to get start with one and you're going to go into criss-cross pattern with your 21 millimeter socket to 76 foot-pounds. One click, crisscross, make a star. If you're feeling up to it, just go around one more time, one, two, three, four, five, five. This puppy's all torqued up. Good to go.
Thanks for watching. Visit 1aauto.com for quality auto parts shipped to your door, the place for DIY auto repair. And if you enjoyed this video, please click the Subscribe button.
A1 is easy to use and navigate prompt and delivery is always on time and easy to track. I highly recommend A1 auto parts online

PSA68403
