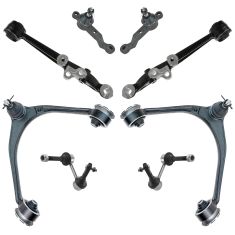
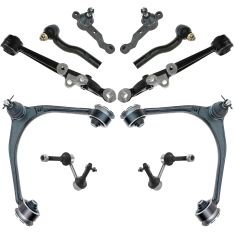
Hey, everyone. It's Len down at 1A Auto. Today we're going to be working on a 2001 Lexus GS300. We're going to be doing the upper control arm. It's a very easy task and is something that anybody can do. I'm just going to show you one thing, and it's very important and easily missed. When you take off this ball joint nut right here, there's a little plastic cover. This right here is trash garbage. This is the boot, the important part, and the reason for this plastic is to protect that important part, which is the boot. Take this off, throw it right in the garbage.
All right, one of the first things that we're going to want to do is after we have the vehicle semi-supported off the ground, you want to make sure the wheel is still on the ground firmly. You take your 21-millimeter socket, and if you have a long ratchet, or a breaker bar, one, just a little bit. You don't want to go too far. As we take off this one last lug nut, you want to make sure you hold that wheel on. You don't want it to fall off, go bouncing off, hit you in the knee, hurt yourself. Safety is key. Let that down nice and easy.
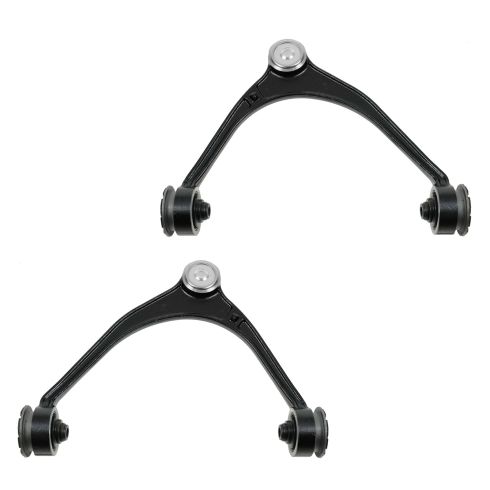
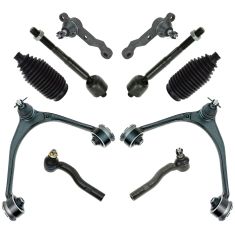
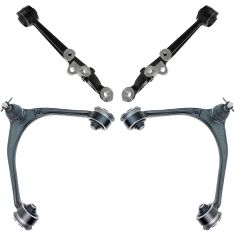
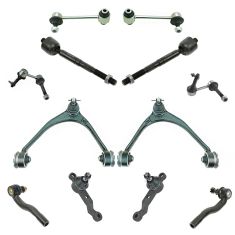
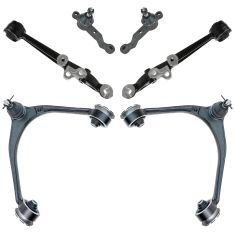
One thing I wanted to mention first of all is you want to compare your part. Before you start taking anything apart, wasting any time, you want to compare it to the old part that you're going to be replacing. Here we have a quality 1A Auto part. We want to bring it up to the vehicle and just to make sure that it matches up. There is an offset to this, as you can see. It's not a perfect triangle. It is actually an offset. There's a longer angle here, shorter angle there. Compare that to your old one. Put it up close--as close as you can. It looks like it matches up. You got the longer arm in the front and the shorter area in the rear. Ball joint is where it's supposed to be. It looks like it should fit. Let's throw it in. Here at 1A Auto we focus on safety first, your safety, my safety, everyone's safety. That's why we try to install quality parts. We try to emphasize on safety, basically, so make sure you have safety goggles on.
Doing this upper control arm, something that we need to think about is what we do is going to cause a reaction. When we start taking out this control arm, we're going to start here. What's going to happen? This is going to come yanking down. It's going to put a lot of pressure on this right here. You know what this is? This is your ABS wire, super sensitive equipment. If this drops down, you yank this wire, give it a little stretch, you're going to have an ABS problem. You'll see a light on. You're going to say, "Len, you showed me something wrong." Think about what you're doing. See what the next action is going to be. First, we're going to remove this right here just to at least give it a little bit of slack for when this does drop down.
We're going to take out this bolt right here. It's a simple 10-millimeter socket to remove it with a ratchet or an air gun, whatever you've got, nice and loose. I did pre-spray everything that I knew that I was going to have to remove--very important. It's going to help you out in the long run. Remove this bolt--very easy. Look at how much slack we have now. Nothing is going to hurt that. I'm going to put this bolt someplace where I can remember it, and it won't get lost.
Next, what we're going to do is we're going to pull out this safety clip. What this does is it makes sure that this nut, for whatever reason, maybe it was under-torqued for some reason, or it just came loose, this clip is to make sure that the nut can't come all the way off, and then your ball joint and knuckle can't separate. This clip right here isn't just a regular cotter pin. It has a little clip on the side that you have to pull out. You pull that away from the nut, and then you can grab this with your angled pliers or angled cutters, whatever you have. Just give it a little yank. Usually, they come right out. This one is a fighter, which is fine. I like that. That pops right out. Here's what your clip looks like, and there's the little angle right there that I was mentioning. Pull that away from the nut.
Our next step is we're going to remove this nut right here. As you can tell, it's already starting to get a little bit wonky. Somebody tried using maybe a 12-point socket on this. The edges where they're supposed to be nice and pointed and cornered are rounded. This could cause an issue for you, trying to remove it. I don't anticipate it being an issue because what I have is a six-point socket. It has a lot more grip on nuts this style. If you have a 12-point nut on there, you'd use a 12-point socket. You have a six-point nut, use a six-point socket. Fairly easy, right? We're going to be using a 17-millimeter socket just like that. Put it on loosen. That's tightened. Give it a little yank and break it free.
I brought it down just a couple threads. I don't know if you can see that or not, but you don't need to come all the way off yet. The reason for that is because I'm going to take my big fabulous hammer. I'm going to whack this knuckle right here. What that's going to do is it's going to cause a little bit of vibration. What it should do fairly easily is break the ball joint free from the knuckle. Once that's free, I'll put away my big fabulous hammer, so I can have two hands. I'm going to put my hand on this. Hold it nice and firm. I'm going to take this nut completely off, and bring this down under a controlled motion. Here we go--big fabulous hammer time. Bing.
As you can see, it broke free. We got a little bit of gap between the boot and the knuckle, and there's no gap between the nut and the knuckle. Here's where the six-point, 17-millimeter socket and ratchet is going to come in. You're going to keep one hand on this. As soon as you get it down to the end, so you can have controlled motion of this knuckle. Very important. This nut is almost off, so I'm going to hold the knuckle. I can hold up the ratchet at the same time, if that's what you're into. We're just going to get this right off of here. Here we go. Last couple threads holding the knuckle firm. You can lift up on that ball joint. Separate the ball joint from the knuckle. Let this down slow. The reason for that is you want to make sure that you have control over it with this hose right here. As you can tell, the ABS wire that we did disconnect, very safe. Nothing happened to it, but if it was mounted, look at how close it would have been. That's pretty close. Anything can happen. This thing can twist a little bit one way or the other. You could put a tug on that. You don't want a tug.
All right, so what we're going to do is we're going to take out these two bolts. We're going to start with one over here. We're going to finish with this one right here, and this control arm will come right out. Firstly, I'm going to use a 14-millimeter wrench. The longer the better, because breaking these free can sometimes be difficult. Next, once you get it to the point that it seems like it's broken free, you can use a ratchet wrench. These are very convenient. Breaking them free: righty tighty and lefty loosey. We're removing, so loosey, to the left, counterclockwise. That broke free nice and easy, love it. Let's go over to this one. Do the same thing to the left, counterclockwise.
Now I'm going to grab my ratchet wrench. This is going to save us a little bit of time. Time is money. There are other things you can do to do this. You can use a ratchet with a short socket, if you'd like, but that's going to give you less space right here between the coil spring and the bolt. It could cause an issue at the point of getting the bolt completely out. I like to use something thin like a ratchet wrench, but you do always want to make sure that you don't go too far with the ratchet wrench. You can't switch it, and once you get too far it'll be stuck like that. I'm going to leave it right like that because now I'm going to go over here. Once this gets loose, I don't need this whole thing flopping around causing an issue for me. We're just going to bang these right out of here.
I'm having fun. You having fun? All right, both those feel like they're nice and loose. Pick which one you want. I like the left. Go this way. Start over here. I can lift this up, wiggle it around a little bit if it seems like it's jammed in. Sometimes things just get a little wedged. Work it. All right, that one's almost out. Grab this one. Do the same thing. That one's almost out. All right, as you can see, the coil spring is blocking the bolt from exiting completely on both sides. What I would normally do is I would bring the vehicle down to a working height, so I can get to the upper strut mount. There should be three or four bolts up there, which I'll find out once we get to the top. I'm going to take those bolts. I'm going to loosen them up to as loose as they can get without actually fully removing them. Hopefully, that will give us enough up and down movement on the coil spring that we can get past these coils.
Right here is going to be where your strut cap is. They got it nice and protected on this. They did a wonderful job. Just lift that right up and put it aside. You can even put it upside down because next, what we're going to have to do is remove these rubbers. They should come right up. What these do is they protect the threads that are under there from rust, corrosion, anything that might jam these nuts up. Genius. These guys are professionals. Take all three of them off. Boom, right inside the cap. You won't lose those.
Next, we're going to have to use a deep 14-millimeter socket. You can't use a shallow because as you can see, there is a shank to these bolts. If you use a shallow, you probably won't get down much further than here. That's not going to do much. You want to grip that whole nut with your six-point socket, not a 12. Put it right on there. Put your ratchet on off counterclockwise to the left, whatever you want to say. We're going to pop these free. One, two, three, just like that. One thing I do want to mention is you do not want to touch this nut right here. What this does is this holds your strut inside your strut mount. You remove this, you don't have anything that's holding that coil that I showed you under there from shooting right up. It could cause major issues. It could cause major safety concerns. Please, just don't touch this nut. That's something for a later date. We'll talk about it at another time.
What we're going to continue doing, though, is we're going to try to remove these nuts. I'd like to leave at least one of them with a couple threads on it and see if we can manipulate the strut up and down to get those bolts out. If not, we might have to remove them all the way. Two out of three, we'll just remove them all out of the way except for just that one. I'm going to start with one. I got the one off. I'm going to get this second one off. This one right here, I got so there's a couple threads sticking up there. It's still on there pretty nice. That's not bad. Next, we'll get back under there, and we'll try to manipulate that strut with the coil to see if we can get the bolts out. If not, we might have to take this nut all the way off, but let's leave it as it is for now.
Now I got all the nuts loosened up. I got two of them off up there, and the other one loosened up to the point it's almost off. What I wanted to do is I wanted to see if we can manipulate this strut right here with the coils out of the way of the bolts. I'm going to try holding onto the knuckle right here, so it doesn't move around too much because I'm going to be jerking stuff around. Try to pull down. As you can see, it really doesn't give us enough space to get those bolts out. We're going to have to take this to the next step.
I grabbed a bungee cord, and what I want to do is I want to hold this knuckle because I don't have three hands, I only have two. I'm going to go right to this piece right here. You can pick any hole you want--this is just the one that I'm choosing. I'm going to try to hold it on there. The reason for this is I want to make sure that there isn't too much tension on this brake flex hose. You put too much tension on this, same as the ABS wire, it could cause issues down the road. There's something else that I wanted to try, see if we can get a little more throw with this, is I want to move this sway bar link from the sway bar. What that'll help do is give us more throw on the pull down of this, hopefully, get more throw pulling down the coil spring, so we can hopefully get those bolts out. I know there's a lot of hopefuls, but that's life. Be hopeful.
Firstly, I should mention that I'm using a 12-millimeter, six-point socket. Put it on there. You're going to want to turn these counterclockwise to the level. You hear that puppy break free? Oh yeah. Get that one nice and loose. You don't have to take it all the way off yet. Grab your other one. Give it a little push. Oh yeah. All right, so what I did is I switched to a six-point, 12-millimeter socket. It's the short version as opposed to the long version. The reason for that is because we have this large backing plate right here, which is to help divert air into the braking system for help cooling and removing dust. As you could see, that might get in the way once I get this bolt and nut almost completely out. There's one nut. Get that one bolt out. Remove the sway bar link from the sway bar and pull that right down and out of the way. Next, we're going to try pulling down this, so we can see about getting those bolts out.
All right, so I do have to remove the last and third nut, turning it counterclockwise. Take it completely off of the threads. I'm going to put it up with the others. Now with the last third nut off completely, what I'm going to try to do is I'm going to hold this control arm up. I'm going to grab the coil spring with both hands. I'm going to give it a little tug. It might need more of a little tug, but little tug. Just slide that a little bit towards the front. Now as you can see, we can get these control arm bolts, hopefully.
Here we go. We're going to try taking out this bolt. It's nice and clear from the control arm. It popped right out. This is the rear bolt. It might not make a difference on this particular application, or it may. Some have different lengths. Some have different thicknesses. Some have different shanks. Let's remember that this one goes to the rear. Place it whatever is comfortable for you, so you can remember. If it doesn't seem like it wants to come off, you can grab your ratchet wrench again, assuming you have enough room. Get it in behind there. Give it a couple more turns because what will happens is the metal right here catches on the threads of the bolt and all it takes is a little bit of offset on the control arm in comparison to the body. It could lock it in a little bit. It is what it is. It's the nature of the beast. We're just going to remove this last bolt. It should come out now. Here we are, and there's the front bolt. No shank. It looks like it's about the same as the rear, but we'll keep them separate.
Next thing I want to show you is just moving this coil spring a little bit away from the upper control arm. We're going to want to hold the upper control arm at the same time in case it comes loose, or falls, or whatever it might do. Just see if you can give it a little push. Get it away, so you can move your control arm around. Now you can wiggle it. See if you can get it to move. It might not want to pop out, but it might. There we are. This is the old one. As I said, out with the old, in with the new. What we have here is a quality, 1A Auto part. It comes with the warranty. It's an excellent warranty, excellent quality part. It has the tapered ball joint shank right there or stud, I guess you could say, same as this.
One thing that I mentioned before that I'd also like to emphasize on now is comparing your part. You can do it while it's in the vehicle, very important to do that at the beginning. It's also important to do it when the part is out. You can get a better comparison, get things side by side. What we're going to do right now is I'm just going to show you. Lay it right over each other. Look at that. You can't get any better than that. These are specifically made for this particular vehicle. This will work perfectly, and let's put it in. I want to make sure that you know that you can get this or any other great quality part at 1AAuto.com.
This part, upper control arm for the left-hand side of the vehicle. It's already been matched up. What we're going to do is we're going to try to line up the holes. You might need a rubber mallet for this. We might not. I'll put it right aside. We're going to take this and try to get it lined up. This could be a little tricky. It's going to want to fight you. Everything is going to want to fight you a little bit. Part of the fun of it. Try banging it in there. Even if you could just get one hole semi-lined up, you could take your rubber mallet and then just give it a little love tap. Try to get it in close to where it needs to go. It looks like maybe a little bit further. I'm just going to start working on one hole at a time, just so you know. Don't try to line up both holes without getting any bolts in. Start with one hole. Get a bolt a little it started. A couple threads in will be great, and we'll go from there.
Next, what we're going to do is we're going to apply a little bit of thread locker to the bolts on this or to the threads, I should say. Just put a little dab. A little dab will do you. A couple little drops. You don't need much more than that. Any more than that, you're just overdoing it. What we need to do is just get that lined up, so we can get the bolt through. It's going to put up a fight. Just move your control arm around a little bit. Now we got this puppy going in. It was a fighter. Look at that. It slid right in. With that in, it's going to make it so this control arm won't move around too much more at this point. And we can try to line up that second bolt hole. Try to get it lined up with the hole. It might need a little bit of finagling. Oh yeah. That's what I'm talking about. That started right in.
Now just give it a couple turns and get it started. Then we'll be able to grab our ratchet wrench or ratchet, whatever you're working with, and tighten those right up. I'm just going to snug those up. You don't need to reef on them because there is a torque specification, which is 39-foot pounds. I'll show you that when we get to that point. Just get them pulled in nice and close. Assuming you have a torque wrench, you should, but assuming you do, we're going to try to torque these bolts: number one and number two. Something that I was noticing is that it might be a little bit difficult to get in between where the bolt and the coil spring is. Even if I was to pull this back down and out of the way, I don't think I'll have enough room and enough throw to get this in. If not, just do the best you can. Grab the front one. If it works for that one, try to gauge how much pressure you're putting on it and try to do about the same with the rear even if it's with a wrench. You don't have to reef on it and hang from it like a jimmy. Just get on it and do the best you can.
I'm going to put this on my six-point, 14-millimeter socket with my torque wrench. I'm going to torque it. This torque wrench is audible. Once it gets to the point of 39-foot pounds, it should beep at me, and say, "Hey, Lenny, you did enough." There we go, that's 39. As you could tell, that's really not much pressure. When I do go to the wrench for the other side, I'm not going to put very much pressure on it. You don't need to break anything. This one, as mentioned, we won't have room for the torque wrench, so I'm just going to use my wrench. I'm just going to give it a couple little tweaks. Just a little bit more. There we go, perfect. I already put a little bit of thread locker on there. Whether you can see it with the camera or not, it is. Just start these nuts: one, two, three.
Now we're just going to snug these down by hand. Get them close. Then we'll use our ratchet, give it a little bit more of a snug. Then we're going to go ahead and torque these. It's going to be 41-foot pounds. That's not a lot, but this will at least get it close. If there was four of these, you'd want to go in a crisscross pattern. There we go. Now I'm going to put this on the torque wrench. All right, so now I've got my torque wrench set to 41-foot pounds. I'm going to go ahead and start at the front. It's easy to remember where I started. There's one, two, three. I'm just going to go around one more time just to double-check and make sure everything is settled in nice. One, two, three. Once again, we did not touch this nut.
Now that we have these torqued down, we're going to go ahead and put these rubbers back on, very simple. Slide it on. One, two and three. What those do, once again, is they protect the threads from getting moisture or corrosion inside there and help you get these nuts off if at some point you need to take them off again. Now we have the cover. This cover is going to also protect everything from dirt, debris, whatever. You're still going to get stuff under there, but it's better than nothing. All right, let's get this sway bar link in. We're just going to try to line up the stud on the sway bar link to the hole in the sway bar. Get that as lined up as we can. We don't need to start the nut on there at this point. What we will try to do is get this other bolt started into the sway bar link while it's still loose. That's started in beautifully. I'll get it in a few threads.
Next, I will put on that nut. There's no available torque spec for this, so use your best judgment. It's not a very heavy duty bolt or stud, so reefing on it could cause yourself an issue. I would just tighten it and then give it just a little shake. It feels good. If you try going too tight, you could break it, or you could actually stretch the stud and/or bolt in which case you'll weaken it, and you could have issues further down the road. With both of those tightened up, we know that this side is tightened up as well. Sway bar link is good to go.
The upper ball joint control arm assembly--I'm going to pull it right down to the knuckle. Let's see, hold that. Turn a little bit to the left and find the first thread. Get that going. All right, so let's get this upper ball joint tightened down. We don't need to go too tight because, of course, we're going to torque it nice and snug. I'm going to grab my torque wrench to 64 foot-pounds. Here we go, 64. Next, we're going to just make sure that the holes in the ball joint stud line up with the holes in the castle nut. I'm going to grab my cotter pin, or safety pin, or whatever you want to call it these days. I'm going to try to push it through. It doesn't look like it wants to push through yet, so what I'm going to do is I'm just going to give this a little bit of a tweak. I want to get it to the closest hole possible.
Flip through my cotter pin. Grab it with your fingers, if you'd like, or your long-handled pliers, or anything you've got. Bend it over. What this is going to do is it's going to make sure that this nut can't back out for any reason. We torqued it, it's going nowhere. All right, now it's time to get the wheel up on here. Roll it up onto your leg or your knee. Never lift with your back unless you have to. You really shouldn't have to most times. Go ahead and grab a lug nut. We're going to start one on. Getting it lined up. Now that we've got our wheel on the ground you don't want all your pressure of your vehicle on it because if this isn't tightened down snug enough, you could off kilter your wheel. Even though you're thinking you're torquing it down to the 76 foot-pounds it's specified to be but it might not be.
With the wheel gently on the ground to the point where it can't spin on you, you're just going to start with one, and you're going to go in a criss-cross pattern with your 21 millimeter socket to 76 foot-pounds. One click: criss-cross. Make a star. If you're feeling up to it, let's go around one more time: One, two, three, four, five. This puppy is all torqued up. Good to go.
Thanks for watching. Visit 1AAuto.com for quality parts shipped to your door, the place for DIY auto repair. If you enjoyed this video, please click the subscribe button.
