Hi, I'm Mike from 1A Auto. We've been selling auto parts for over 30 years. ...
Hi, everyone. Sue, here, at 1A Auto. Today, we're putting in a right front control arm on our '07 Mazda 3. You need this part, or any other part for your car, click on the link below, and head on over to 1AAuto.com.
We're going to loosen the lug nuts with the weight of the car on the tire. It's a 21 millimeter. So, now, you're going to raise the vehicle with a jack and jack stands, or two post lifts, if you have that. Now, I can take the lug nuts off--it's up in the air. 14 millimeter socket, and I'm going to put it right on that pinch bolt for that ball joint. I'm going to break the nut free, before I twist that bolt free.
Now, these are probably going to be pretty rusted in there. The bolt actually might break. So, whenever you're doing suspension work, and you think you might be running into a bolt that looks pretty bad, it wouldn't hurt to call the manufacturer, the dealer, parts department, and see if they carry that bolt, because sometimes they don't, and sometimes they do. If they do carry it, then you know there is a good chance, that it's pretty common, it's going to break. We did that with this, and they had over 10 of these ball joint, pinch bolts with nuts in stock. I pre-got mine. I'm anticipating the breakage.
Okay. We're going to go from the backside, and I'm going to try to see if I can spin this bolt. Wow. I've got it spinning. I'm going to spray some more in there. So, hopefully we can get that out with a little effort. The knuckle is not threaded. So, what's holding that in there is the pressure of the ball joint, and rust. So, now that I know I've got the replacement for this bolt, and nut. It's just going to spin in place. So, I'm going to take probably a brass punch and a hammer, and I'm going to hammer out this side.
Okay. Now, that I've got that flush. Now, have to get a smaller punch. See if can bang that bolt out. Now, you make sure no one is on the other side, because it falls right out. There you go. Now, I'm going to take these main bolts off the subframe. The front one here is 17 millimeter. No. I'm sorry. 19. 19 millimeter on the front bolt. I'm going to cut the plastic ties off, so I can get in there hopefully with a ratchet, a lot easier.
So, whatever is holding your shroud on, whether it's plastic ties, or the actual factory hardware, I would suggest moving it, and give yourself a little bit more room. I've got a Bungee Cord that I'll use, and I'll get this out of my way. I could just hopefully work a little bit easier. It won't hit my hand.
Now, with that down, 19 millimeter socket. Unfortunately, there's no way for me to get any rust penetrant spray in there. But, at the same time, sometimes that protects it from the element. Okay. I broke that free. I'm going to take my ratchet and socket off, because it's already starting to hit the AC Compressor. I wouldn't want to bind that up in there.
Now, I'll get a ratchet wrench, 19 millimeter. Finish it out. Now, that it's out, let's hope that it clears the AC Compressor. So, what I'm going to do now, is I'm going to take these out, and then the ball joint out from the knuckle, and hope that when that sways, I can manipulate it to get the bolt out, at the angle. This is a 17 millimeter socket. These you can spray. I sprayed from up top. They're almost a four inch bolt, two four inch bolts.
Let's see. This is a little time consuming, because they're so long, and go through the subframe. To disconnect the ball joint from the knuckle, I'm just going to use a pickle fork, and I don't have to be too careful, because I'm replacing the ball joint. I'm just going to hammer it on in. Wow. There we go. Okay. I might have to use a big pry bar now, to wedge that out. ...
All right. Now, with that out of the way. When doing the passenger side control arm, the forward bolt won't come out of the control arm into the subframe, because the AC unit is in the way. On the driver side, it's nice and out in the open. So, this bolt is about six inches long, five and a half inches. It comes right out to here. Pull it out with your hand.
I'm going to dismount this support bolt for this--it's like motor mount, but it's really what they call a Torsion Mount. I'm going to take this bolt out, then I'm going to pry the engine, rotate it forward, like a cradle, and hopefully get the bolt out the rest of the way. The bolt on this is a 17 millimeter. ... Okay. Now, that's out of the way. I'm going to take my pry bar, and see what happens when I rotate this engine forward. See how much clearance I have. Looking pretty good.
To remove the front forward bolt, like I told you, I've dismounted the transmission strut mount. We're going to push the engine forward, I lifted it up a little bit, and it is pretty heavy, so I have someone helping me do that, while I manipulate the bolt out. Okay. And here we go. That was easy with two people.
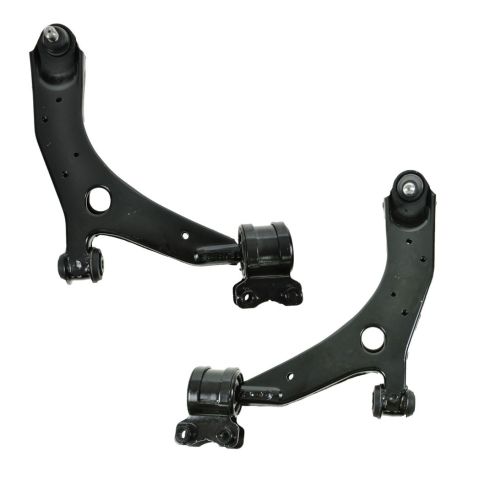
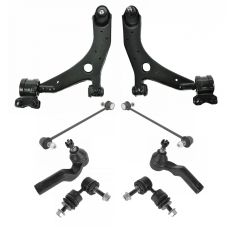
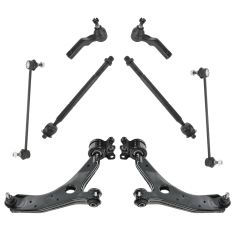
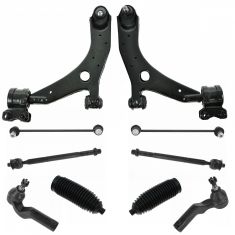
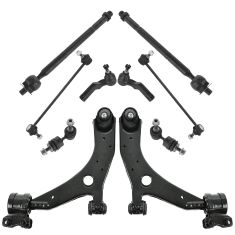
Here we have our new control arm from 1A Auto, and the manufacturer's control arm on our '07 Mazda 3 sedan. The new control arm looks exactly like the factory. It's got the same rear bushing, front pressed end bushing, and ball joint. Comes with this packaging plastic that protects the boot for the ball joint, so it doesn't get pinched during traveling package. Make sure you remove that when you install it. Same thickness, same material. If you need this part, or any other part for your car, click on the link below, and head on over to 1AAuto.com.
When we're replacing, reinstalling, shall I say, I'm going to line the front up, see if I can get the rear bolts in. This is the hardest part of it, because the flex of the mount. You can see how the top bolts have that. The threads come with the actual mount. We need to actually straighten that out like that, for those two bolt up in. I'm going to get my two bolts for this. See if I can get started then.
I'll get a pry bar in here, and see if I can tweak that enough to get that top part of the mount to center. See if I can get that bolt in there. It's not that easy. That's how you do it. Persistence. Okay. Good. So, now I have somebody helping me again, and they're going to pry on that engine, while I line up this bolt. There you go. Perfect. That's it. Thank you
Wow. Before I remount this mount bone, and lower the engine with a post jack, I'm just going to start this, I want the threads to be completely started in there. It's the last thing you want to do is have to redo it. So, I'm going to put the ball joint into the knuckle. Let's give it a little tap to make sure it lines up. There we go. Best way sometimes to get those centered to start it like that, push on the actual knuckle. And there you go. Okay. Now, I'm going to lower the engine, and put that bolt back in that mount.
Now, it's time to put this bolt back in. There we go. That was a 17 millimeter socket. And I started with my ratchet wrench. What I'm doing here, is I'm going to push the new ball joint up into the knuckle. If it was down lower, you can use your floor jack. I was up in the air, and I've got my pull jack here, so, I'm just going to take advantage of it. You might end up having to tap down a little bit on the knuckle. Be careful, because it might just pop right in. So, don't put your finger in there.
I'm going to put some tension on there. I'm just going to tap it. So, to see if it's in place, you look inside, you'll see that cutout of that ball joint. That's where the bolt will slide past, straight through. This is where you will see. Look to see if you see the cutout where the bolt passes through from that machine part of the ball joint. It's not quite there yet, so I'm going to hit it down some more. Give it a visual. Seems like a little bit more. That looks like that should be it right there.
Here, I have my new pinch bolt that I picked up at the dealer. The old one I took out. The old one, if you look at it on a flat table, when you roll it, it has a little bit of a bend to it. It seems like through the years the rust has compromised the strength of this bolt. Literally it was, I think like five dollars and eight cents, and they stock for the safety of yourself and other people on the road, and your family and loved ones, it's worth the five dollars to go get the new bolt, torque it in there, and we'll be all set. I'm going to put the bolt right through. Give it a little tap. Put the nut, on the other side.
Now, it's clear to take the jack out, or your post jack, whatever you have. Now, I can get that out of the way. We're going to get ready to torque everything up to the manufacturer's specs. Now, we're going to bottom these bolts out. The torque spec for these, is 75.2 foot pounds. So, here we are at 75.2 foot-pounds.
The reason why manufacturer's give torque specs, and not just an air gun, and just rank it up in there, is because these bolts, and suspension parts, or anything that requires torque, has a breaking point. So, if you rank it on with an air gun, you think 'Hey, it's tight.' But, if it's over tight, as it goes down the road, the bolt actually can wear out, and break. Nowadays with the internet, I just say do it once, do it right.
Now, I'm going to move to this bolt, which is 110 foot-pounds from the manufacturer. Wish me luck. Nice. The pinch bolt, and the knuckle to the lower ball joint, there are no manufacturer specs for torque. The reason for that is basically it's exactly what it is. It's a pinch bolt. So, I'm just going to tighten it. Do not over tighten it, because it is an eight millimeter bolt. It's a small bolt. Use your judgment. 14 millimeter socket. I'm just going to bottom it out, really give it a nice half turn. Feel safe with that.
Now, we've moved on to the transaxle bushing bolt that I took out, so that I can move the engine forward. It's a 17 millimeter socket. There is no torque specs for this either. I'm just going to tighten it down. Once it hits bottom, give it a nice quarter turn. There we go. Don't forget to put your splash shield back up. Where this one had plastic ties, now, I got to get some plastic ties, and tie it up for the rest of the job. Once I lower this to the ground, always tighten wheels in a star pattern. Now, rear torque on our '07 Mazda 3 is 87 foot pounds. Always go around twice.
Thanks for watching. Visit us at 1AAuto.com for quality auto parts, fast and free shipping, and the best customer service in the industry.
