Hi, I'm Mike from 1A Auto. We've been selling auto parts for over 30 years.
Hey everyone. Sue here from 1A Auto, and today on our '06 BMW 325Ci, we're going to be doing spark plugs. So if you need these parts or any other parts of your car, click on the link below and head on over to 1AAuto.com.
Open the hood on this '06 325Ci. The lever is on the driver's side, left foot. Kick panel right here. It's a long black handle. Just pull on it and the hood pops up. The nice thing about this BMW, the hood latch lever pops right out of the grill area and you just pull up on that and lift the hood open.
The first spot is it's located in the center of the engine department right below the windshield. You've got three little clips here and you just turn them to the side. They pop right up. They're spring loaded. Once those are popped up, you just grab this lid and slide it right out.
Then we're going to lift up the actual seals that goes around this compartment area because we're going to take this out. So you're going to have four t40 bolts. You can see them located up on that firewall. Using a Torx Bit screwdriver, I'm just going to take them all out right across. I'm just going to remove this sheathing so that I can take these wires and make sure that I don't break the tabs. You get the battery cable and the electrical wiring harness.
Now we're going to lift up on this housing and get that out of the way.
So in order to take the engine cover off, we took that out of the way, the cowl up there, and I'm going to take these little covers with a small screwdriver. Just pop them out.
It looks like it's a 10 milliliter. And also you're going to need to take the oil cover off. Set that right there.
10 millimeter socket. I'm going to take these two mounting nuts off this cover. Set those aside. You just grab onto that cover and lift it right up out of the way. Now I'm just going to place the oil cover back on because I just don't want any dirt or accidents to happen and something falling down in that crank case.
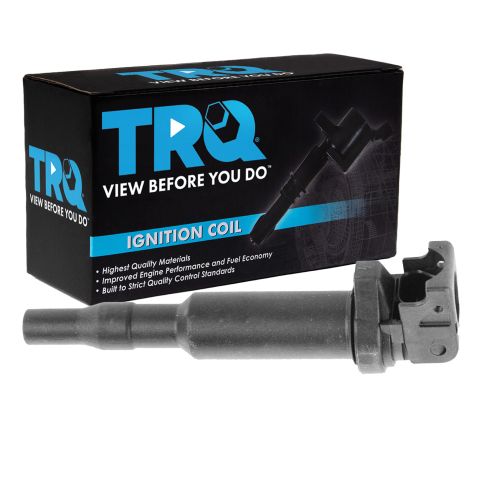
To disconnect the ignition coil harness, these are a little levers that pop up. I like to take a flathead screwdriver and I just give myself a little leverage and then you can watch it actually disconnect itself and push the harness out. It's a really nice design. And then you just put your finger right into that hole and give it a twist and pull up and there's your ignition coil.
Now I'm going to take a number one cylinder spark plug out and I'm going to use a spark plug socket that we sell here at 1A Auto on our website, and it is a five-eighths extended, all one piece, and it's great for deep cylinder holes like this, BMW is notorious for. We'll take that right out.
And there is our spark plug. And you can see the crossfire. It's a four-pin crossfire. And this is a magnetic style, so the magnet holds onto it and locks it in. So before I install my new spark plug, because it's a crossfire, four-piece crossfire, there is no gapping, but we do do a visual and make sure that, accidents happen. This could have been dropped at the factory before it went in the box. You want to make sure the prongs are all, look alike visually, the equal distance, and that the ceramic is not cracked, and that includes on this part of ceramic.
Everything checks out good for this plug, so I'm going to install it.
Always install spark plugs by hand first. You don't want to cross thread an aluminum head. That is not a project you wish to tackle. There are torque specs to this. So what I do is I just take my 3/8 and I'll just snug it, crush that washer a little bit and I'll go get my torque specs and torque it down.
So there are two sets of specs for this. If it is a 12-millimeter spark plug, the specs are 14.8 to 19.2 foot-pounds. If it's 14 millimeter, it is 20 to 24 foot-pounds. I'm going with five-eighths, so I'm going with the 14 millimeter and I'm going to set this at 21 foot-pounds.
Now before I install my new coil, you can see a little bit of dry dielectric grease they install the factory. I'm just going to add just a little bit more, nothing too generous.
I'm going to set it up, line it right up, push it down. Feel it physically click in. Make sure it's sealed all the way around, that rubber seal, and line up my connector and then bring this right down and lock it. Now we're going to continue this down and do the same procedure on the next five cylinders.
Now that I've done all my coils and spark plugs, I'm ready to install the engine cover again. So I will remove the oil field cover. Slide this down through. Replace that.
I have the two mounting 10-millimeter nuts, 10 millimeter socket size. We had a plastic cover. I'm just going to really just snug it down. There's no need to crank that down. There we go. And the two covers. Line up the grooves. You'll see the little indent tab here. It's in the front part and then the two longer tabs.
So now I'm going to put that plastic cowl back in. I'm going to just line it right up. Place it right in. Here we go. Get the back screw started. Just pop them into place and take your t30. start them. I recommend starting all of them before you tighten it all the way down.
Okay, so now I'm going to just tighten it down. They're all started. I know it's in the place it's supposed to be.
Now I'm going to put the positive cable back into the housing. I'm going to mount that on that inner beginner clip right on over to the other side. So the positive cable goes down right there and then this harness with the loom will clip into this.
We'll take the under piece and line it up. There's tabs on the back, tab in the front. We'll just line them up and snap it right back up in there.
There you go. To install your cabin filter, you've got a tab right here on the bottom in the middle, I'm sorry, and two tabs on each side, and you'll see that there's a notch right here that tab in the center is going to line up to and the two side tabs. We'll just slide it right in, easily. Line that center tab up, line the side, and then go line up the other side.
Now we're going to install the cover and that just slides right down in the back there. You line up these little tabs, push down and twist.
Now we can install the seal. Just line it, push it down all the way around. I'm going to put this one on before I go over there.
And then we're all set.
Thanks for watching. Visit us at 1AAuto.com for quality auto parts, fast and free shipping, and the best customer service in the industry.