Hi. I'm Mike from 1AAuto. We've been selling auto parts for over 30 years!
Before you raise and support the vehicle, take a breaker bar and a 21 millimeter socket and break the lug nuts free while the vehicle's on the ground. Raise and support your vehicle. Once the lug nuts are loose, I can use the socket and finish removing them. Remove the wheel. Place it aside.
Start by grabbing the caliper before you remove it and pushing it, or pulling it outward to try to compress it so that when we go to unbolt it, it will slide away from the brake pads. I want to take a 14 millimeter wrench and see if I can break these free. They're pretty tight. I'm going to use a dead blow mallet and break that one free. Do the same with the bottom one. It goes loose so I can switch to a ratcheting wrench. We use a ratcheting wrench to finish removing these.
Now these are actually the slide bolts and we pull them out. So what I'm going to do – with this lower slide bolt, the control arm is in the way. I can't pull it out. We're going to roll the brake caliper down, I'm just going to thread the lower bolt back in a little bit.
That way it stays put, and I can remove the brake pads. Use a flat bladed screwdriver or a small pry bar. These ones are pretty stuck. Use a small screwdriver. That's okay if they fall on the floor. They’re old brake pads anyways. I'm not too worried about the rear one if I can't get it out because I've kind of released the pressure from it by removing the front one. I'm going to unbolt the bracket and I'm just going to pull the whole thing off together.
I'm going to remove the two 19 millimeter caliper bracket bolts. The lower one is here. The upper one is here. I'm going to start with the upper one, with a 19 millimeter wrench on here. Take my dead blow mallet, break it free. With the top one loosened I will loosen the lower one. Same thing, I'll use a dead blow mallet to break it free. Since these are loose, I'm going to switch to a ratchet and 19 millimeter socket to speed removal. I get that one pretty loose but not all the way out, because I want to work on the bottom one. It's going to need an extension. Try an extension in here, ratchet out here, and this 19 millimeter socket and extension. Now remove the lower bolt and finish removing the top one, the one with the bracket because it will become loose. It needs a little persuasion. It was frozen in there. Now I can unscrew, take off our slide pin bolts, lay the caliper up here for now. Take a bungee cord, just hold it up and out of the way.
The e-brake should be released but this is pretty rusty. There might be a rust ridge in here. I’m going to try to get this rotor off. Normally there's a rubber cap here. You pop that out and you can reach the adjuster and turn the adjuster in to pull the e-brake shoes, which are inside here together to help release this rotor. You may have to do that. I'm going to try spraying some rust penetrant around the edge of the hub and around the studs. I'm going to give it a couple whacks with our dead blow hammer, see if the rotor will just come right off. Otherwise, I'll have to work on releasing the e-brake. We might get lucky. It slid right off without having to release the adjustment. If you had to release the adjustment, you'd use this access hole and you'd go through here and turn this so the shoes would pull themselves in here.
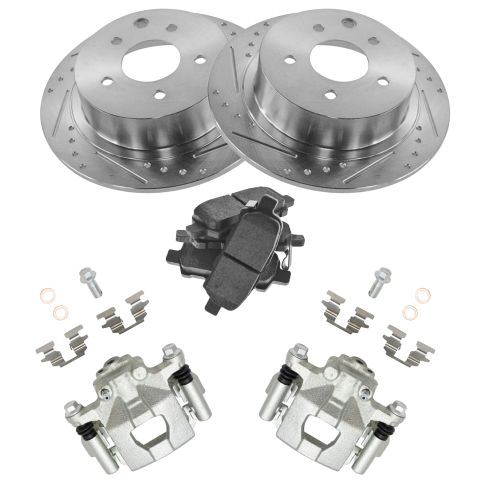
These are our old rotor and pads for our vehicle. They're pretty rusted up. The car was sitting for a while so they needed to be replaced. See the new ones from 1AAuto.com are an exact match in the style of pad, they've got the wear indicators, the backing shims, same amount of lug holes, same opening to get to the e-brake adjuster. These will fit on your car great and help you stop really well.
Install the new rotor. I'm going to start out by installing it backwards. This way I can clean the oil off it that keeps it from corroding in shipping. I'm going to spray the inside because that's where the parking brake shoes are going to run. Take a rag, wipe down any excess, down the inside. Flip it over and install it over the studs.
Since the new rotor is brand new it's thicker and it won't fit over our parking brake adjuster or parking brake shoes, so we need to spin the auto adjuster in to give us more clearance. I'm just going to turn it up with this flat bladed screwdriver. It's going to pull the shoes in. This is automatic adjustment so as soon as you pull the handbrake a couple times or the parking brake handle, it will adjust out and it latches. These little notches lock against the spring, so once it goes this way it can't spin back. It has to be flipped back manually by doing this. Since I touched them, I'm just going to clean them off with brake parts cleaner. Let's try our rotor this time. There it is. So it should slide over with no resistance. I'll take a lug nut to hold the rotor in place.
We're going to remove the brake pad clips. They're stainless. We can clean them up and reuse them. So use a flat bladed screwdriver, pop them out. Pop out both sides. I'm just going to clean where they sit. Take some brake parts cleaner and wire brush and knock off the loose stuff. Repeat for the other side. Then I clean the clips with brake parts cleaner. Then I brush. Reinstall them on the caliper bracket. They click back into place. This is ready to go back on the car.
Unhook our brake caliper. I'm just going to lay it there for a second. You need to compress the piston inside here. Use our C-clamp and an old brake pad, and just gently compress the caliper piston in. That's good. Place these aside.
Before we can install the bracket fully, the lower slide pin that has the rubber bushing on it has to go through the caliper. You can actually start threading in a little bit. It's going to sit here. Because the suspension arm is in the way, I can't slide it in, so it needs to sit like this. Now I can line up the bracket and capture the top bolt. Now I can capture the lower bolt. Start tightening the bolt.
Before you go too far, I skipped it, but we're going to do it now, clean this brake rotor surface down from the protective oil that it's shipped with. You can wipe off any excess with a rag.
Now we can install our pads. Going to make sure that we didn't touch the surface of the pad. If you did, you can just clean with some brake parts cleaner. Put a little bit of caliper grease on the ears. Again, the same thing, make sure these pads are nice and clean. Use a little bit caliper grease.
I’m going to place the outside pad in here. We can slide our caliper back over. I'm going to push the little boot in. Slide our caliper pins in here. Thread them in.
When I had this rotor off and we were cleaning up I actually found the rubber plug that belongs in here, and I replaced that. I'm going to torque the brake caliper carrier bolts, these two big ones back here, torque as 116 to 144. I got my torque wrench set to 120 foot-pounds. For this top one, I don't need the extension. For the caliper slide pins, torque is 20 to 35, got my torque wrench set to 30.
For the final step after installing the wheel and torquing the lug nuts when the car is on the ground, gently step on the brake pedal. What that's going to do is bring the caliper piston out to meet the pads. See right now the brake caliper is loose. It's moving on its slide pins. When you step on the brakes, it pulls it in, pulls the brakes to the rotor. That's what helps you stop. We need to bring that piston out so it takes up the gap that's here and you'll be able to stop.
Install the wheel. Thread them on by hand first. Torque on these is 72 to 85. I've got the torx wrench set to 80 foot-pounds. I'm going in cross pattern. The wheel's installed and torqued.
Thanks for watching. Visit us at 1AAuto.com for quality auto parts, fast and free shipping, and the best customer service in the industry.