Hi, I'm Mike from 1A Auto. We've been selling auto parts for over 30 years.
Hey, everyone. Sue here from 1A Auto and today I am working on a 2010 Nissan Murano. We're going to be doing rear brakes. If you need these parts or any other parts for your car, click on the link below and head on over to 1AAuto.com.
You want to take the wheel off. I've got a 21 millimeter socket, vehicle supported, just a light weight on the tire. I've got a wheel lock key, I'm going to line it up. Loosen up the lug nuts.
Now I'm going to lift the car up and I'll take the rest of the lug nuts off. You can use a jack and jack stand at home. Now the vehicle's up in the air, I can take the five lug nuts off. Now we can take the tire off. Take the leader screw boot right off. Set that aside. Let's break the leader screw open, make sure it opens freely. Oh yeah, perfect. I'm just going to lightly snug it. I got a catch pan down here, so it will drip run into there.
Now we can take the caliper off the caliper bracket. Fourteen millimeter wrench and I'm going to break free the caliper to bracket slider bolt. We can see the inside pin moving freely and that's good. I'm going to break free the top one first before I take that pin out.
Now we can take both of these slider bolts out. You can't take the bottom one out, it hits that radius arm. I'm going to have to take the bracket off of the knuckle.
The bracket to the knuckle is 19 millimeter socket or wrench. There is 0.0 room even for a socket, let alone a socket with a ratchet. I have to put a wrench on there and unethically take a rubber mallet and hit that wrench to break this bolt free. The torque is 62 foot-pounds. There we go. I got that one free. I'm going to free up the top one.
Now we can pull the caliper bracket off, get that slider pin out. Let's take the bracket right out. There's our caliper bracket with the pads. While I'm here, I'm going to install my piston tool so I can push this piston back.
First thing I'm going to do, is open that bleeder screw and aim it at my catch pan. My catch pan. Make sure it's in good working order going. Nice clean fluid and this piston is going back real smooth. There's no drag. We'll examine the caliper boot after. Make sure there's no pin holes, no damage to the seal. Bottom that out, and just tighten up the bleeder screw.
Now what I'm going to look for is any fluid coming out of the dust boot, and I don't see any leakage. We're in good shape with this. I'm just going to put the caliper up there, make sure it doesn't hang and stretch off the flex hose.
Let's take the rotor off. We're going to take a look at the emergency brake shoes. Let's see. In pretty good shape here. Got plenty check for any loose bonding. You just grab the shoe itself, pull back and forth. The bonding is the glue that adheres the shoe to the actual metal bracket and it's very common for it to come undone. Looks good, so now we can move on.
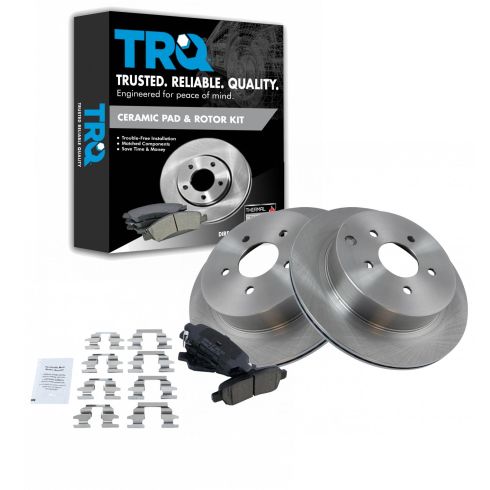
Here we have our new rotor and pads from 1A Auto and we chose to put the performance rotors, because it is an option on this model. We could get the solid rotors or the performance and we went with the performance. The reason for that is they are a higher grade rotor. They come slotted for the cooling and they are thinned. The thins are straight on, not curved. They are milled, that's a balanced rotor right there and the rotor is zinc coated, so they cut down on the rust, which would cause pulsation and they last longer. It's got a machined inside hub for the actual e-brakes. Pads are slotted for cooling and have the shaved edges for the dust distributing. Come with shims riveted on, so if you need this part, or any other part for your car, click on the link below and head on over to 1AAuto.com.
I'm going to take a wire brush and just clean up my hub. Looks pretty good, there's no rust buildup. I just want to make sure that I can clean it quickly and then I can clean it down, spray it down with some brake clean. Just to make sure there's nothing there. You want a smooth surface against your hub to reassure no break pulsation.
Now we'll clean the shoes also. There's always going to be brake dust. We'll just get rid of the residual part of it. Let that dry. We're just going to clean these real quick with some break parts clean, just to get any little metal particles off. I got some high temp copper spray. Stop some rust buildup.
Install my new rotor and we can see that they're slotted right here and that is for e-brake adjustment. Don't forget to change your rubber boot from the old rotor over to the new one.
I just take a flat-head screwdriver, you can just poke it right in there and pull that right out. Make sure it's not torn and it's going to work, fit in the new one. You don't want any water getting in there.
What I like to do is also check the adjustment on the e-break and that's what that window for, that little cut out window. I'll show you the adjuster. Here's the adjuster right here. We're going to end up taking a flat-head screwdriver going through the window and turning the adjuster to push the shoes out or bring them in if I want to drag. A little difficult on an all-wheel drive vehicle, because the differential already has a good drag on it.
I'm going to put a lug nut on to make sure my rotor stays flush. I'll put one more on the other side, opposite. Try to keep it as flush to the hub as possible.
Now I can just take a small flat-head screwdriver and I can go right into that window, feel the adjuster, there it is, and I can move the adjuster and feel the drag. When I'm happy with the adjustment, I'll just take my rubber boot, reline it up, same flat screwdriver, I'll jut pop that little edge right in. It's done.
Now we're going to clean the caliper. First thing I'm going to do is remove both slider boots and I'm going to examine the boots for any tears, punctured holes, worn, they're not worn. Same to the other boot, you want to do it to both of them, examine. Now I'm going to take the tins off. If you've got new tins, I say, "Bravo." I prefer to use new tins every time. It's just pennies on the dollar. But I'm going to show you if you didn't get tins, how to clean the bracket and the tins up.
I'm carefully prying these off so that I don't manipulate them and bend them because I have to reuse them. Look at all that rust coming off. That is what I'm trying to show you here. Important part of a break job is cleaning, cleaning, cleaning. It's not just throwing pads on. There's a reason for it.
All this rust buildup under here pushes the pads up and freezes them in the bracket, so when the caliper squeezes, the pad does not move freely in and out, it doesn't slide. Then you have premature wear on your pads and break pulsations. Calipers will end up malfunctioning. It's a heavy expense for truly what is just time. That's all this is, is time.
I'm going to take a wire brush to this whole thing. If you've got a wire wheel, brush on a wheel, you can try to see if you can get it to fit in there. I don't, so I'm going to use my little wire brush. You do this to both sides, everything I'm going to do you're going to do to all sides of the brakes.
Next, I'm going to take a wire brush that I connect to a drill and they call this horning out the port in here. I'm going to take all the rust out, because the slider bolt slides in here and I want it to be smooth. Do it to both sides.
I'm also going to suggest you strongly clean around where that boot goes, because if that boot doesn't sit tightly on this lip that is designed for it, water will get in there and water and calipers do not mix. Not the sliding part at least. In here we have the caliper sliding pin, bolt pin, whatever you want to call it and this one is a rubber tip on the end.
I have found in my years that the rubber tip caliper slider pin will always go on the top of the mounting. Once this is mounted it's actually mounted this way, so it'll go in on this part. I would love to answer any questions if you say, Why? But I can't, so I'm not going to lie to you. It's just the way it is. I've taken a million brakes apart from calipers for manufacturers and they always are on the top. Maybe someday I'll find someone I can ask, but just in case if you're questioning it, that's where it goes.
Look at the rust here. This is severe. These we had a hard time taking out and I could tell you I've already done the other side and I had to hammer the pins out of the caliber bracket, so that's not what you want. After this break job, hopefully it will not be that way. I'm actually going to go to my wire wheel and use it on these threads and get that seat right there all nice and clean in here.
Now I'm going to clean the actual caliper tins. I'm going to rest it on the steel here and I'm just going to stop, the most important part is the bottom part believe it or not. I don't want any rust on the bottom. There's going to be silicone paste on the bottom, or caliper grease, whichever one you want to use. That's just the dust shield.
Now we're going to clean the inside here where the pad rides. The difference. Do the same to the other tin. I'm going to clean this caliper all up, try to get all the dust out. Alright just going to let that dry.
Now I'm going to use the high proof waterproof silicone paste and just coat the bottom part of the caliper where the tins sit. I just want to keep the water and rust from building up. I'll snap the tins right down in there. The high side goes to the back of the caliper. Here we go. Same to the other side and then you do not apply silicone or caliper grease to the top of the sliders where the pads sit. You want that surface to be nice and just clean of any residue.
Now I'm going to take a small screwdriver and I'm going to open up this boot and I'm going to put some silicone paste inside. I want it to get in all the grooves, so it keeps the actual pin lubricated as it goes through the years. And plus it keeps the rubber from dry rotting and breaking. Okay, that's ready now.
Now I'm going to put a little silicone paste inside, actually I'll put it on the pins. Okay, let's put the boots on. You'll see the wide end, the rubber has a narrow and wide lip. The wide piece goes on this and locks around. Make sure it's seated and it's locked right in. Perfect.
Now I'm going to set my pads up inside the bracket. The one with the indicator goes on the inside, that's closest to the actual knuckle. We're going to line it up. I like to lay it flat like that into the tip clips and then just slide it right in. Same with this side. I just lay it down flat, stand it up. Sometimes it works, it slides right in. There we go. Now that's all ready to go.
The way this Nissan's designed, I can't just mount this on and put the actual caliper over the pins in. The bottom pin there's a radius arm there that hits, so I have to actually mount this on the caliper and then mount the caliper on the rotor.
I know that it goes like that, so I'm going to find my caliper, set it up, guide it in. The pads are going to want to fall out, so this makes it a little difficult. Let's try it without. It's really not the easiest thing. The slider without the rubber boot goes on the bottom. Let's see if we can get that started. Yeah, that's all I want to do is get the top one started.
Let's see if we can slide the pads actually in now. Okay, inner pad. There we go. And then the outer pad. Whole time I've got pressure on those caliper sliders so that it doesn't push the pad out.
Now we can line that up. Put the top bolt in. That's a 19 millimeter wrench. Let's see if we can get those started. The torque specs for the caliper bolt bracket to knuckle is 62 foot-pounds. Now I've set up my 3/8 ratchet with 62 foot-pounds and I'm going to show you why you can't torque it. The radius arm right here is in the way. You cannot get in there. You can do the top. For the bottom, I'm going to have to use a wrench. There's a bottom nut. I want a little security, take a rubber mallet, give it a quarter of a turn.
Now I can tighten down the caliper sliders 14 millimeter, keeping an eye on that boot. I want that boot to make sure it seats properly. I know I got enough silicone in there, keep it nice and moist and not dry. I don't want it to be sitting back here. There's a little lip on that. I don't want it off the lip. I want it on that lip of that slider pin. Make sure they're both on there. Cool. The torque on that is 32 foot-pounds. I'm going to get a 13 millimeter socket and see if I can tighten that to the manufacturer specs.
Looks like I'm going to be able to get the top, but I don't think I'm going to get in here. Nope. They're really help themselves along putting that arm so close, huh? I'm just going to give this a nice little, it's only 32 foot-pounds, so that's good.
Now we can open that bleeder screw and let it gravity bleed. Make sure you put your catch pat underneath. A lot of air bubbles going out of this one. I got a nice steady stream now, so I'm just going to snug that up, close it off. Clean that up, put the boot back on. Here we go.
Now we can come up to the master cylinder and top it off. Look at the cover, it'll tell us type of fluid. This says .3 brake fluid, so I'm going to take the cover off, make sure I try not to get any dirt in there. You want it as clean as possible. I'm going to bring the level up to where it needs to be. I can replace the cover, make sure it locks down.
Now we can put the tire back on. Make sure you put the rim flush against the hub. I'm going to snug this lock lug nut flush, so I can let go of the tire. 2010 Murano, the wheel torque is 80 foot-pounds. I'm going to start in a star pattern, 21 millimeter socket, I'm going to go right to the bottom. One, torque it and do star pattern all the way around. I'm going to do it twice, because I like to make sure. Ready to go.
Thanks for watching. Visit us at 1AAuto.com for quality auto parts, fast and free shipping, and the best customer service in the industry.