Okay, friends. One of the first things we have to do is safely raise and support the vehicle. Once you have your wheels off the ground in the rear, we're gonna go ahead and remove all six of these Lug Nuts. Remove your wheel.
One of the next things that we need to do is take a nice small pry bar like this. We're gonna come in between the Caliper and the Pad, and we're just gonna apply a little bit of leverage. What we wanna do is just push in that Caliper Piston just a teeny bit to take the pressure off of the brakes. The next thing we need to do is remove our two 18-millimeter mounting bolts for our caliper. Just take a wrench, you can use a socket with a ratchet if you'd like. There's one bolt.
I'm just gonna start that in just a couple of threads to hold the caliper for me while I remove the second. There it is. Let's get that other one out of there. Next, we're gonna take the caliper and we'll just set it up here where it's gonna be nice and safe. Just make sure you put it somewhere that it's not gonna potentially fall down and hopefully not hurt you in any way. Now it's gonna be time to remove your rotor. You might need to give it a couple of light bonks.
The next thing we're gonna wanna do is make sure that the vehicle is in neutral. You wanna be able to spin your drive shaft. With that said, come right over here to your fill plug on your rear differential. You're gonna remove that next using a 3/8ths ratchet. All right, let's grab a collection bucket for the next step.
The next thing we're gonna do is come right here for your E-brake cable. Just get that right out of its securing bracket. Okay. After that, go ahead and grab something and just kinda come along the side of your differential, approximately where the pan is. You just wanna try to get out as much of that crud as possible so nothing will fall down inside of the differential once we get this cover off. Now, the next thing we're gonna wanna do is make sure that we keep in mind that this is where the bracket's gonna go, right in the center, because it needs to go back there once we take this all apart.
Use your 13-millimeter socket and a nice light hammer. You can use a rubber mallet if you're worried about it. Just go over these bolts and tap it on there. All we're trying to do right now is just kinda break free all the rust, rot, or any type of obstacle that's gonna make it an issue to get these bolts out. We also wanna make sure you have a nice collection bucket because after you remove these bolts, there's gonna be fluid behind here that needs to go somewhere and it needs to be recycled.
Now let's just start that bolt back in a little bit here. Now we're gonna continue by removing all the rest of the bolts. Remove the pan. If for some reason your pan is stuck on the rear differential, you could use something as simple as a nice rubber mallet, give it a couple of light bonks, or even try to get in between the pan and the differential itself with something as simple as a screwdriver or a pry bar.
Now, if you were to look at the inside of this pan, you're gonna see a whole bunch of debris, especially in this area right here where the magnet is. This is all small metal shavings, and it's no good for the inside of your differential. Speaking of no good, if you were to look all along the side where the gasket is supposed to ride between the pan and the differential, you're gonna see a lot of debris. You need to make sure you clean all that up. So, go ahead and clean it up, clean up all this area. Make sure you get off all the debris. If you have a nice parts washer, that'll work great. Or of course, you can use some parts cleaner, just make sure you're using safety protection and do it over a recycling unit.
The next thing we need to do is cover this whole area with something, because when we peel this up, we don't want very much dirt or debris getting inside this area, obviously. Just do whatever you can to try to protect it. That looks pretty decent. It's gonna keep the majority of everything out. The next thing we need to do is clean up the surface on the rear differential, where the gasket/pan is gonna be. Now, to clean this up, there's a couple of things that you could use. You could use a nice scraper that looks like this, you could also use a razor blade if you were so inclined, because maybe you don't have a scraper. Something that I do recommend that you do not use would be something that looks like this. The reason for that is because of course it's course, it's gonna, of course, tear into the metal of the rear differential and all that metal dust that you're gonna be shooting all around inside the air can accumulate on anything that's moist, which, well, everything is moist in there. And that can, of course, potentially cause damage with your bearings and other stuff inside the differential.
So now, let's go ahead and get this out of here. What you're gonna notice is that the areas that had a lot of rust and everything are still gonna be discolored, and that's okay. We're not necessarily worried about coloration. We're more or less worried about making sure everything is nice and smooth so we have a great mounting surface or mating surface for when the gasket and the pan go on the differential. Don't worry so much about the dripping, we'll deal with that later.
But to continue, the next thing we're gonna do is grab onto that rear driveshaft and we're gonna spin it, and we're gonna pay attention right inside of here because we're looking for this pin and we're also looking for this bolt right there. Now, when we go to take out this bolt, it's gonna be a long bolt and it's gonna come right straight through this pin, and then in through a little bit further. Once you take out the bolt, there's a potential and a probability that this bolt or this pin right here is just gonna wanna slide out. That's hardened steel, if it slips and hits the ground, especially if you're on pavement, you could chip it or damage it in some way. So take out the bolt carefully, grab your pin and slide it out. Now, to remove this bolt, you can use a socket with a ratchet if you want to, but you're probably not gonna have very much space. I prefer to go with an 8-millimeter wrench, and if you have a six-point, it's gonna do good. Go ahead and put it right on there. Use a nice rubber mallet. We're just gonna break that free, work it back and forth because there should be a teeny bit of locktite on there, or thread locker. Now we're just gonna remove that bolt. So, that bolt's nice and loose, it can move around. Like I said, it's gonna come straight through this pin. Make sure you hold up that pin, remove your bolt, and then slowly let this pin-down and set it aside.
Now, if you spin that drive shaft around, you're gonna see an area that looks like this. You don't wanna mess with any of this stuff, we're not gonna mess with that. I just go ahead and use my finger inside this hole. Be careful, because if you don't, what you might notice is that the gears on the inside are gonna kinda get spun. So I'm just kinda keeping my finger in there. Be careful for any pinch points, nobody should get hurt doing this. I'm gonna try to spin this all the way around so this hole right here is facing down. The reason why I want that is because inside here, the axle is gonna come through the whole differential tube, and it's gonna come out into here, and you can see where these little gears are right there, there's gonna be a little clip. So, what's gonna happen next is I'm gonna go over to the outer portion of the differential on the axle that I'm working on, I'm gonna press it in. The little U-clip, it's gonna look something like this, is gonna go fall out and then fall inside here, hopefully, or even inside my collection bucket.
Give it a nice little wiggle around. We wanna see if we can get that clip to fall out of there. If you can't, we're gonna try using a pick or a magnet. I have a small pocket screwdriver that has a tiny magnet on it. You don't necessarily need the screwdriver portion, but you do need the small magnet. I'm gonna come right in here along where that gear is and I'm gonna try to find right where that clip's gonna be, the one that I told you about, it looks like a little U. I'm gonna just stick it on there. And now I'm gonna go back over to the outer portion of the axle and just try to move it around and see if we can get this clip to break free/come out. There it is, friends.
Now, for the next step, we wanna have it back at a working height so we can easily get to our axle. Keep in mind that axles aren't super light, so, it will be heavy. Also something that you need to keep in mind is, as we draw this away, there's gonna be fluid that's inside this differential tube and some of it's gonna wanna come out. So, also, make sure you have a collection bucket underneath this axle portion here. I like to just wipe it as I pull it out. Awesome.
Now, just before we continue, I just wanna make sure you understand that, yeah, the E-brake shoe is missing and the backing plate, it looks like it's pretty much missing, it's just rotted away. That's not necessarily part of this video and/or this instruction, just don't pay any attention to that.
The next thing that I always like to do is just take a rag, I'm gonna shove her right inside this hole right there. And then I'm gonna take something like this, and I'm just gonna clean up as much of this rust/rot that might be around this area. Okay, so this looks nice. Let's go ahead and get our rag out of there. We'll make sure that we dispose of that properly in a minute. The next thing we're gonna have to do is remove this seal. You're gonna notice that the seal actually has a little bit of a ridge. It's not really something that you can probably grab onto your fingernail, especially if it's rotted like this one is, but if you were to take something that looks like this, or even a small punch or chisel, you can usually grab that edge and bonk it away and it'll come away from the differential. Other ways that you can do it, if this way wasn't working for you. You can use something like this, a nice long pry bar, come right in between like this, and then you would just keep prying and it'll eventually lift this up and then draw it away. Just be careful because, once again, like I said before, fluid is behind this and it will wanna come out, make sure you have a collection bucket.
So let's try this with the first way here. We're gonna use this little scraper. Just try to kinda pry out on that edge. And even if this way doesn't necessarily work, it will actually help with the second method that we could use by using the leverage because it's gonna pull away. Okay, so, as you could tell, it's starting to pull away from the differential there. I'm just gonna use this pry bar and I'm gonna use a little bit of leverage and see if this works. You're gonna need a tool that looks a lot like this. This is called a slide hammer. The way that this is gonna work, is this weighted unit right here is gonna slide and it's gonna kinda bonk up against it, and it's gonna draw this bearing out. Turn it just like this, slide it in there, put it right up against the bearing as close as you can. This particular tool has a nice big washer that's gonna go up against here, and then I'll just bottom this out.
Now, when you do this job, it's important to remember that, more than likely, the bearing is actually gonna come apart. All those little roller bearings inside of there are pretty much only held in by a teeny little sleeve. So, as we continue with this slide hammer, it's gonna put a lot of pressure on that small sleeve, more than likely it's gonna break and the bearings could come shooting out. So make sure you don't have any innocent bystanders around, make sure you're wearing your safety protection. Looks like it's actually coming out, that's a first. There it is friends. Now we're gonna use a rag and we're gonna clean up any of the debris or oil that's inside the end of this tube. Be careful for any sharp edges.
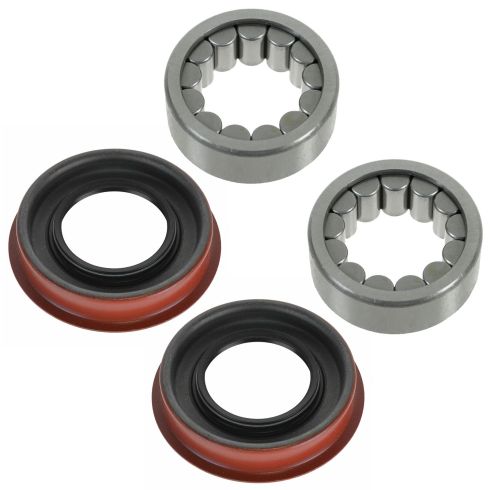
The next thing we're gonna do is take our brand new bearing here, and you're gonna want a bearing driver. It's gonna look a lot like this, and you wanna find a piece that's gonna fit directly over it. You don't wanna hang in too far over and you especially don't want it to only hit on the bearings or the roller bearings in here. It needs to go along that outer edge. At this point, we'll just take the bearing, put it into the differential tube, as far as we can. It should pretty much stay there. But of course you don't wanna let it drop and damage it. Put your driver on there, grab your hammer. And of course, watch your hands.
We're gonna keep listening, it's gonna sound like it's going bonk, bonk, bonk, bonk, bing. And when it goes bing, that means that it made the audible sound that lets you know it's completely bottomed out. So I did a whole bunch of bonking and we're probably pretty close to the bing. So, that's it right there. That's telling me that that bearing is completely inside the differential tube and it's seated as it needs to be. Just work this back out of here, take a peek inside, make sure that you didn't cause any damage to these roller bearings. They should all be able to roll around fairly freely.
Now it's gonna be time to install our new seal. There's gonna be a couple of things we need to think about before we do this. Using the original seal driver or a bearing driver that we used just isn't gonna be large enough. It can go up against on the inside portion and damage your seal. You need to get the next size up or the corresponding size that goes up against this rim. So, this one fits right over, perfect.
The next thing we need to think about is the backside of the seal. If you were to look along it, you're gonna see a nice spring, that needs to be on the rubber area. The problem is, is it tends to break free unless you put some form of lubricant along here. I like to use a little bit of Vaseline or petroleum jelly, call it what you want, just grab a little fingerfull here, and then I'm gonna go right along that spring. I like to make it a little bit thick, it doesn't cost too much, a lot cheaper than a brand new seal because I ruined the spring. And, of course, you could probably put it back on if it did fall off, but just put that right on there. This looks great. I'll just coat all the rubber, because why not? And the great thing about the petroleum jelly is that it'll just dissipate and it won't cause any damage to the inside of the Differential.
The next thing we need to think about is along the edge of the seal. This is metal and the differential tube is metal. Well, we need some sort of sealant between there. So, what I'm gonna do is I'm gonna clean off that petroleum jelly from my finger. I'm gonna grab a little bit of gasket maker. You can use just basic black RTV, just pretty much any kind of gasket maker. We'll make a nice line right down at like this. It doesn't have to be pretty, it's gonna be hidden, but you do wanna make sure that you make a seal going all the way around to keep moisture and debris out of there. Super important. That looks great. We'll put that aside.
Now we're gonna go ahead and grab our driver and our hammer. We'll set this right up on here. Oh, before we do that, just take a peek, make sure you don't have any debris or any type of gear oil in here. It needs to be completely dry. If you have any gear oil, the RTV or gasket maker isn't gonna work properly. Put it right up on there. I got my driver. We're gonna do the same thing, bonk, bonk, bonk, and then when you hear an audible change in sound, more than likely it's completely bottomed out. There it is. Well, we made a nice mess, so we'll just clean that up and then we'll move along.
Take some of your manufacturer-specified fluid, 75-90. If you can't find LS version, which would mean limited-slip, that would be great. If you can't, you're gonna need an additive when it comes time to fill-in the differential. But 75-90 LS. Go ahead and squirt it in, put it on those bearings, spin the bearings around, make sure they're coated well.
Time to install the axle. If you were to take a peak right down along this area, you're gonna see the area where the bearing/seal is gonna ride. Clean that down completely and inspect it. If you can see any wear or grooves, especially where the seal is supposed to ride, which would be pretty close to right there, you know you have an issue. Just carefully go over along the top of that seal, be careful not to drag the axle along it very much though, because you could potentially ruin it. Just go right in here. At this point, I can feel that it stopped. Is it all the way in while you can tell that it isn't. The reason why it stopped is because down at the other end, there's the gears with the little notches that are gonna have to line up with the splines on the axle. At this point, you can just kinda grab this and wiggle it around. If you push down over here, it's gonna lift up on the pumpkin side and hopefully you'll be able to align it. Okay. That just slid right in perfectly. Let's move along.
Now, our next step is kinda gonna be a twofer. What we need to do is we need to get this clip back up and around that axle. And then once we do, we need to keep it there and grab the outer portion of the axle and draw it back away so it holds it in this clip. Just slide this right up in there. I'm gonna grab the axle, carefully slide it, watch for any pinch points. Okay. So now you wanna take a peek up inside there. You wanna make sure that that horseshoe or the clip that is shaped like a horseshoe is all the way up inside and you wanna barely be able to see it. If you can see a whole bunch of it, more than likely it's not completely in.
Now, let's step away from the pumpkin for a second and get right over to the axle. The reason why I wanted to do that is because I want us to grab onto it and give it a nice tug. You need to make sure that this axle is not able to pull out of your differential. If it can at this point, you need to stop, get back over there and fix that clip.
Next thing we need to do, we need to be super careful for, because we're gonna be taking our finger, putting it back inside this hole right here and being super careful for any pinch points, because we're gonna need to spin that differential, bring this back around so we can get the pin up through and of course the mounting screw back in. There we go. Okay. So I can see where the pin is gonna have to come through. I can see where the bolt is gonna go through. I have plenty of clearance to be able to swing my wrench. Put your finger in there and just make sure that the hole lines up. If it doesn't, you can go ahead and just try to line it up just simply by spinning it a little bit, and then that should be perfect.
Now, talking about reinstalling the screw, you wanna make sure you pay special attention to the threads. If you see any thread locker on there, or if it looks as though the pin is damaged in any way, it's probably a great idea to either clean it up or replace it if need be. Now, I used a little bit of blue thread locker on this. I would definitely not recommend using no thread locker and I would also definitely not recommend using red thread locker. Red thread locker is gonna be super hard to get this out someday. With that said, we'll set it aside for one second. And then, although I don't recommend using parts cleaner inside of your differential because of the clutch gears and everything, I do actually recommend using it only inside of this little hole where the threads for the screw is gonna be. So I'm just gonna grab my rag, I'm gonna direct it in specifically with my hose and only use what needs be to clean out any of the gear oil that might be inside there. Make sure you clean that up as well. Great. Inspect it real quick for any imperfections, such as a crack going down it or any sort of damage that looks apparent. This looks good.
Next, what I'm gonna do is continue on by installing this. I wanna make sure that the hole on the pin is facing down where the hole for the screw is gonna go through. If it doesn't seem like it wants to go through, you just need to align the gears on the inside. Just keep working at it, should wanna go. Don't go too far because then you have to, of course, get in there and push it back down. Keep your finger over this so it can't fall down. Grab that bolt with the thread locker on it. Go ahead and put it right on through there. Now we're gonna snug this up. Just to say, it's always a great idea to go ahead and replace this pinion shaft locking bolt. Either way, whether you're replacing it or not, for torquing it, the 8.6-inch axle or rear differential, you wanna torque that bolt to 27 foot-pounds. For the larger rear differential or axle, the 9.5 inch, you're gonna wanna torque that to 37 foot-pounds.
So now it's time to take a look at our differential pan cover. This looks great. We cleaned it up. I did both sides. I made sure that there's nothing on the magnet or at least as little as possible, especially in terms of large chunks of metal. This looks good. Let's take some gasket maker or unless you, of course, bought a specific gasket that goes to this. If you have a specific gasket that's made of cork, or paper, or anything like that, do not use any gasket maker with it. Assuming you're not one of those specific gaskets, go with this RTV. I'm just gonna go right along, go around the hole. This is gonna make a nice watertight seal. Make sure you don't have any debris or anything like that on any of these gears. And then just take a nice clean rag with maybe some solvent on it and just clean up any of this gear oil that might be on here, because this is gonna affect the gasket.
We've got our plate or rear diff cover. We've got a lot of silicone on there, that looks great, or RTV. We're just gonna put it so the bump or the bumpout area is facing towards where the pinion gear is. Go ahead and line it up up there. We'll take our bolts. You do not need to use any thread locker on these.
Start them all in. Now it's gonna be time to snug all these up, do it in a criss-cross manner. Now we're gonna go ahead and torque these down to 30 foot-pounds. Let's go ahead and grab this cable, get it right into that bracket. Make sure that it's secured, it cannot flap around. But if you used RTV, you're gonna need to let it set and even dry, because if you use gear oil inside of it right now, it's gonna potentially mess up the effect of the sealing agent of this RTV, and you might end up having leaks. If, of course, you did use an original gasket, or a paper gasket, or cork, or whatever you might've used, and it was not a chemical such as RTV, you can, of course, go ahead and fill it now.
The next thing that we need to do is clean up the mating surface where the rotor's gonna match up against the axle. If it's all bumped up like this or rough in any way, just go ahead and sand it down with something. Now that the majority of the area is nice and clean and sanded down. We need to continue on by getting in between the lug studs and the rest of the hub area here, right in there. If you notice there's large buildup, you can use something like this, maybe a scraper or even a flathead screwdriver, just kinda get the majority of it up and then you can take a nice brush and just work at the rest. Now we're gonna spray down the mating areas with some copper never-seize.
Before you go ahead and put your rotor back on there, look at the backside. This is the area that's gonna meet up against the axle. You need to make sure that's nice and clean as well. Now that we've cleaned up the backside of the rotor, we're just gonna place it over the axle like this, push it all the way in and it should go over the emergency brake shoes. If it doesn't go over the emergency brake shoes, de-adjust your adjuster. If it does go over, but you feel as though there's no drag at all, you're probably gonna wanna adjust it up a little bit. What you're actually gonna wanna do right now is get it so it's semi-close. So you can hear the shoes just barely dragging in there. Okay? That's the sound of the shoes hitting up against the inside drum portion of this rotor. If it's too tight and you try to turn it and it just doesn't wanna turn, then you know that it's over-adjusted. If your brakes are over-adjusted, they're gonna overheat and you're gonna have major braking issues.
Now it's gonna be time to get the caliper back on the vehicle. Before you go ahead and do that, you need to make sure that you clean all the existing thread locker off of these bolts. And I always like to replace it with some new thread locker of my own. Put the caliper around here. Make sure that your pads are situated inside the brackets as they need to be. They might keep wanting to fall out if they're like mine. Go ahead and grab those caliper mounting bolts. Start them both in. Now we'll snug them up and we'll torque them to 148 foot-pounds. Get our torque wrench.
The next thing I always like to do at this point is to make sure I pump up the brake. Now it's gonna be time to fill your rear differential. You need to make sure you go with the manufacturer-specified fluid. For this particular application, the manufacturer recommends full synthetic 75-90 with limited slip additive. If you look right here, you're gonna see 75W-90, right? If you saw something that went along the next couple of letters would say LS, that would stand for limited slip. This one doesn't have an LS, so you need to go out and get yourself an additive that says limited-slip supplement or additive.
Once you put in your additive completely, you're gonna continue topping it off until it comes up just below this fill plug right here. So you can go ahead and put your finger in, take a peek, and if it seems like your finger is getting really wet, then more than likely you're at the level you need to be. Okay. So, at this point, I've just put in my limited-slip additive, and I've put in one full bottle and a little bit under another full bottle. It just barely started trickling out the top, so I stopped there. Now, what I'm gonna do is I'm just gonna wait for this to continue trickling out as much as possible. Optimally, at the level that you want your fluid to be at when your differential is sitting on a nice level surface, such as the ground, would be just about one-eighth of an inch below that fill hole. Doing that on the lift is a little bit different, of course, because the suspension is hanging, and if you're doing it on jacks or jack stands in the yard, depending on if you have the jack stands under the differential tube, that could work. But if you have it underneath the frame to try to lift the vehicle, it's gonna be kinda slanted like ours is here.
With that said, if you can get your level approximately one-eighth of an inch down below this fill hole, that's exactly where you want it. Next, it's gonna be time to put our rear differential plug back in there. Just take a quick look at it and make sure it's in good condition. If you look at the threads and it looks like they're rotted, or maybe they're not gonna make a good connection on the differential, you probably wanna replace it. If you have any type of sealant around here, you probably wanna get it off of there. If it looks as though the inside of this area is getting stripped out and it's not in very good condition, and you don't think that you'll be able to either tighten it up or even remove it further on down the line, it's probably a great idea to just go ahead and replace that plug. This one looks decent, so I'm just gonna wipe it down and put it in there. Now we'll just snug it up until it bottoms out. That's it right there. Clean up your mess.
When you're doing the bearings on this. Yes, we did pre-lubricate them with a little bit of gear oil, and that was great. Something that you need to remember is you need to tip the rear differential. What I mean by that is you wanna jack up the opposite side that you were working on. So if we wee working on the passenger side, doing the bearing over here, we would wanna jack up the left rear axle, bring that up. So the differential is gonna go from being nice and level so that it comes up and it's gonna allow some of that fluid that's inside that rear differential pumpkin in the center to work its way down the tube, coming right down here, and then it's gonna make its way down to the end, and it's gonna help lubricate the bearings that are in there. Let that sit for approximately 5 to 10 minutes. And then it's probably a good habit to go ahead and do the same in the opposite direction, mainly to help out the other bearing as well. Once you've done that, level it back out and move along.
Now it's gonna be time to get the wheel up on here. Let's start on those lug nuts, and then we'll bottom them out and we'll torque them to 140 foot-pounds. Let's torque them. Double-check them if you want. And if you have a center cover, put that on as well. Let's make sure we double-check that brake fluid, give it a wiggle. It looks as though this is low. There's the maximum line. Open this up. We're gonna add some DOT 3 brake fluid. Bring it right up to that maximum line. Make sure you close it back up. Down the road you go.