WARNING: This product can expose you to chemicals including Lead and Lead Compounds, which are known to the State of California to cause cancer, and birth defects or other reproductive harm. For more information, go to www.P65Warnings.ca.gov.
Lifetime Warranty
This item is backed by our limited lifetime warranty. In the event that this item should fail due to manufacturing defects during intended use, we will replace the part free of charge. This warranty covers the cost of the part only.
FREE Shipping is standard on Orders shipped to the lower 48 States (Contiguous United States). Standard shipping charges apply to Hawaii, Alaska and US Territories. Shipping is not available to Canada.
Expedited is available on checkout to the United States, excluding Alaska, Hawaii and US Territories as well as P.O. Boxes and APO/FPO/DPO addresses. Final shipping costs are available at checkout.
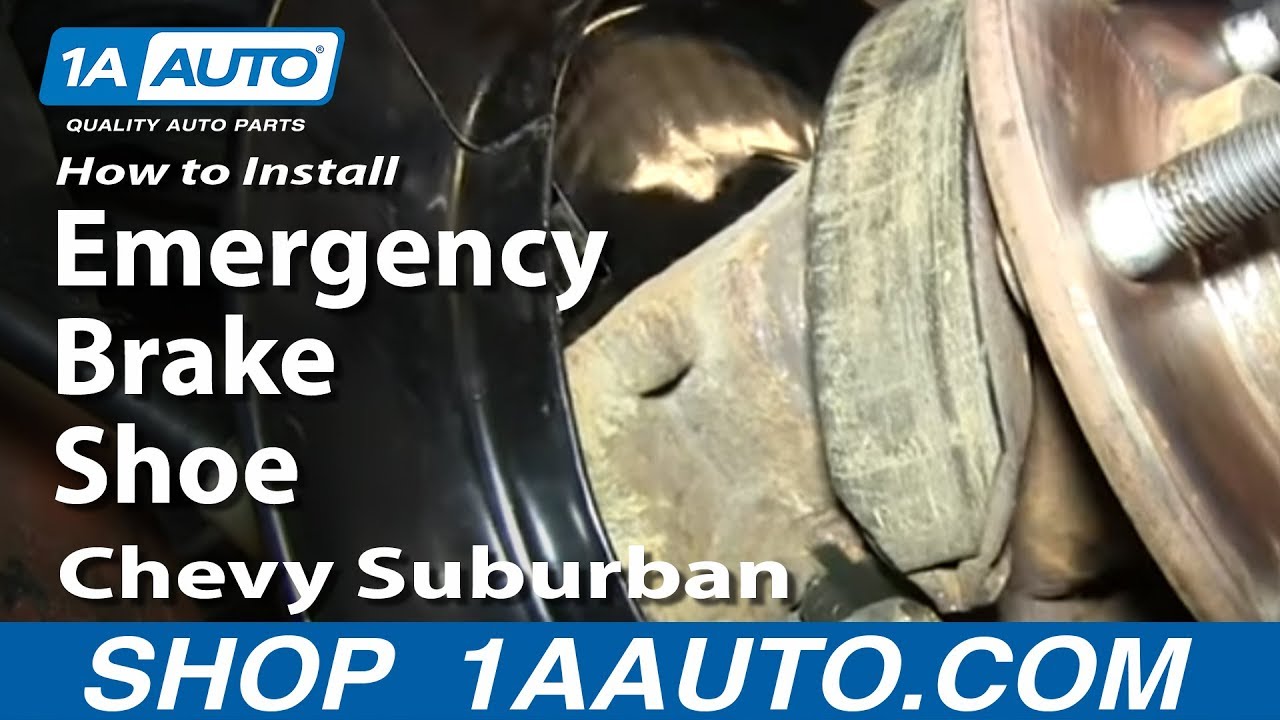
How to Replace Parking Brake Shoe 2000-14 Chevy Suburban
Created on:
Tools used
12mm Socket
A Piece of Pipe (for leverage)
Large C-Clamp
Flat Blade Screwdriver
Torque Wrench
Jack Stands
18mm Socket
8mm Socket
Ratchet
Floor Jack
22mm Socket
1. Removing the Wheel
Loosen the lug nut covers with a 22mm socket
Pry off the center cap by hand
Loosen the lug nuts with the vehicle on the ground
Raise the vehicle with a floor jack
Secure the vehicle on jack stands
Remove the lug nuts
Pull off the wheel
2. Inspecting the Brakes
Check for gouges on both sides of the rotor
Check the thickness of the brake pads
Check the brake pad wear indicator
3. Removing the Brake Pads
Remove the two 12mm bolts from the brake caliper
Use a large C-clamp to push the pads into the brake caliper
Pull the caliper aside
Pry the brake pads off with a flat blade screwdriver
4. Removing the Brake Rotor
Remove the two 18mm bolts from the brake caliper bracket
Pull off the brake caliper bracket
Pull the rotor off
5. Removing the Emergency Brake Shoes
Remove the 8mm bolt from the emergency brake bracket
Pull off the emergency brake bracket
Pull the emergency brake shoes off around the hub
6. Installing the New Emergency Brake Shoes
Put the emergency brake bracket into place
Insert the 8mm bolt into the emergency brake bracket
Put the new emergency brake shoes into place
Put one emergency brake shoe tab into its slot
Push the second tab into its slot with a flat blade screwdriver
Turn the adjuster wheel with a flat blade screwdriver
The adjuster should be set so that the rotor slides on with some resistance
7. Reinstalling the Brake Rotor
Slide the rotor on
Thread on one lug nut to hold the rotor in place
Put the bracket back into place
Start the 18mm bolts by hand
Tighten the 18mm bolts to 85 foot-pounds of torque
8. Installing the New Brake Pads
Install the new brake pads into the bracket
Put the caliper on
Thread the 12mm bolts by hand
Tighten the 12mm bolts to 30 foot-pounds
9. Reattaching the Wheel
Slide the wheel into place
Start the lug nuts by hand
Tighten the lug nuts preliminarily
Lower the vehicle to the ground
Tighten the lug nuts to 100 foot-pounds in a crossing or star pattern
Reattach the center cap
Fasten the lug nut covers with a 22mm socket
10. Testing the Brakes
Pump your brakes repeatedly until they feel firm
Test your brakes at 5 miles per hour and then 10 miles per hour
Road test the vehicle
Brought to you by 1AAuto.com, your source for quality replacement parts and the best service on the Internet.
Hi, I'm Mike from 1A Auto. I hope this how-to video helps you out, and next time you need parts for your vehicle, think of 1AAuto.com. Thanks.
In this video, we're going to show you how to replace your E-brake shoes on this 2002 Chevy Suburban. We show you on the passenger side, but the driver side is the same procedure. The items you'll need are new emergency brake shoes from 1Aauto.com; 8, 12, 18, and 22 mm socket and ratchet with a piece of pipe for leverage; flat blade screw driver; large C-clamp; torque wrench; and jack and jack stands.
Start off by loosening up these lug nut covers. We'll fast forward as Don does this. Once those are all loosened up, you can pull the hub cap free. Now, you want to loosen the lug nuts preliminarily, raise the vehicle and remove them the rest of the way, unless you have air powered tools. Then, you can do it while it's up in the air.
Then, to inspect your brakes, just run your finger along the rotor, and check for any deep grooves. You can look in here for the life of this brake pad, and then through here for the life of the other brake pad.
Now, remove these two 12 mm bolts. We'll fast forward as Don does that. Use a large C-clamp. You just put it on this end on the back of the caliper, and on this brake pad and just twist it in. This is going to push the caliper piston in and make it easier to pull the caliper up and off. Now, remove the large C-clamp. Pull the caliper free and set it aside. Now, pry out the brake pads.
Now remove these two 18 mm bolts. Just use a piece of pipe to help break it free. We'll just fast forward as Don removes those two bolts. Now pull your caliper bracket off. Pull the rotor off.
There should be a bracket underneath here held in with an 8mm bolt. So, you'd want to remove that next. Ours is missing. After that, you can pull your E-brake shoes forward, and then hit them down. Now you just want to pull it over the hub. You do have to angle it just right to get it over.
Now, before you install your new E-brake shoes, make sure you put this new bracket into place. The E brake shoes from 1Aauto do come with this bracket. Just replace that 8mm bolt and tighten it up. Put your new E-Brake shoes on. Now you want to just put these two tabs on the ends of the shoes into these two slots, one on either side of the adjuster here. Once you get one side into the slot, just use a flat blade screw driver to pry the other side. Once it's lined up, you can just use your flat blade screw driver to just turn this adjuster. If it's a little stiff, just use a hammer. Just adjust it so that when you put your rotor on there's just a little bit of resistance.
Slide your new rotor into place. Then twist on a lug nut to hold the rotor in place while you put the caliper bracket back on. Then put your caliper bracket back into place and replace those two 18mm bolts. We'll fast forward as Don tightens those up. You want to torque these to about 85 foot-pounds.
Push your brake pads back into place. Then, put your caliper back down into place and replace those two 12mm bolts. Now we'll just fast forward as Don does this and tightens them up. You want to tighten these to about 30 foot-pounds.
Put your wheel back into place. Then replace your lug nuts and tighten them preliminarily. We'll fast forward as Don does this. Lower the vehicle and torque the lug nuts to 100 foot-pounds in a crossing pattern. Then replace that hub cap and tighten up each of your lug nut covers.
Before taking the vehicle out on the road, you want to just pump the brake pedal until it firms up. Then do a stopping test from 5 miles per hour, and then 10 miles per hour. Then you're all set.
We hope this video helps you out. Brought to you by www.1AAuto.com, your source for quality replacement parts and the best service on the Internet. Please feel free to call us toll-free, 888-844-3393. We're the company that's here for you on the Internet and in person.
BFA73639
In Stock
Product Reviews
Loading reviews
4.76/ 5.021
21 reviews
5 Stars
4 Stars
3 Stars
2 Stars
1 Star
17
3
1
0
0
Exact fit replacement
Gene
April 23, 2020
It doesn't matter where you get these, they're a bear to replace. These came with all the necessary brackets and hardware for installation. Follow the 1A Auto video on YouTube and you'll be all set.
Parking brake
Gerald
December 1, 2020
The brake shoes were the exact fit and they were a little hard to ger them on. That is Chevrolets fault because it should have originally been two shoes instead of one.
Brake Pads
B
March 22, 2021
Good quality pads. Came with all variations of hardware you might need.
Perfect fit and easy install!
A
April 7, 2021
These brake shoes are the same or even better than original. I will recommend.
Two Thumbs Up
Tim
July 24, 2021
Parts arrived on time (very fast service). The parts fit perfectly and were exactly as described. And, everything needed was included (part, mounting clips and bolt). The video was 100% correct and the whole process was extremely easy.
Good Product
Steven
August 9, 2021
Easiest brake shoe I ever installed!
David
August 26, 2021
Good quality received order fast
Jessie
September 4, 2021
Didn't have the right hard ware, brake band fit good,
Great parts at a good price.
Ben
October 26, 2021
Bought a 2002 GMC Sierra 1500 RWD that needed a complete brake overhaul. Ordered these emergency brake pads along with a new set of rotors / pads. Installed perfectly, easy to adjust, and work great. Definitely recommend.
Perfect fit!
Bruce
November 2, 2021
Great replacement for 2002 Chevy Silverado. Had everything you need in the box.
Pablo
December 16, 2021
Everything much perfect
Terrance
December 25, 2021
Its worth it
Excellent
Timothy
May 28, 2022
Two thumbs up
I would definitely buy here again for my parts. Another vendor I bought from the parts didn't fit
Duane
September 17, 2022
Great quality parts and a great fit all for a great price
Perfect fit.
Robert
January 29, 2023
As far as I can tell these are an exact OEM replacement. Simple install.
Can't beat A1Auto
William
March 2, 2023
Just wanted to say great customer service! Will shop here always!
2003 Chevy suburban.
Hector
August 23, 2023
Very good,fast , and very good price.
Bad GM design
Roger
December 28, 2023
The shoes fit well. GM should have stayed with the split shoe design on older Suburbans instead of a horseshoe design that is difficult to work past the hub and seat against the backing plate. Another case of the engineers not thinking of maintenance.
Danny
May 2, 2024
After watching the video on how to do the job I had a good idea of how to do it. The
Work was easier than if I had not watched the video. But it made it easier to figure things out. Not to hard a job if you don't give up on the first try. Everything fit and works well. Good luck ??
USA or China Made
GARY
October 7, 2024
Although this kit is complete for parking brake on Tahoe, I question the reliability since this kit is made in China.
George
December 9, 2024
The break pads worked really great. The parking brakes are working great as well. Thanks for the parts. My wife is very happy.
Customer Q&A
What hardware come with it?August 2, 2024
John D
10
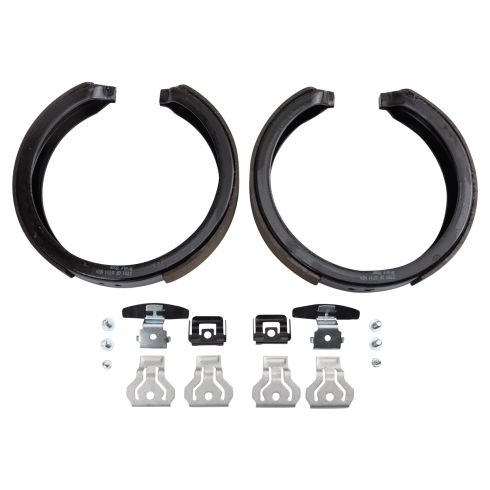
This listing includes all of the hardware shown on the images.
August 3, 2024
Kemal S
10
Yes
August 12, 2024
Michael N
Customer service
877-844-3393
Monday - Friday 8:00am - 9:30pm ET Saturday - Sunday 8:00am - 4:30pm ET
Cadillac is a registered trademark of General Motors Company. 1A Auto is not affiliated with or sponsored by Cadillac or General Motors Company.See all trademarks.
Enter Vehicle Year Make Model
Specify your vehicle's year, make and model to guarantee fit.
Year
Make
Model
Options
Drivetrain
This part doesn’t fit a . Select from parts that fit.