Replaces
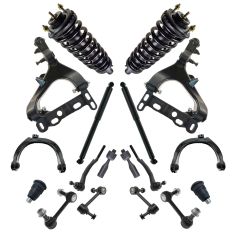
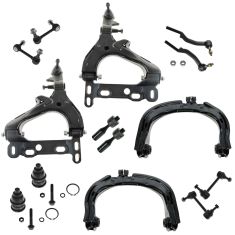
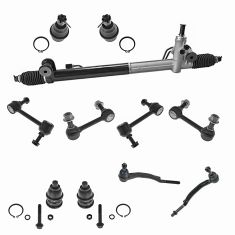
Replaces Front & Rear 18 Piece Steering & Suspension Kit TRQ PSA30988
$684.95
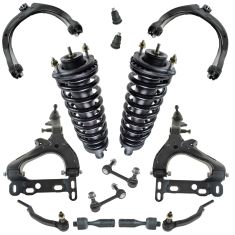
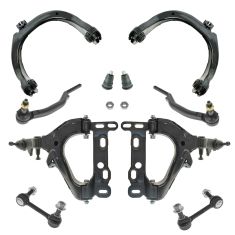
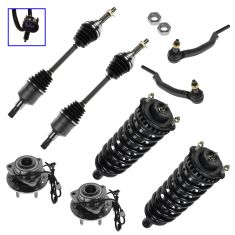
Replaces Front 14 Piece Steering & Suspension Kit TRQ PSA34367
$614.95
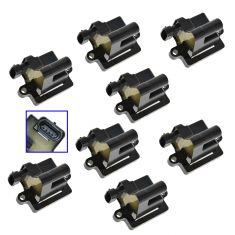
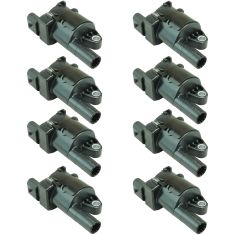
Replaces Chevrolet GMC Cadillac Hummer 8 Piece Ignition Coil Set ACDelco ACERK00006
$537.95
Replaces Front & Rear 14 Piece Steering & Suspension Kit TRQ PSA59845
$464.95
Replaces Front 10 Piece Steering & Suspension Kit TRQ PSA63414
$439.95
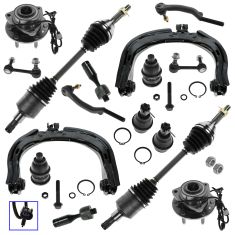
Replaces Front 16 Piece Steering, Suspension, & Drivetrain Kit TRQ PSA59350
$414.95
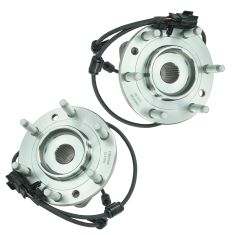
Replaces Front Driver & Passenger Side 2 Piece Wheel Bearing & Hub Assembly Set Timken TKSHS00011
$414.95
Replaces Front & Rear 11 Piece Steering & Suspension Kit TRQ PSA60012
$414.95
Replaces Front 8 Piece Steering & Suspension Kit TRQ PSA59255
$404.95
Replaces 8 Piece Ignition Coil Set Delphi DEEEK00002
$389.95
Item Condition:
New
1 Year Warranty
This item is backed by our 1-year warranty. In the event this item should fail during intended use, we will replace the part free of charge. This warranty covers the cost of the part only.
FREE Shipping is standard on Orders shipped to the lower 48 States (Contiguous United States). Standard shipping charges apply to Hawaii, Alaska and US Territories. Shipping is not available to Canada.
Expedited is available on checkout to the United States, excluding Alaska, Hawaii and US Territories as well as P.O. Boxes and APO/FPO/DPO addresses. Final shipping costs are available at checkout.


Created on:
Tools used
Tools used
Brought to you by 1AAuto.com, your source for quality replacement parts and the best service on the Internet.
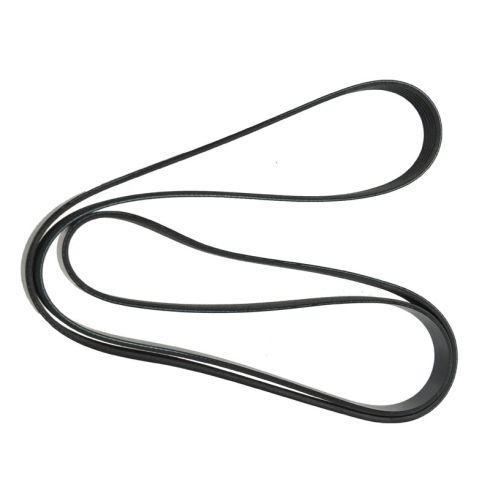
In this video we show you how to replace the serpentine belt on this 2002 Trailblazer. This vehicle has the inline-6 4.2 liter engine same as most Trailblazers, Envoys, Ascenders, Rainiers, and Bravadas. The only tool you'll need is a ratchet handle with a 3/8 inch drive.
Right down in here is your belt tensioner. We can get a 3/8 ratchet or flex handle right into this hole here. Take the handle and push it clockwise. I'm going to grab my belt. Okay just a quick freeze in the action. If you did need some more leverage on that handle, just use a piece a pipe, put it right onto the handle and that gives you some extra leverage and moves that tensioner easier. Slip it off the power steering pump. Then slowly let my handle back. I'm going to pull my belt off my alternator, off the idler, off the AC compressor way down underneath, up around the water pump, and then off of the crank down low. The belt's out.
Here's my artist's rendition of the belt diagram. This is very important because these belts can be a little confusing to put back on. I didn't find one in the engine compartment of this truck. What you can see is basically you're going to put a big loop down around the crank which is the largest pulley down at the bottom of the engine. Run it up over the water pump , then down around the AC. Then pull it up by the idler pulley and then loop it over to the power steering pump, and the tensioner. The last thing you'll put it on, actually, is the alternator.
Here's the new belt from 1A Auto. Stretch it out a little bit here. Take it and put a loop down here. You can't see this, but I'll just call it out. Put a loop down around your crank shaft. It comes back up around your water pump here, then down over your idler way down until you just take it, push a loop down underneath your AC compressor which is the smaller pulley way down at the bottom. Pull that around until it comes back up to the left side of your idler pulley. We've got it down around the crank. It comes back up and around the water pump. Then goes down around the AC compressor way down there, back up around here. It's not on the alternator yet. Then it's over here around the power steering pulley as well. Now we're going to put our handle back in the tensioner. Pull it all the way with both hands. Hold it down with my left while I take the belt and put it on the alternator with my right. Make sure it's on my idler puller. Then slowly release the handle which puts tension on the belt. Now we can see it's around my power steering, down around the tensioner, around the crank, up around the water pump, down around the AC, up by the idler, and the alternator.
We hope this helps you out. Brought to you by www.1AAuto.com, your source for quality replacement parts and the best service on the Internet. Please feel free to call us toll-free, 888-844-3393. We're the company that's here for you on the Internet and in person.
Tools used
Brought to you by 1AAuto.com, your source for quality replacement parts and the best service on the internet. In this video we'll be showing you how to remove and put back on the Serpentine belt on this 2004 Chevy Blazer with a 4.2 liter. Only tools you'll need is a 3/8 ratchet and you'll want either a long-handled ratchet or a piece of pipe to get some extra leverage as well.
First thing you want to note is how the Serpentine belt is on your vehicle. It goes across up there to the alternator and down to an idler pulley and down around the AC pulley way down there, then up and around the water pump and fan and then it wraps back down and around the crank and back up to the tensioner right there. I'm going to place the camera over here. What you'll want is a ratchet with a 3/8 drive end on it ... is a square hole in our tensioner here- Here's a shot of it from the other angle of my ratchet in my tensioner... going to take your ratchet and you're going to want to push it clockwise. As I push down on the tensioner, that loosens the belt, I can remove it up here from the alternator and slowly let my wrench back being careful not to pinch my hand in anything.
Now my belt will come off. Check the condition of your belt. Ours is in pretty good shape, see there's a little bit of cracking on the ribs but that's not too big of a deal. You want to check the whole length. Where they sometimes can get bad is where they're joined together and if it's getting bad there you'll know it because you'll see it and I don't see it so this one's okay. If you do need a new belt, we carry them at 1AAuto.com. Can't really film putting this on too well but I'll try and put it together and detail as best I can. I'm putting a loop down and around the crank pulley which is the largest pulley at the bottom of the engine. Loop it down there. Then I'll bring it back up and over my water pump right here on top. Then way down and around my AC pulley which is a smaller pulley at the bottom of the engine. Then up and around my idler pulley here and on this side around my tensioner pulley. Then around my power steering pulley.
Now basically I have the whole thing routed except for having it on the alternator. Okay. Here's my belt. I took a piece of pipe actually, you can see it at the top of the camera there, put it onto my ratchet that's in my tensioner and that gives me a lot more leverage. Pull my tensioner over, put the belt onto my alternator there, let the tension back, take out the pipe, take out the wrench, make sure everything is routed correctly. It appears to be and we're all set.
We hope this helps you out. Brought to you by www.1AAuto.com, your source for quality replacement parts and the best service on the internet. Please feel free to call us toll free 888-844-3393. We're the company that's here for you on the internet and in person.