Replaces
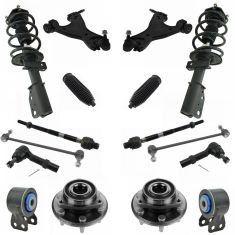
Replaces Chevrolet GMC Buick Front 16 Piece Steering, Suspension, & Drivetrain Kit TRQ PSA66561
$634.95
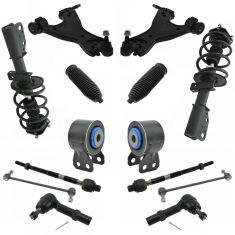
Replaces Chevrolet GMC Buick Front 14 Piece Steering & Suspension Kit TRQ PSA66562
$467.95
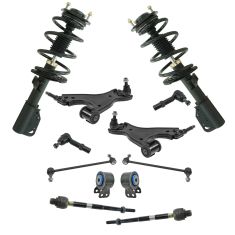
Replaces Chevrolet GMC Buick Front 12 Piece Steering & Suspension Kit TRQ PSA64841
$455.95

Replaces Chevrolet GMC Buick Front 10 Piece Steering & Suspension Kit TRQ PSA69963
$430.95
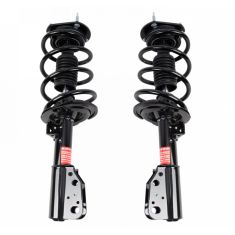
Replaces Chevrolet GMC Buick Front Driver & Passenger Side 2 Piece Strut & Spring Assembly Set Monroe Quick-Strut MNSSP01204
$423.95
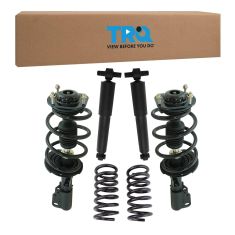
Replaces Chevrolet GMC Buick Front & Rear 6 Piece Complete Strut Assembly & Shock Absorber Kit TRQ SKA64313
$417.95
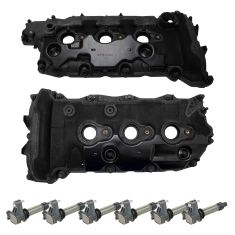
Replaces 8 Piece Ignition Kit DIY Solutions ENG00683
$377.95
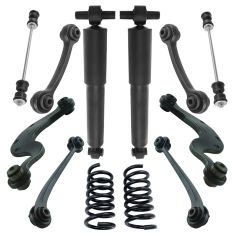
Replaces Chevrolet GMC Buick Saturn Rear 12 Piece Suspension Kit TRQ PSA69630
$370.95
Replaces Chevrolet GMC Buick Saturn Rear Driveshaft TRQ DSA80230
$368.95
1 Year Warranty
This item is backed by our 1-year warranty. In the event this item should fail during intended use, we will replace the part free of charge. This warranty covers the cost of the part only.
FREE Shipping is standard on Orders shipped to the lower 48 States (Contiguous United States). Standard shipping charges apply to Hawaii, Alaska and US Territories. Shipping is not available to Canada.
Expedited is available on checkout to the United States, excluding Alaska, Hawaii and US Territories as well as P.O. Boxes and APO/FPO/DPO addresses. Final shipping costs are available at checkout.

Created on:
Tools used
Hi, I’m Mike from 1A Auto. We’ve been selling auto parts for over 30 years!
Go inside the vehicle and open up the hood. With the vehicle on the ground, you're going to use a breaker bar and a 22 millimeter socket to loosen the lug nuts. Raise and support your vehicle with a jack and jack stands—we're using a two post lift. Use the socket to finish removing the lug nuts. All right, seized to the hub. Take a couple of lug nuts, just thread them on lightly. You can use a dead blow or a rubber mallet. Hit on the tire, it will knock it free. Lug nuts will keep the wheel from falling off. Now it's loose so you finish taking the lug nuts off. Just going to support it so it doesn't fall. I'm just going to turn this knuckle out of the way.
Remove these two push clips holding in this plastic shield. I'm going to use a flat bladed screwdriver to just pop them up and unlock them. They might break, and you'll have to get new ones. It's very common for them to break. Try to get this one first. They get old and brittle. I'm going to use a trim clip tool, trying to get underneath them, and I'll just break them off. I'll have to replace these with new ones afterwards.
I'm just going to pop them through the holes. They're just plastic. It's not a big deal. I'm going to take a bungee cord and just hold this fender liner up and out of the way. I'll just bungee it over.
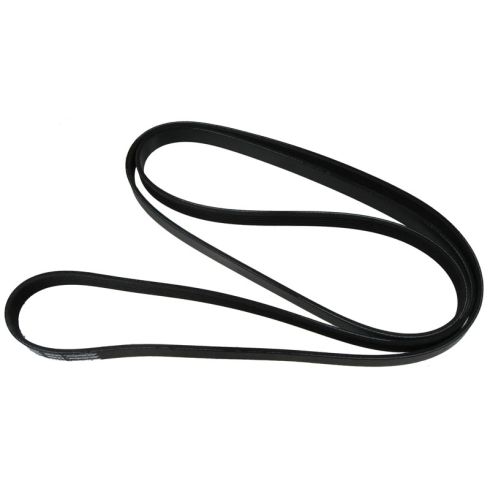
If you want to reuse the belt, you can mark the direction that it's mounted in by just taking a paint marker and just putting an arrow to the outside. This has got a pretty broad tip, but I'll know when I reinstall it that I want that arrow facing out. The belt is already worn in, and I want it to travel in the same direction. If you're going to replace the belt, don't worry about marking the direction. The belt tensioner is here. It has a 1/2 inch drive opening on it. You could use a 1/2 inch drive breaker bar. I'm going to use a 1/2 inch drive socket with a swivel head. Whatever you've got that will let you in there.
Basically, you're just going to line it up. You might have to turn it—that's why a ratchet might be easier than a breaker bar. Get it pushed into the opening, and now we're going to push it to the back. Take the tension off, and then pop it off of this eyelet pulley because it's a smooth pulley. Get the belt off, just like that. You have to slide it underneath the tensioner pulley, and now I can slowly release the tensioner. I'll just feed the belt out of the engine compartment.
There's the drive belt, our serpentine belt. Since we're reusing the belt, I made an arrow to tell me the direction because I want the belt to go in the same direction so the arrow is pointing up this way. I put the belt in the vehicle this way.
I'm going to reach up and get it around the power steering pulley first. Bring it over the water pump pulley, and bring it down around the alternator. I'll loosely put it around the idler pulley near at the alternator. It's going to have to slide behind the tensioner between the tensioner and the block. You actually have to flip it sideways and slide it up, and then it will go down around the A/C compressor. We'll put it around the crank. I'll put it on the tensioner, loosen the tensioner and then pop it over the idler and then release the tensioner. Take the bungee cord out of the way.
Put this splash shield back up with some new clips. Now turn the knuckle straight and reinstall the wheel and tire.
Install the lug nuts by hand. Just going to use the socket, and thread these down. We'll re-torque them with the vehicle on the ground. Torque the lug nuts in a cross pattern to 140 foot-pounds.
Thanks for watching. Visit us at 1AAuto.com for quality auto parts, fast and free shipping, and the best customer service in the industry.