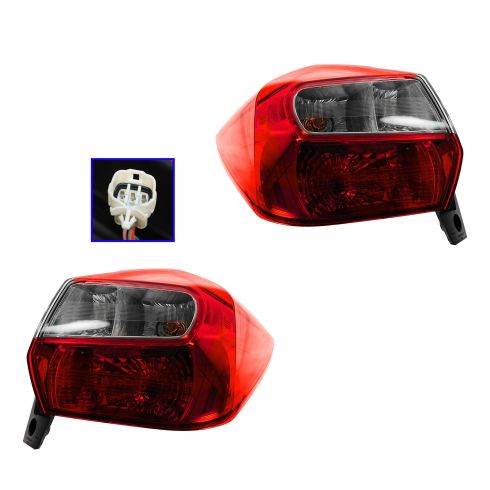
Assemblies may include halogen or incandescent test bulbs that should be replaced before installation.
Attention California Customers:
WARNING: This product can expose you to chemicals including Chromium (Hexavalent Compounds), which is known to the State of California to cause cancer, and birth defects or other reproductive harm. For more information, go to www.P65Warnings.ca.gov
Lifetime Warranty
This item is backed by our limited lifetime warranty. In the event this item should fail due to manufacturing defects during intended use, we will replace the part free of charge. This warranty covers the cost of the part only.
FREE Shipping is standard on orders shipped to the lower 48 States (Contiguous United States). Standard shipping charges apply to Hawaii and Alaska.
Shipping is not available to a P.O. Box, APO/FPO/DPO addresses, US Territories, or Canada for this item.
Expedited is available on checkout to the United States, excluding Alaska, Hawaii.
Final shipping costs are available at checkout.
How to Replace Tail Light Housing 2013-16 Subaru Impreza XV Crosstrek
Created on:
Tools used
Socket Extensions
10mm Socket
Ratchet
1. Removing the Tail Light Housing
Remove the two 10mm bolts from the tail light
Pull the tail light straight out
Disconnect the wiring harnesses
2. Installing the Tail Light Housing
Connect the wiring harnesses
Line up the grooves and pins on the housing with the holes on the vehicle
Pop the tail light in
Tighten the two 10mm bolts
Hi, I'm Mike from 1A Auto. We've been selling auto parts for over 30 years. We're dedicated to delivering quality auto parts, expert customer service, fast and free shipping, all backed by our 100% satisfaction guarantee. Visit us at 1AAuto.com, your trusted source for quality auto parts.
Right here is the tail light, and you're going to want to remove these two 10mm bolts. I'm using a 10mm socket and extension and a quarter drive ratchet. We'll start by spinning these out. As soon as you crack them loose, you should be able to take them out right by hand because they're not all that tight. Once the two screws are out, you should be able to pretty much pop this right off just by pulling it straight out. You can see there's a few tabs right here. It slides on this tab, and then there's two little push pins that it pops into. From that point you can take it right off the car just by unplugging that one connector.
Putting the taillight back on, you'll want to connect this connector. Then you want to make sure that you line up this groove and these two push pins so that it sits on the car appropriately just like that. Now you'll take your two 10mm screws. You always want to start them by hand without any real force on them so that they don't crossthread. Then you can tighten them up with your ratchet and extension.
Thanks for watching. Visit us at 1AAuto.com for quality auto parts, fast and free shipping, and the best customer service in the industry.
1ALTP00882
In Stock
Product Reviews
Loading reviews
There are no reviews for this item.
Customer Q&A
No questions have been asked about this item.
Customer service
877-844-3393
Monday - Friday 8:00am - 9:30pm ET Saturday - Sunday 8:00am - 4:30pm ET
Subaru is a registered trademark of Fuji Heavy Industries Co., Ltd. 1A Auto is not affiliated with or sponsored by Subaru or Fuji Heavy Industries Co., Ltd.See all trademarks.
Enter Vehicle Year Make Model
Specify your vehicle's year, make and model to guarantee fit.
Year
Make
Model
Options
Drivetrain
This part doesn’t fit a . Select from parts that fit.